

25 Resin Art Ideas for Beginners
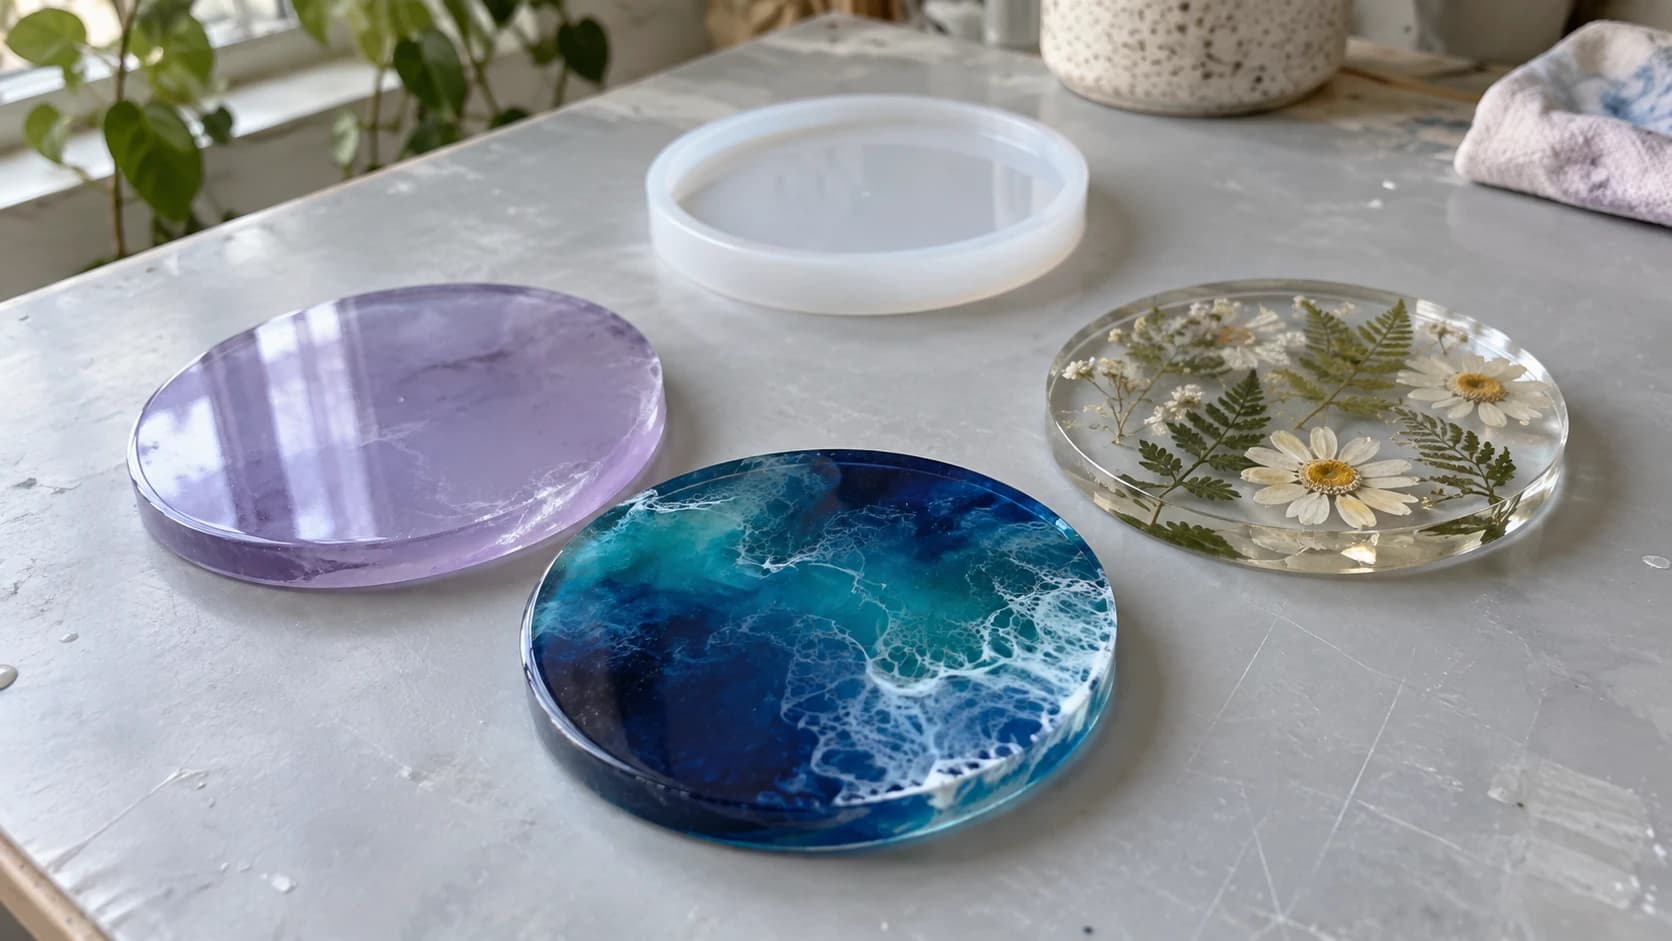
You bought the resin kit. It has been sitting on the shelf for two weeks because every project you see online looks like it was made by someone with a pressure pot, a heat gun collection, and five years of practice. Meanwhile you just want to mix your first cup without ruining the kitchen table.
Here is the secret: almost everything impressive in resin is a small number of basic moves. Pour into a mold. Add color. Drop something in. Pour onto a surface. That's it. The fancy stuff is those four moves with better taste and more patience.
So this is a list of 25 projects built from those moves, sorted by what you need and how much can go wrong. Start at the top, work down as your confidence grows, and you'll cover most of the skills resin ever asks for.
What You Need for Each Tier
The list runs in four tiers. Each one adds a little to your supply pile, and none of them requires anything exotic.
| Tier | What it adds | Rough extra cost | Risk of a bad day |
|---|---|---|---|
| First pours | Resin, silicone molds, pigment, cups, sticks | The starter kit you already own | Low |
| Color play | Alcohol inks, white pigment, glitter | Small | Low |
| Embedding | Dried flowers, shells, paper, trinkets | Nearly nothing | Medium (bubbles) |
| Bigger pieces | Deep-pour resin, a wood blank, tape | Moderate | Medium |
One supply note before you pour anything: nitrile gloves and a ventilated room are the baseline, every time, even for a tiny keychain. Uncured resin can irritate skin right away, and repeated contact can lead to sensitization over time, so keep it off your hands from pour number one. Your product's safety data sheet spells out the right glove type and ventilation for that exact formula, and it's a two-minute read. Gloves on, air moving, done. That is the whole lecture.
Info
Stuck mid-pour with a question this list doesn't answer? Craft Chat, the free AI maker assistant, is built for exactly that. Ask it why your resin is still bendy or what mold release to use, right when it happens. Free to use once you're signed in, with a monthly message allowance.
PRINT. CUT. CARVE.



- Multiple formats (SVG, DXF, PNG)
- Machine-tested designs
- Commercial licenses
Sponsored by PrintCutCarve.com
Tier 1: First Pours (Ideas 1 to 7)
These are single-color, single-pour projects in silicone molds. The mold does all the shaping, so your only jobs are measuring accurately and mixing thoroughly. If your kit came with a mold variety pack, you probably own most of these shapes already.
1. Classic coasters. The default first project for a reason. The mold is shallow, so bubbles rise out easily, and a coaster is forgiving: a small flaw disappears under a mug. Make four in different colors and you've practiced the full mix-pour-demold cycle four times.
2. Keychains. Tiny pours that use up leftover mixed resin instead of wasting it. Drill the hole after curing or use a mold with the hole built in, add hardware from any craft store, and you have gifts for basically everyone you know.
3. Bookmarks. Long thin molds, very little resin, and the flat shape shows off color beautifully. A great project for testing new pigments because each one costs you almost nothing in material.
4. Trinket dishes. A small dish for rings and earrings by the sink. Slightly deeper than a coaster, which teaches you to pour in stages if the mold depth asks for it.
5. Fridge magnets. Any small mold works. Glue a magnet on the back after curing. These are the lowest-stakes project on the entire list, which makes them perfect for experiments you suspect might go wrong.
6. Dice. Sharp-edged dice molds are everywhere now, and a set of swirled dice looks far harder to make than it is. Bubbles love corners, so this one quietly teaches you to pour slowly and warm your resin bottles in a water bath first so the mix flows thin.
7. Drawer knobs. Knob molds accept a standard screw insert, and a set of custom knobs upgrades a plain dresser for a few dollars of resin. This is usually the first project where someone asks "wait, you made those?"
Tip
Mix slower than feels natural, scrape the cup walls and stick constantly, and mix for the full time your resin's instructions call for, since brands vary. Most "my resin never hardened" stories are mixing or measuring stories, with a room that was too cold coming in a distant third. When something does go sideways, our resin troubleshooting guide walks through every common failure and how to rescue the piece.
Tier 2: Color Play (Ideas 8 to 13)
Same molds, new techniques. This tier is where resin starts looking like art instead of craft, and everything in it comes down to how colors move through liquid resin while it cures.
8. Petri art. Pour clear resin into a silicone mold, then drop alcohol inks in from above with a final drop of white on top. The white sinks and drags the color down into tendrils that look like sea creatures. Zero skill required, wildly impressive results, genuinely addictive.
9. Ocean pour coasters. Layers of blue and teal with a line of white along one edge, nudged with a gentle blast from a heat source so the white breaks into a lacy wave. The classic beginner showpiece. Your first wave will be a blob. Your third will look like the sea.
10. Geode-style dish. Rings of color radiating from an off-center point, with a line of chunky glitter tracing one of the boundaries the way crystals line a real geode. No two ever come out the same, which is the charm.
11. Swirled marble tray. Pour two or three colors into the mold in blobs, then drag a toothpick through them once or twice. The restraint is the technique: two passes looks like marble, ten passes looks like mud.
12. Glitter ombre anything. Mix fine glitter into resin and pour so it concentrates at one end, fading to clear at the other. Works on bookmarks, coasters, dishes, everything in Tier 1.
13. Color-blocked layers. Pour one color, let it gel for a few hours until it holds its shape, then pour the next on top for a crisp horizon line. This project teaches you cure-stage timing, which quietly matters for half the ideas further down this list.
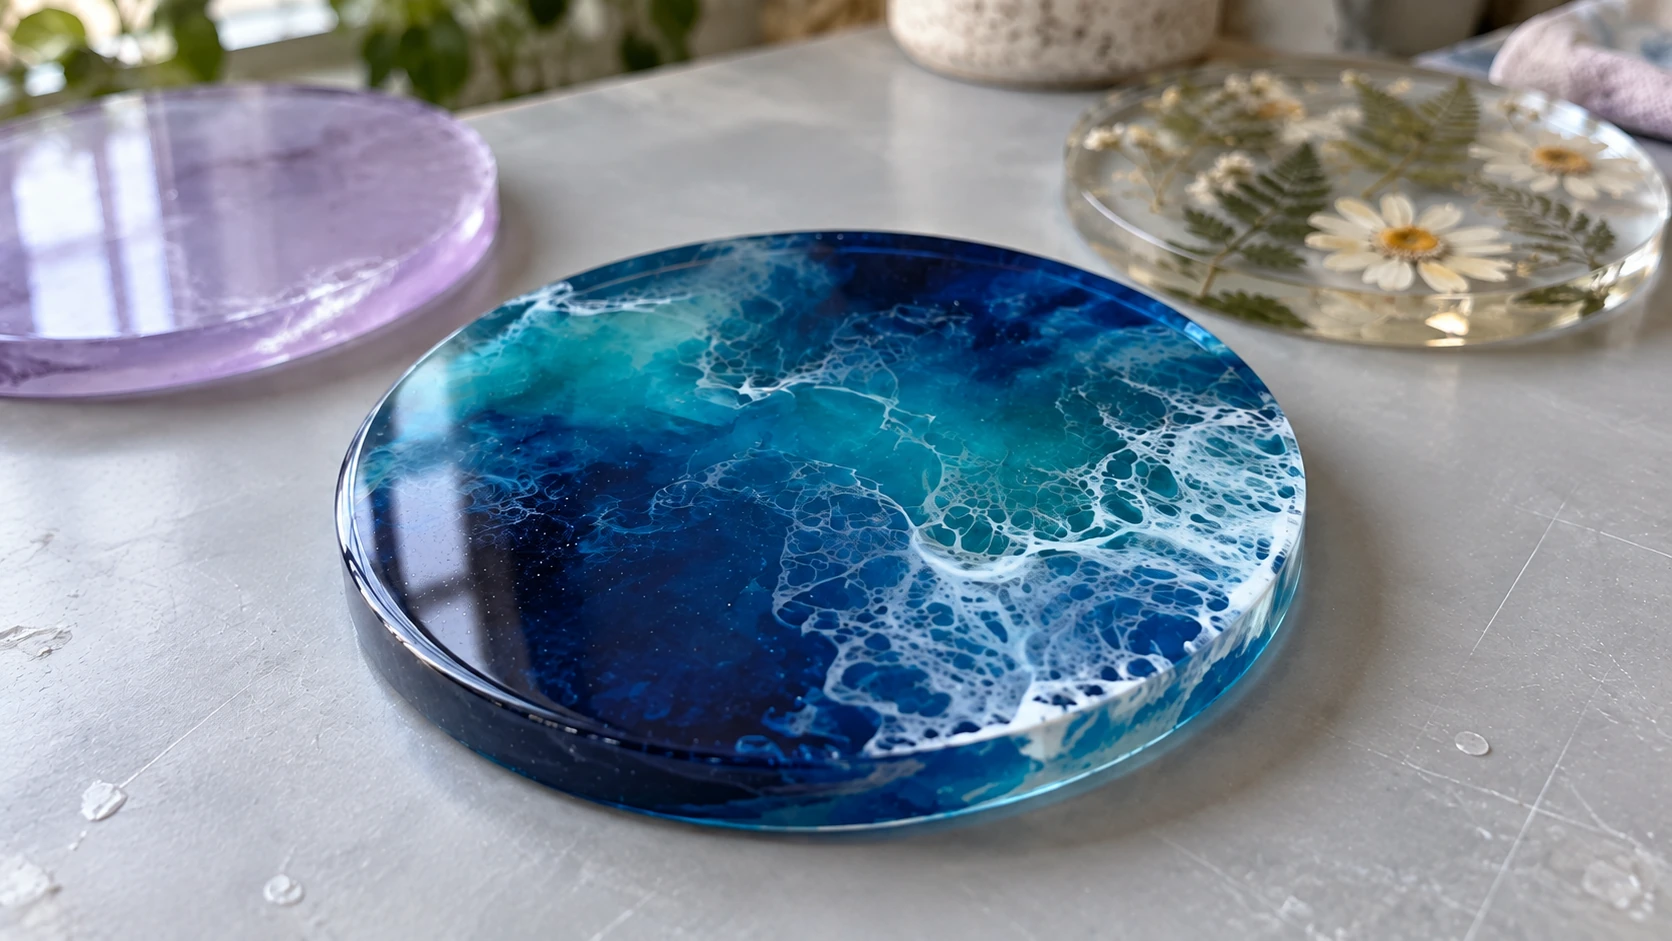
The white lacing sits within the colored pour. This close view shows the pattern and the smooth finished surface as separate details.
Tier 3: Embedding (Ideas 14 to 19)
Dropping real objects into clear resin is the move that makes people gasp, and the supplies are things you mostly already have. The one recurring enemy here is air: porous objects carry it in and release it as bubbles, so this tier is where sealing and patience earn their keep.
14. Pressed flower coasters. The single most loved embedding project. Flowers must be fully dried first, since any moisture inside them turns cloudy in resin. Press them for a couple of weeks in a heavy book, or buy them pre-dried and skip the wait.
15. Beach memory pieces. A layer of sand from an actual trip, a few small shells, then blue-tinted resin above it like shallow water. A coaster or trinket dish that is also a souvenir beats a fridge magnet from the gift shop every time.
16. Book page bookmarks. Strips of an old damaged book sealed in a bookmark mold. Paper must be sealed first with a thin coat of glue or spray sealant, or the resin soaks in and turns it translucent. A bookmark made from a book is exactly the kind of joke resin was invented for.
17. Photo keepsakes. A printed photo sealed and embedded in a paperweight or ornament. Print a copy, never the original, and seal it the same way as paper. Test your printer's ink with a scrap first, since some inks smear on contact with sealant.
18. Confetti pieces. Sprinkle confetti, tiny stars, or leftover craft-punch shapes through clear resin. Cheap, cheerful, and a good way to use up the shiny debris every craft drawer accumulates.
19. Miniature scene paperweight. A tiny plastic animal, figure, or toy suspended in a clear dome or cube. Pour in layers so the object sits mid-piece instead of sinking to the bottom, which is the same gel-stage timing you practiced in idea 13.
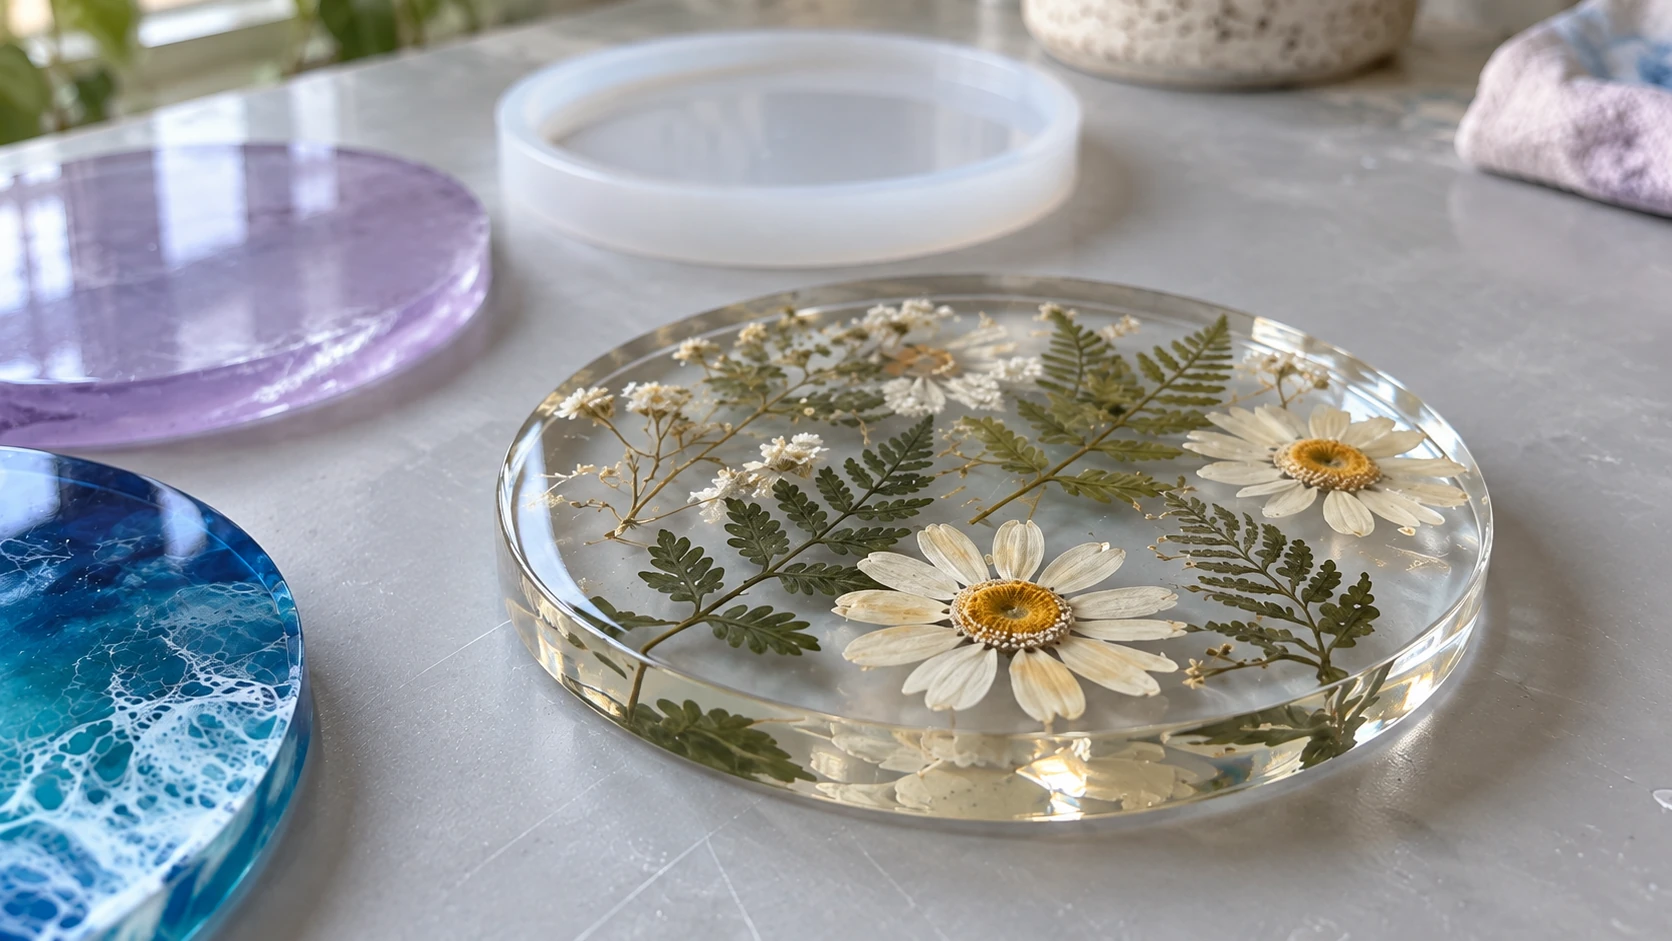
The flowers sit inside the casting, with resin above and below them. Leave enough depth to cover the thickest part of each inclusion.
Tier 4: Bigger Pieces (Ideas 20 to 25)
These projects leave the mold-variety-pack world behind. Some need deep-pour resin, which is formulated to cure slowly in thick layers without overheating. Regular coating resin poured deep can crack, yellow, or get alarmingly hot, so check the maximum pour depth on your bottle before starting anything in this tier.
20. Vanity tray with handles. A large tray mold, any Tier 2 color technique scaled up, and a pair of metal handles screwed on after curing. The jump in size makes this feel like furniture rather than craft, and it's still just a pour.
21. Resin-topped artwork. A thin flood coat of clear resin over a painted canvas, art print, or photo panel gives it a glass-like gallery finish. Level the piece carefully first, tape the underside against drips, and let gravity do the shine.
22. Mini river board. The famous river table, shrunk to a cheese board. Two offcuts of live-edge wood, a taped-up form around them, and tinted deep-pour resin down the middle. Small enough to be cheap and forgiving, dramatic enough to be the best thing you've made so far. If it will touch food, use a resin whose manufacturer states it is safe for food contact once fully cured, and treat it as a serving surface rather than a cutting board.
23. A simple pendant. One good pour in a small bezel or pendant mold, a jump ring, and a chain. Petri technique or a single embedded flower both shine at this scale.
24. Stud earrings. Tiny molds, glue-on posts, and pairs come out of one small batch of resin. Matching two pours teaches consistency in a way single pieces never do.
25. A resin wall clock. A large round pour, an inexpensive clock mechanism through a center hole, and any color technique you've practiced above. It hangs on the wall where everyone sees it, which makes it the perfect graduation piece for this list.
Where to Go From Here
Twenty-five ideas is a lot of pours, and nobody needs to do them in order. Grab whatever tier matches the supplies on your bench today. The only real rule is to keep pouring, because resin skill is mostly mileage: every cup you mix makes the next one more predictable.
When a pour goes strange, and one eventually will, start with our guide to common resin mistakes to diagnose it. And for everything in between, keep Craft Chat open on your phone while you work. It's Craftgineer's free AI assistant for makers, it knows resin, and it answers the "is this normal?" questions at 11 pm when no forum will. Sign in, ask away, and get back to the pour.
Ready to try these tools?
Sign up free, no credit card required. Free tools available immediately.
Start Free