

Näin suunnittelet yksilöllisen kellon laserille tai CNC:lle
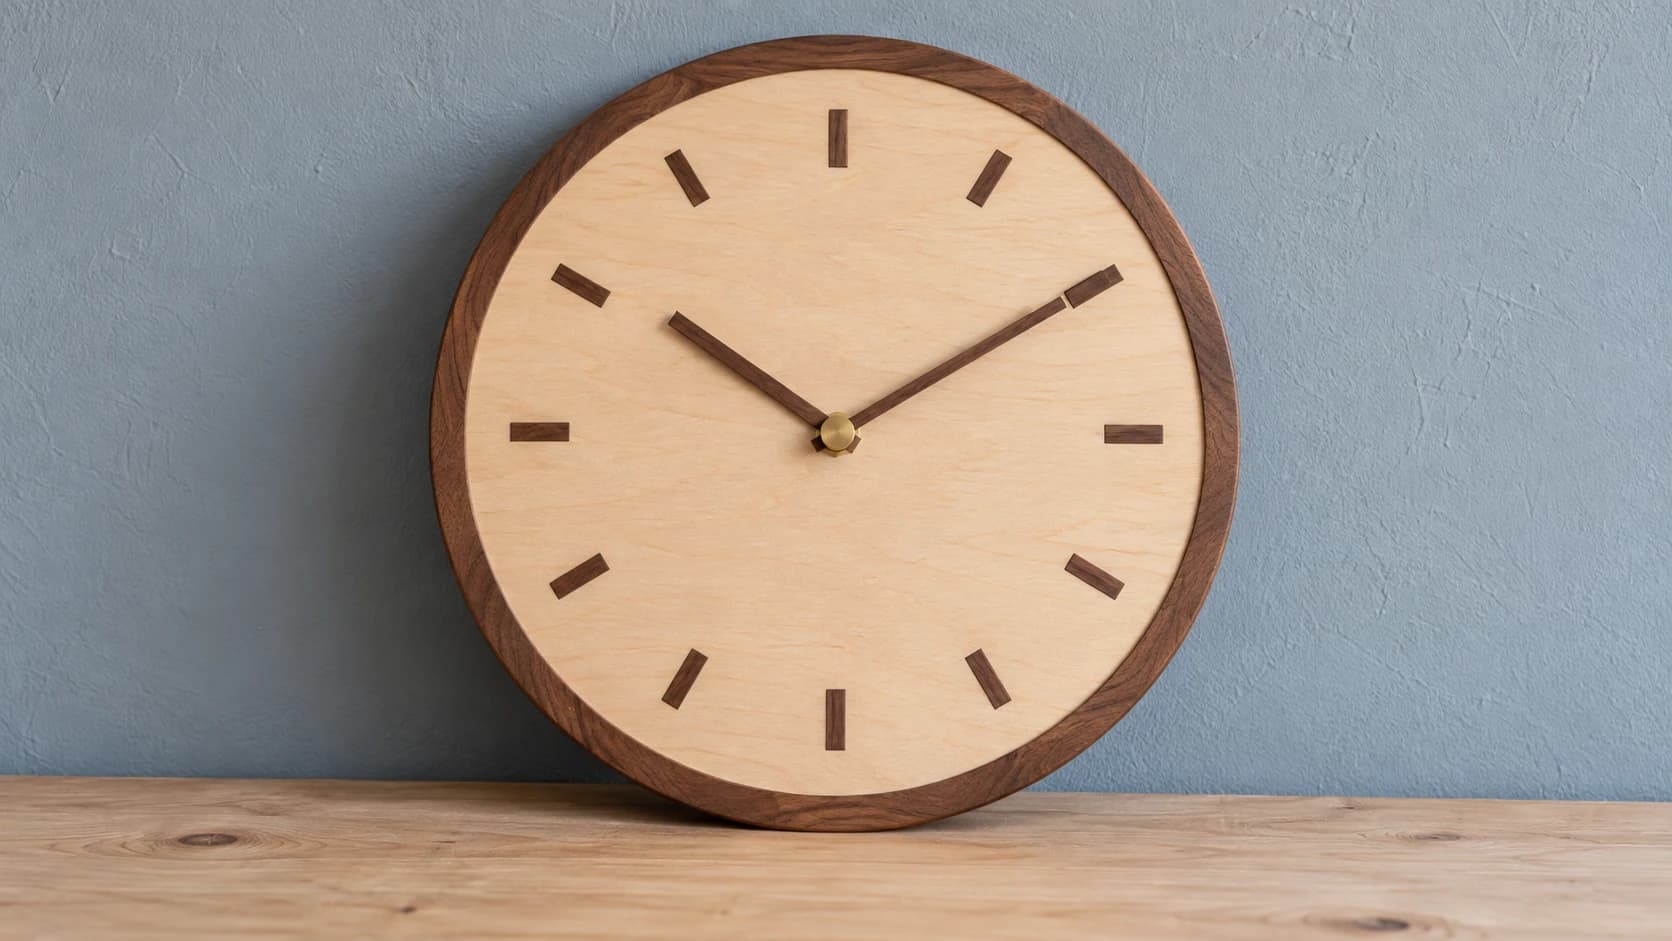
Kello on yksi niistä projekteista, jotka näyttävät aloittelijan työltä mutta eivät sitä hiljaisesti ole.
Kellotaulu on helppo osa. Ongelmat syntyvät kolmessa kohdassa: akselin reikä on väärän halkaisijainen, viisarit eivät sovi ostamaasi koneistoon ja kaksitoista merkkiä liimataan silmämääräisesti, jolloin yksi niistä jää pysyvästi näkyvästi väärään paikkaan.
Mikään näistä ei ole taito-ongelma. Kyse on mittaamisesta, ja jokainen mitta saadaan osasta, jota et todennäköisesti ole vielä ostanut.
Vinkki
Lyhyt vastaus: osta koneisto ensin. Sen akselin halkaisija määrittää taulun reiän, akselin pituus rajoittaa taulun paksuutta ja sen kaksi viisariasennuksen kokoa määrittävät kiinnitysreiät. Suunnittele näiden neljän luvun ympärille, ja loppu on ulkoasua.
Koneisto ratkaisee neljä asiaa
Kvartsikellon koneisto on pieni laatikko, jossa on kierteinen akseli. Se maksaa hyvin vähän, mutta rajoittaa koko suunnitelmaasi.
Akselin halkaisija määrittää taulun keskellä olevan reiän. Jos reikä on liian pieni, akseli ei mahdu läpi. Jos se on liian suuri, kello jää löysäksi ja epäkeskiseksi.
Akselin pituus on kohta, joka yllättää kaikki. Kierteisen osan on mentävä taulumateriaalin läpi niin, että aluslevylle, mutterille ja viisareille jää riittävästi kierrettä. Pitkäakselinen koneisto on olemassa juuri siksi, että paksu taulu kuluttaa kierteen. Mittaa materiaalisi ja osta siihen riittävän pitkäakselinen koneisto, älä toisin päin.
Kaksi viisariasennusta. Tunti- ja minuuttiviisari kiinnitetään eri tavalla, ja niiden reiät ovat erikokoiset. Jos nämä ovat väärin, viisarit eivät joko asetu paikoilleen tai heiluvat löysinä.
Koneiston kokonaiskoko, jos upotat sen taulun takaosaan etkä asenna sitä pinnalle.
Varoitus
Osta koneisto ennen kuin leikkaat mitään. Kaikki edellä mainitut mitat saadaan fyysisestä osasta, ja niiden arvaaminen on yleisin tapa muuttaa valmis kellotaulu jätteeksi.
TULOSTA. LEIKKAA. KAIVERRA.



- Useita formaatteja (SVG, DXF, PNG)
- Koneella testatut mallit
- Kaupalliset käyttöoikeudet
PrintCutCarve.comin sponsoroima
Kellon rakentaminen ClockLabissa
ClockLab on parametrinen kellonrakennustyökalu: asetat parametrit, ja se tuottaa leikkaustiedostot sen sijaan, että piirtäisit kellon ja toivoisit geometrian toimivan. Sivupalkki käy kuusi vaihetta läpi järjestyksessä, ja esikatselu näyttää kootun kellon työn edetessä. Viisarit ovat asennossa kymmentä yli kymmenen.
1. Taulu
Valitse muoto: ympyrä, neliö, pyöristetty neliö, kahdeksankulmio tai kuusikulmio. Voit myös ladata oman ääriviivasi, jos haluat jotain, mitä valmiit vaihtoehdot eivät kata.
Aseta sitten taulun koko, kellotaulun halkaisija ja kellotaulun sijainti taulussa. Kellotaulun ei tarvitse olla keskitetty. Näin voit sijoittaa esimerkiksi nimen tai kuvion alaosaan ja toimivan kellon sen yläpuolelle.
Tässä kohdassa asetetaan myös akselin reiän halkaisija. Se on aiemmin mainittu koneiston mitta.
2. Reunus
Reunus on erillinen rengas, joka leikataan kontrastivärisestä materiaalista ja asetetaan taulun päälle niin, että sen ulkoreuna seuraa täsmälleen taulun ääriviivaa.
Tämä kannattaa selventää, koska moni odottaa kaiverrettua rengasta: kyseessä on oikea fyysinen kerros. Se leikataan, ei kaiverreta, joten se voi olla eri puuta, eriväristä akryyliä tai kokonaan erilainen pintakäsittely. Materiaalien kerrostaminen saa itse tehdyn kellon näyttämään viimeistellyltä.
3. Viisarit
Valitse sauva- tai lapamalliset viisarit tai lataa omat muotosi. Aseta tunti- ja minuuttiviisarin pituudet sekä kiinnitysreiät koneiston kahden viisariasennuksen mukaan.
Mukana on myös keskiön liitoskoko, joka pitää viisareiden geometrian koossa leikkauksen aikana.
Pituudella on suurempi merkitys kuin miltä näyttää. Merkkien ohi ulottuva minuuttiviisari näyttää väärältä ja voi fyysisesti osua taulun pinnasta koholla oleviin applikaatiokappaleisiin.
4. Tuntimerkit
Neljä tyyliä: Numbers, Roman, Symbols tai Custom text. Kaksi asettelua: kaikki kaksitoista merkkiä tai neljännekset niiden välisillä viivoilla.
Tärkeää on, että merkit ovat tässä erillisiä applikaatiokappaleita. Leikkaat ne kontrastivärisestä materiaalista ja liimaat tauluun. Näin kelloon syntyy fyysistä syvyyttä tasaisen kaiverretun kellotaulun sijaan.
Voit säätää myös merkin kokoa, merkkirenkaan etäisyyttä keskustasta, kääntyykö kukin merkki kohti keskustaa sekä fonttia. Mukana on valikoituja fontteja, ja voit ladata omasi.
5. Kuvitus
Vaihtoehtoja on kaksi. Upload-toiminnolla ladattu SVG käytetään sellaisenaan. Valokuva taas jäljitetään kaiverrettavaksi viivakuvaksi, jonka kynnystä, kontrastia ja kohinaa voit säätää. Voit myös generate-toiminnolla luoda kuvion tekoälyllä.
Kuvitus pidetään automaattisesti erillään merkeistä ja akselin reiästä, joten se ei päädy minkään alle.
Jos lähdekuva täytyy siistiä ensin, MonoTrace tuottaa puhtaat vektorit ilmaiseksi ja File Converter hoitaa muunnokset ilman krediittikuluja. Muunnetun tiedoston lataaminen edellyttää maksullista tilausta.
6. Vienti
ZIP-tiedoston sisällöstä kannattaa tietää etukäteen, sillä siinä on useampi kuin yksi tiedosto.
| Tiedosto | Käyttötarkoitus |
|---|---|
| Taulun leikkaustiedosto | Pääosa, jossa on akselin reikä ja mahdollinen kaiverrus |
| Viisareiden leikkaustiedosto | Tunti- ja minuuttiviisarit kiinnitysreikineen |
| Merkkien leikkaustiedosto | Applikaatiokappaleet leikattaviksi kontrastivärisestä materiaalista |
| Sijoitteluohjain | Näyttää tarkasti, mihin kukin merkki liimataan taulussa |
| Kaiverrustiedosto | Sijoittaa merkit tauluun, jos haluat kaivertaa applikaation sijaan |
| Yleiskuva | Koko kokoonpano yhtenä yhdistettynä näkymänä |
Sijoitteluohjain ratkaisee vinojen merkkien ongelman. Et kohdista kahtatoista kappaletta silmämääräisesti kellotaulun ympärille, vaan liimaat ne tulostetun viitteen mukaan.
Tekoälykaiverrus
Yksi maksullinen toiminto, ja juuri se kiinnostavin. Kuvaile kuvio, valitse yhdeksästä taidetyylistä ja kaiverra koottu kello yhdellä ajolla.
Tärkeä yksityiskohta on, että se koristelee koko kellon yhteensopivana kokonaisuutena: sama kuvio tulee kellotauluun ja molempiin viisareihin, joten ne kuuluvat yhteen eivätkä näytä kolmelta erilliseltä päätökseltä. Voit halutessasi sisällyttää myös reunarenkaan koristeluun.
Se maksaa yhden krediitin generointikertaa kohden. Taulun muuttaminen jälkikäteen voi rajata kaiverrusta, joten generoi se vasta, kun geometria on valmis.
Tietoa
ClockLabilla suunnittelu on ilmaista kaikille Craftgineer-tilin käyttäjille. Tämä koskee myös reaaliaikaista esikatselua ja oman kuvituksen jäljittämistä. Leikkaustiedostojen ZIP-paketin lataaminen edellyttää mitä tahansa maksullista tilausta. Tekoälykaiverrus maksaa 1 krediitin generointikertaa kohden.
Toimivat materiaaliparit
Koko suunnittelukieli perustuu päällekkäisten kerrosten kontrastiin.
Vaalea taulu, tummat merkit. Koivu- tai vaahterataulu ja pähkinäpuumerkit ovat klassinen yhdistelmä, joka näyttää kuvissa upealta.
Tumma taulu, vaaleat merkit. Pähkinäpuu- tai petsattu taulu, jossa on vaahterasta tai valkoisesta akryylistä tehdyt merkit. Kontrastikkaampi ja modernimpi.
Akryylireunus puun päällä. Värillinen tai peilaava akryylirengas puutaulun päällä näyttää harkitulta tavalla, johon yksipuinen kello ei aina yllä.
Sovita merkintätapa prosessiin. Laserilla kaiverrettu yksityiskohta on pinnan matala palojälki. CNC:llä se on oikeaa kaiverrussyvyyttä. Molemmat näyttävät hyvältä, mutta eivät samalta, joten valitse kuvitus prosessin mukaan.
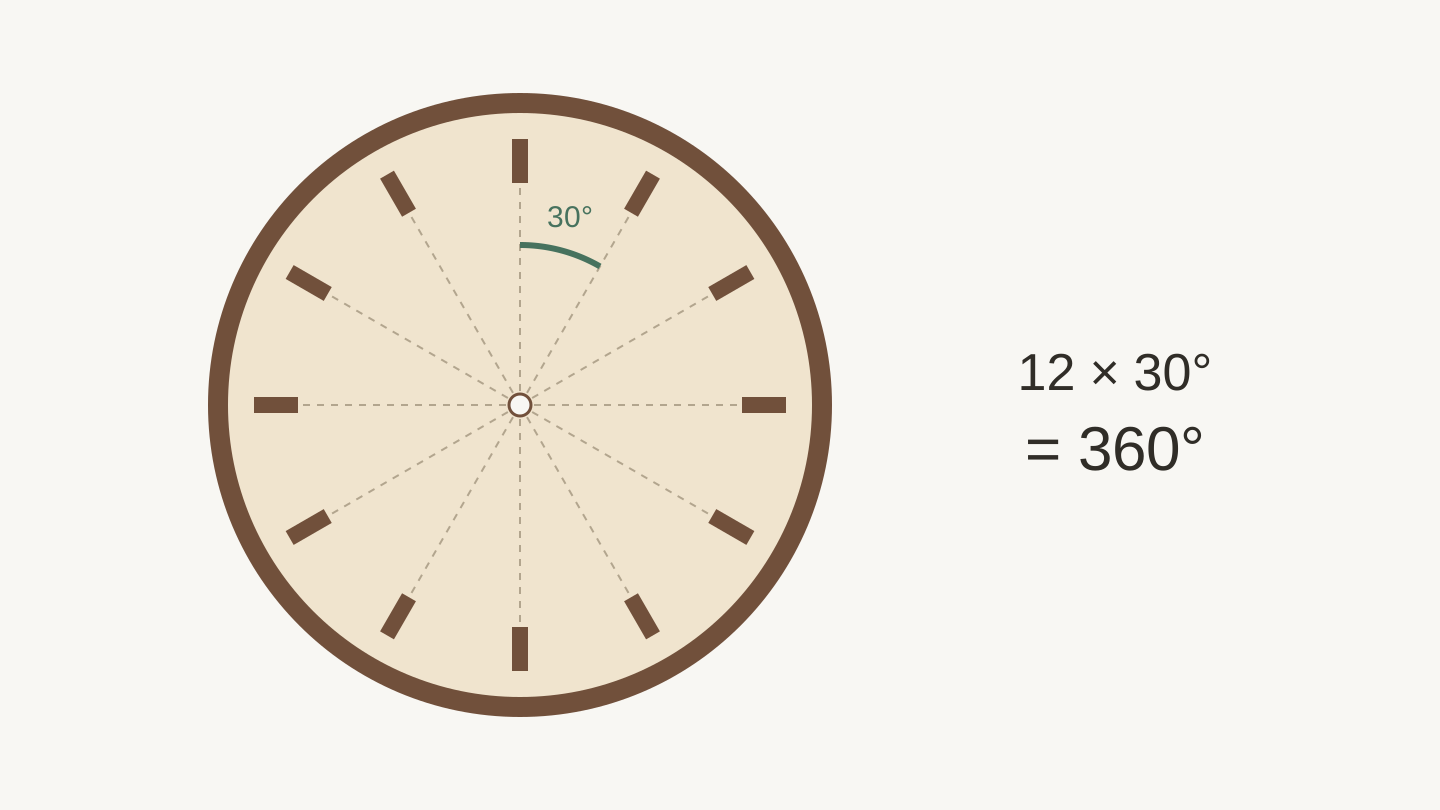
Kaksitoista yhtä suurta jakoa sijoittaa jokaisen tuntimerkin 30 asteen päähän seuraavasta. Pidä merkkien keskipisteet samalla ympyrällä asettelun avulla.
Kokoamisjärjestys
- Leikkaa kaikki, myös sijoitteluohjain, jos aiot tulostaa sen.
- Sovita koneisto kuivana taulun reiän läpi ennen liimaamista. Varmista, että akseli menee läpi ja kierrettä jää riittävästi.
- Käsittele kappaleet erikseen. Öljyä tai tiivistä taulu, reunus ja merkit ennen kokoamista, kun kaikki pinnat ovat vielä käsiteltävissä.
- Liimaa reunus kohdistamalla sen ulkoreuna taulun ääriviivaan.
- Liimaa merkit sijoitteluohjaimen avulla, älä silmämääräisesti.
- Asenna koneisto, kiinnitä sitten tuntiviisari, minuuttiviisari ja lopuksi sekuntiviisari, jos sellainen on.
- Tarkista välykset pyörittämällä viisareita käsin täyden kierroksen ennen kuin luotat kokoonpanoon. Jos jokin ottaa kiinni, se ottaa kiinni joka tunti.
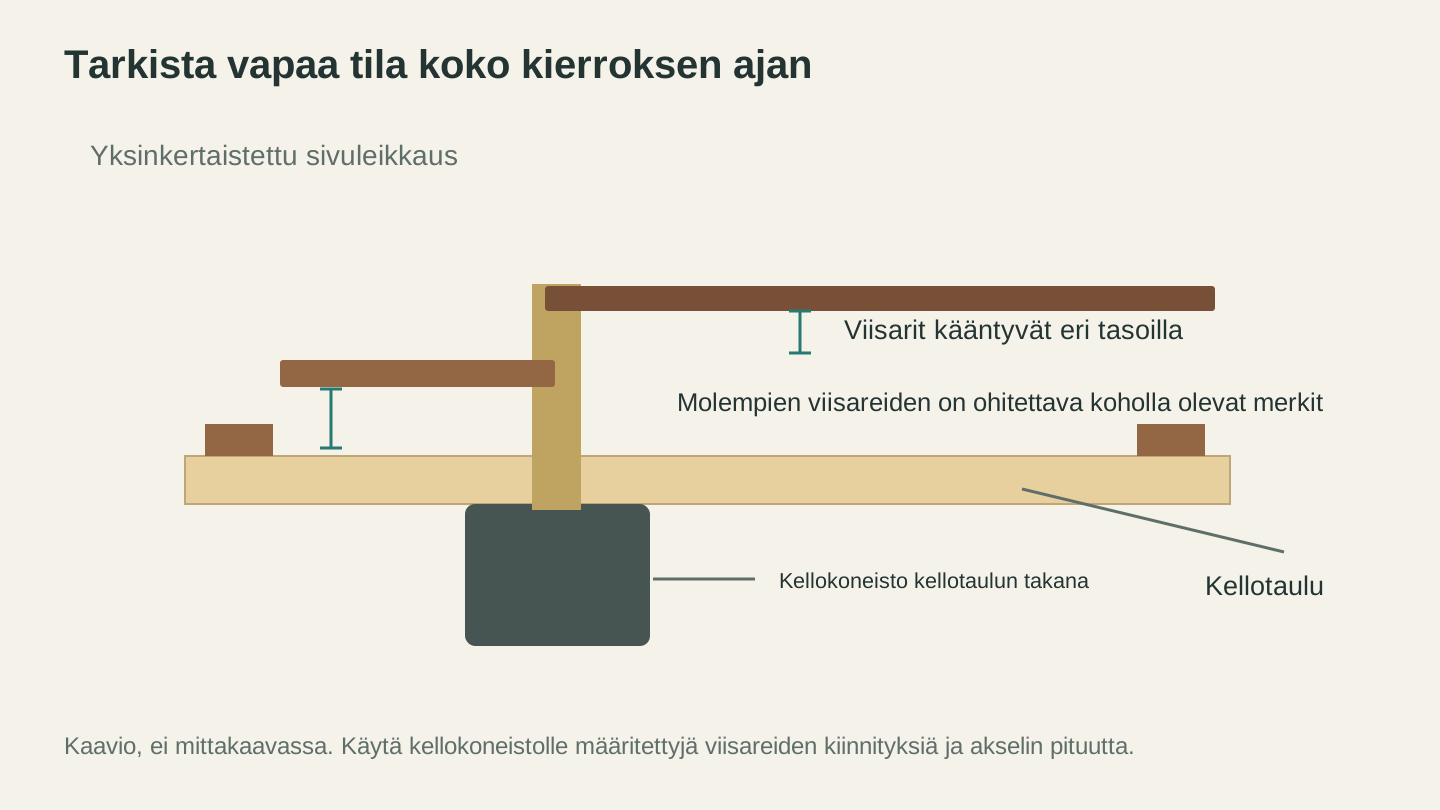
Tarkista molempien viisareiden koko liikerata. Kummankin on ohitettava toinen viisari, kellotaulu ja kaikki koholla olevat tuntimerkit. Tarvittava väli riippuu koneistosta ja viisareiden kiinnityksistä.
Usein kysyttyä
Millaisen kellokoneiston tarvitsen?
Tavallisen kvartsikoneiston, jonka akseli on riittävän pitkä kulkemaan taulumateriaalin läpi niin, että kierrettä jää yli. Osta koneisto ennen suunnittelua, sillä sen akselin halkaisija ja viisariasennusten koot määrittävät tiedoston reiät.
Kuinka paksu kellotaulu voi olla?
Niin paksu kuin koneiston akselin pituus sallii, kun aluslevyn ja mutterin vaatima tila vähennetään. Paksut taulut tarvitsevat pitkäakselisen koneiston, jota myydään juuri tätä tarkoitusta varten.
Miksi kellon viisarit eivät sovi?
Kiinnitysreiät eivät vastaa koneiston asennuksia. Tunti- ja minuuttiviisari kiinnitetään eri tavalla ja erikokoisina, joten molemmat reiät on määritettävä oikean fyysisen osan mukaan.
Täytyykö tuntimerkit liimata?
Ei. Ne ovat oletuksena applikaatiokappaleita, jotka antavat taululle syvyyttä, mutta vienti sisältää myös kaiverrustiedoston, joka sijoittaa merkit suoraan tauluun, jos haluat mieluummin kaivertaa ne.
Voinko käyttää kellotaulussa omaa kuvitustani?
Kyllä. Lataa SVG, jolloin sitä käytetään sellaisenaan, tai lataa valokuva, joka jäljitetään kaiverrettavaksi viivakuvaksi. Voit säätää kynnystä, kontrastia ja kohinaa.
Onko ClockLab ilmainen?
Suunnittelu, esikatselu ja oman kuvituksen jäljittäminen ovat ilmaisia Craftgineer-tilillä. Leikkaustiedostojen lataaminen edellyttää mitä tahansa maksullista tilausta, ja tekoälykaiverrus maksaa yhden krediitin generointikertaa kohden.
Mittaa koneisto ja suunnittele vasta sitten
Tilaa koneisto tai etsi sellainen laatikosta ja kirjoita muistiin kolme asiaa: akselin halkaisija, akselin pituus sekä kaksi viisariasennuksen kokoa.
Avaa sitten ClockLab ja rakenna taulu niiden ympärille. Esikatselu näyttää kootun kellon työn edetessä, joten merkkien kokoa ja viisareiden pituutta on paljon helpompi arvioida kuin tasaisesta piirroksesta kuvittelemalla.
Valmis kello sopii omistamaasi koneistoon, ja siinä on koko idea.
Aiheeseen liittyvät työkalut
ClockLab
Suunnittele kellotauluja, viisareita, merkkejä, reunuksia ja kaiverruskuvioita reaaliaikaisella esikatselulla.
Tekoälykoristelu käyttää krediittejä; lataaminen edellyttää tilausta
MonoTrace
Muunna valokuvat ja kuvitukset ilmaiseksi SVG-ääriviivoiksi. Käytettävissä on myös luonnostila.
File Converter
Muunna tuettuja vektori-, asiakirja-, rasterikuva- ja 3D-verkkotiedostomuotojen yhdistelmiä.
Lataaminen edellyttää tilausta
Haluatko kokeilla näitä työkaluja?
Rekisteröidy ilmaiseksi, et tarvitse luottokorttia. Ilmaiset työkalut ovat heti käytettävissä.
Aloita ilmaiseksi