

Gioielli in resina per principianti: stampi, castoni e i tuoi primi tre pezzi
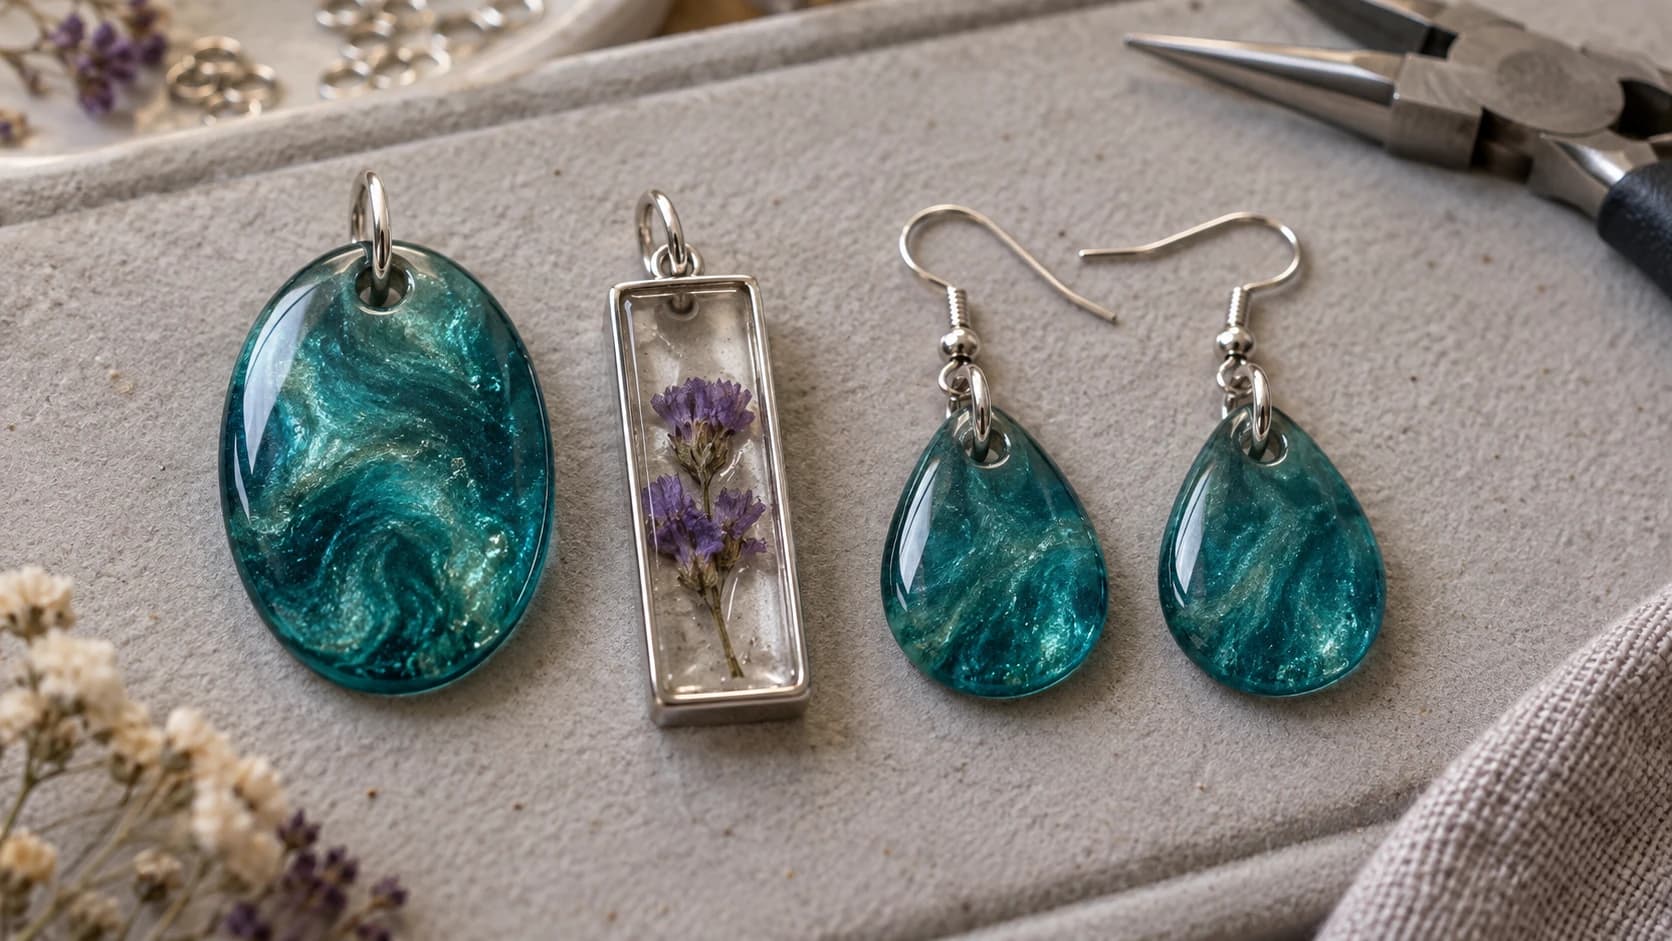
I gioielli in resina hanno uno strano problema di reputazione. I pezzi finiti sembrano minuscole sculture di vetro, quindi i principianti pensano che il livello di abilità richiesto debba essere enorme. Nel frattempo, l’ostacolo reale è molto più banale: ti trovi davanti a quaranta bottiglie quasi identiche con l’etichetta "crystal clear casting resin", senza idea di quale sia adatta a un ciondolo, e torni a casa a mani vuote.
Ecco la buona notizia. I gioielli sono probabilmente il punto più facile, non il più difficile, da cui iniziare con la resina. Le colate sono minuscole, quindi un errore costa un cucchiaino di resina invece di una tazza. Gli stampi sono economici. E la chimica non diventa più difficile su piccola scala: semplicemente c’è meno materiale con cui sbagliare.
Inizia dalla scelta della resina, perché da questa dipendono tutte le altre decisioni.
Le due resine e quella più adatta ai gioielli
Quasi ogni progetto di gioielli in resina usa una delle due chimiche principali, e scegliere tra loro è la prima vera decisione.
La resina epossidica bicomponente è la classica. Misuri resina e indurente nel rapporto indicato sulla bottiglia, mescoli, versi e aspetti. A seconda del prodotto, per estrarre il pezzo dallo stampo servono da alcune ore a un giorno o più, mentre la durezza completa arriva anche più tardi. Segui le istruzioni della tua bottiglia, non quelle di un blog. La resina epossidica si autolivella, è generalmente il modo più economico per riempire molti stampi contemporaneamente e può riempire stampi profondi, purché il prodotto specifico sia indicato per la profondità della colata.
La resina UV è pronta all’uso nella bottiglia, non richiede miscelazione e indurisce in pochi minuti sotto una lampada UV o alla luce solare intensa. Il limite è che la luce deve raggiungere tutto il materiale, quindi funziona meglio su pezzi bassi e aperti, dove nulla blocca la lampada. Inoltre è sensibilmente più costosa al grammo.
| Resina epossidica bicomponente | Resina UV | |
|---|---|---|
| Miscelazione | Misura e mescola due componenti | Nessuna, si usa direttamente dalla bottiglia |
| Tempo di indurimento | Da ore a giorni (controlla la bottiglia) | Pochi minuti sotto una lampada UV |
| Profondità | Le colate profonde vanno bene se il prodotto è indicato per quella profondità | Solo strati sottili |
| Ideale per | Serie di stampi, pezzi spessi, forme bombate | Castoni, piccoli ciondoli, riparazioni rapide e strati di finitura |
| Costo per pezzo | Basso | Più alto |
| Modalità di errore | Errori nel rapporto o nella miscelazione lasciano il pezzo appiccicoso | Gli strati non completamente induriti restano appiccicosi |
Per i gioielli, la risposta onesta è che alla fine vorrai entrambe. La resina UV è fantastica per i ciondoli con castone e le riparazioni rapide. La resina epossidica è quella con cui riempi un intero vassoio di stampi la domenica. Se oggi puoi acquistare una sola bottiglia, scegli un piccolo kit di resina epossidica bicomponente indicata per gioielli o colate: fa tutto, solo più lentamente.
Attenzione
La resina è una sostanza chimica, non una pittura per hobbistica. Usa sempre guanti in nitrile, una ventilazione adeguata e non mangiare nell’area di lavoro. La resina completamente indurita è generalmente più sicura da maneggiare, ma quella non indurita o parzialmente indurita può sensibilizzare la pelle e, una volta sviluppata la sensibilizzazione, esposizioni future possono provocare una reazione. Leggi la scheda di sicurezza del prodotto specifico che acquisti.
STAMPA. TAGLIA. INCIDI.



- Più formati (SVG, DXF, PNG)
- Design testati sulle macchine
- Licenze commerciali
Sponsorizzato da PrintCutCarve.com
Stampi o castoni
Ogni gioiello in resina nasce da una di due cose: resina versata in uno stampo di silicone oppure resina versata in una cornice metallica chiamata castone.
Gli stampi in silicone sono piccole vaschette flessibili a forma di gioiello: gocce, esagoni, cabochon, basi per anelli, interi set di orecchini. Versi, fai indurire e fletti il pezzo per estrarlo. Uno stampo lucido produce un pezzo lucido; uno stampo opaco produce un pezzo satinato che richiede lucidatura o uno strato di finitura brillante. Gli stampi si usurano lentamente con l’uso e quelli lucidi perdono per primi la brillantezza, quindi tratta con delicatezza il tuo stampo preferito e tienilo lontano dal sole.
I castoni sono cornici metalliche aperte con un anellino già applicato. Alcuni hanno un retro pieno e si riempiono come una piccola vaschetta. I più belli sono aperti sul retro: appoggi il castone su un nastro adesivo largo, lo riempi, lo fai indurire e stacchi il nastro, lasciando una resina attraversata dalla luce come una piccola vetrata.
| Stampi in silicone | Castoni | |
|---|---|---|
| Aspetto | Forme solide in resina, di qualunque geometria | Resina incorniciata nel metallo |
| Componenti per appendere | Li aggiungi dopo | Già integrati |
| Finitura | I bordi di solito richiedono carteggiatura | Quasi nessuna |
| Pezzi aperti e trasparenti | No | Sì, con castoni aperti sul retro |
| Costo | Pochi dollari per stampo, riutilizzabile | Economici, ma uno per pezzo |
| Livello per principianti | Inizia da qui | Secondo progetto |
Inizia dagli stampi perché ti insegnano a conoscere la resina: miscelazione, colata, tempi ed estrazione. Passa ai castoni per il secondo progetto, perché risolvono discretamente il problema più difficile per un principiante: applicare i componenti a una massa scivolosa di resina indurita.
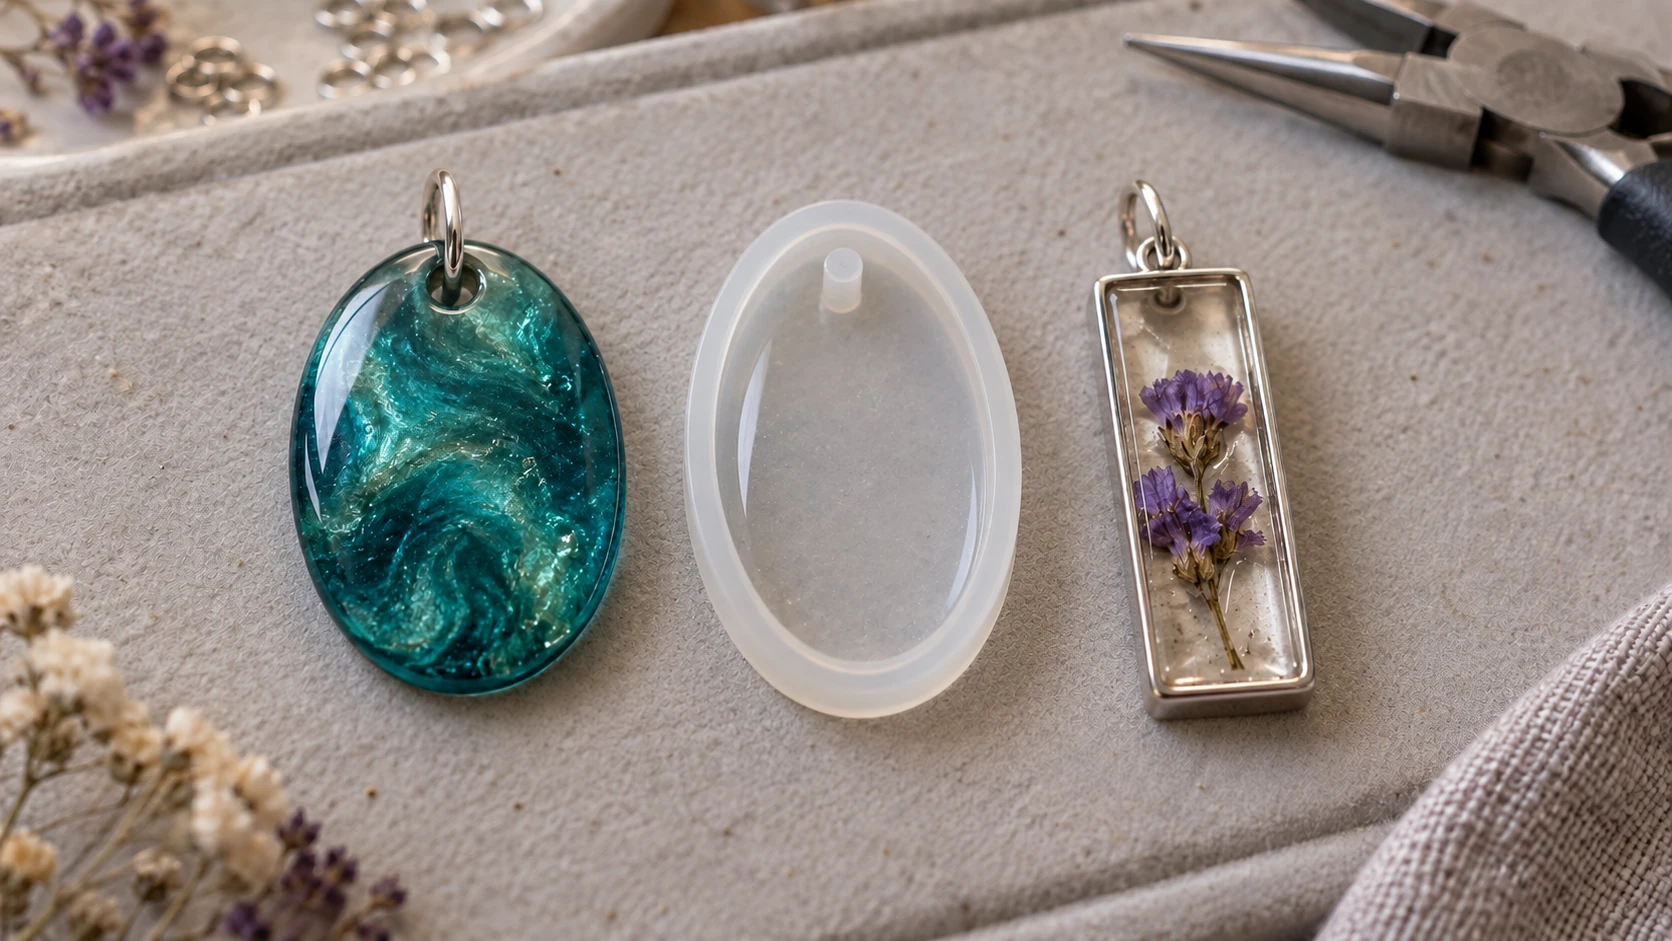
Lo stampo in silicone si rimuove dopo la polimerizzazione. La montatura metallica rimane con il pezzo finito, quindi la sua forma e il suo anello di attacco diventano parte del design.
Colore, brillantezza e cose intrappolate nel ghiaccio
La resina trasparente è la tela. Tre famiglie di additivi fanno quasi tutto il lavoro:
- Le polveri di mica sono le più versatili. Una quantità pari a quella che sta sulla punta di uno stuzzicadenti rende la resina perlata e crea splendidi effetti vorticosi quando versi due colori nello stesso stampo. I kit campione economici con molti colori sono perfetti per i gioielli, perché ogni pezzo ne usa pochissima.
- I coloranti liquidi per resina esistono in versioni trasparenti e coprenti. I coloranti trasparenti mantengono l’aspetto vetroso, simile a una gemma. Quelli coprenti creano colori pieni e vivaci. Aggiungi le gocce una alla volta: esagerare con il pigmento può interferire con l’indurimento, e il limite massimo indicato dal produttore del pigmento è la regola da seguire.
- I glitter e i fiocchi di lamina affondano o galleggiano a seconda delle dimensioni e dello spessore della resina. Versa prima uno strato sottile e trasparente, lascia che inizi ad addensarsi, poi aggiungi il glitter per mantenerlo sospeso al centro invece di accumularlo sul fondo.
Poi ci sono le inclusioni, il trucco degli oggetti intrappolati nel ghiaccio che fa prendere in mano il ciondolo e strizzare gli occhi: fiori essiccati, foglia d’oro, piccole conchiglie, un ritaglio di spartito, fotografie di carta.
Una regola evita la maggior parte delle delusioni con le inclusioni: qualsiasi materiale organico o cartaceo deve essere completamente asciutto, e la carta va prima sigillata con uno strato sottile di colla o resina UV. L’umidità e la carta non sigillata causano macchie scure e opacizzazione quando la resina penetra. Se una colata diventa torbida o appiccicosa, la nostra guida agli errori comuni con la resina spiega cosa significa ogni problema e quali sono recuperabili.
Suggerimento
Per il primo pezzo con inclusioni, acquista fiori pressati appositamente per la resina invece di pressarli da te. Arrivano piatti e completamente asciutti, e un foglio costa pochissimo. Pressali da te più avanti, quando saprai riconoscere un buon risultato.
Componenti: trasformare una goccia indurita in un gioiello
Il momento in cui una goccia lucida di resina diventa una collana dipende tutto dai componenti, che hanno nomi precisi: anellini apribili, ganci per orecchini, passanti, chiodini con occhiello, catena. Per i lavori in resina ci sono tre modi per collegarli.
Crea il foro nello stampo. Molti stampi per gioielli hanno un perno o un canale che forma il foro al posto tuo. Nessun lavoro aggiuntivo e il foro è pulito. Quando scegli tra due stampi simili, preferisci quello con i fori integrati.
Foralo. Un trapano manuale, chiamato portapunte, con una punta piccola attraversa facilmente la resina indurita. Fora lentamente, appoggia il pezzo su un ritaglio di legno e inizia il foro con una leggera rotazione, così la punta non scivola sulla superficie lucida. Poi una vite con occhiello o un chiodino con occhiello fissato con una goccia di colla crea un anello.
Incolla un passante. Un passante è un piccolo anello con una base piatta che si incolla direttamente sul retro del pezzo. Usa un adesivo resistente per gioielli e irruvidisci prima il punto da incollare con la carta vetrata; la colla aderisce molto meglio alla resina carteggiata che a quella lucida.
Da qui in poi, l’assemblaggio è normale lavorazione di bigiotteria: apri un anellino ruotandolo lateralmente, mai tirandolo per trasformarlo in un ovale, fallo passare nel pezzo e nella catena o nel filo per orecchini, poi richiudilo ruotandolo. Se questi movimenti sono nuovi per te, la nostra guida alla creazione di gioielli per principianti illustra le quattro abilità fondamentali, che si applicano direttamente anche ai pezzi in resina.
Per il colore del metallo, acquista i componenti con un’unica finitura, argentata o dorata, così ogni esperimento di questo mese potrà usare gli stessi componenti. Se i gioielli sono un regalo per una persona con le orecchie sensibili, spendi quel dollaro in più per fili venduti come certificati senza nichel, scegliendo di solito il titanio di grado implantare.
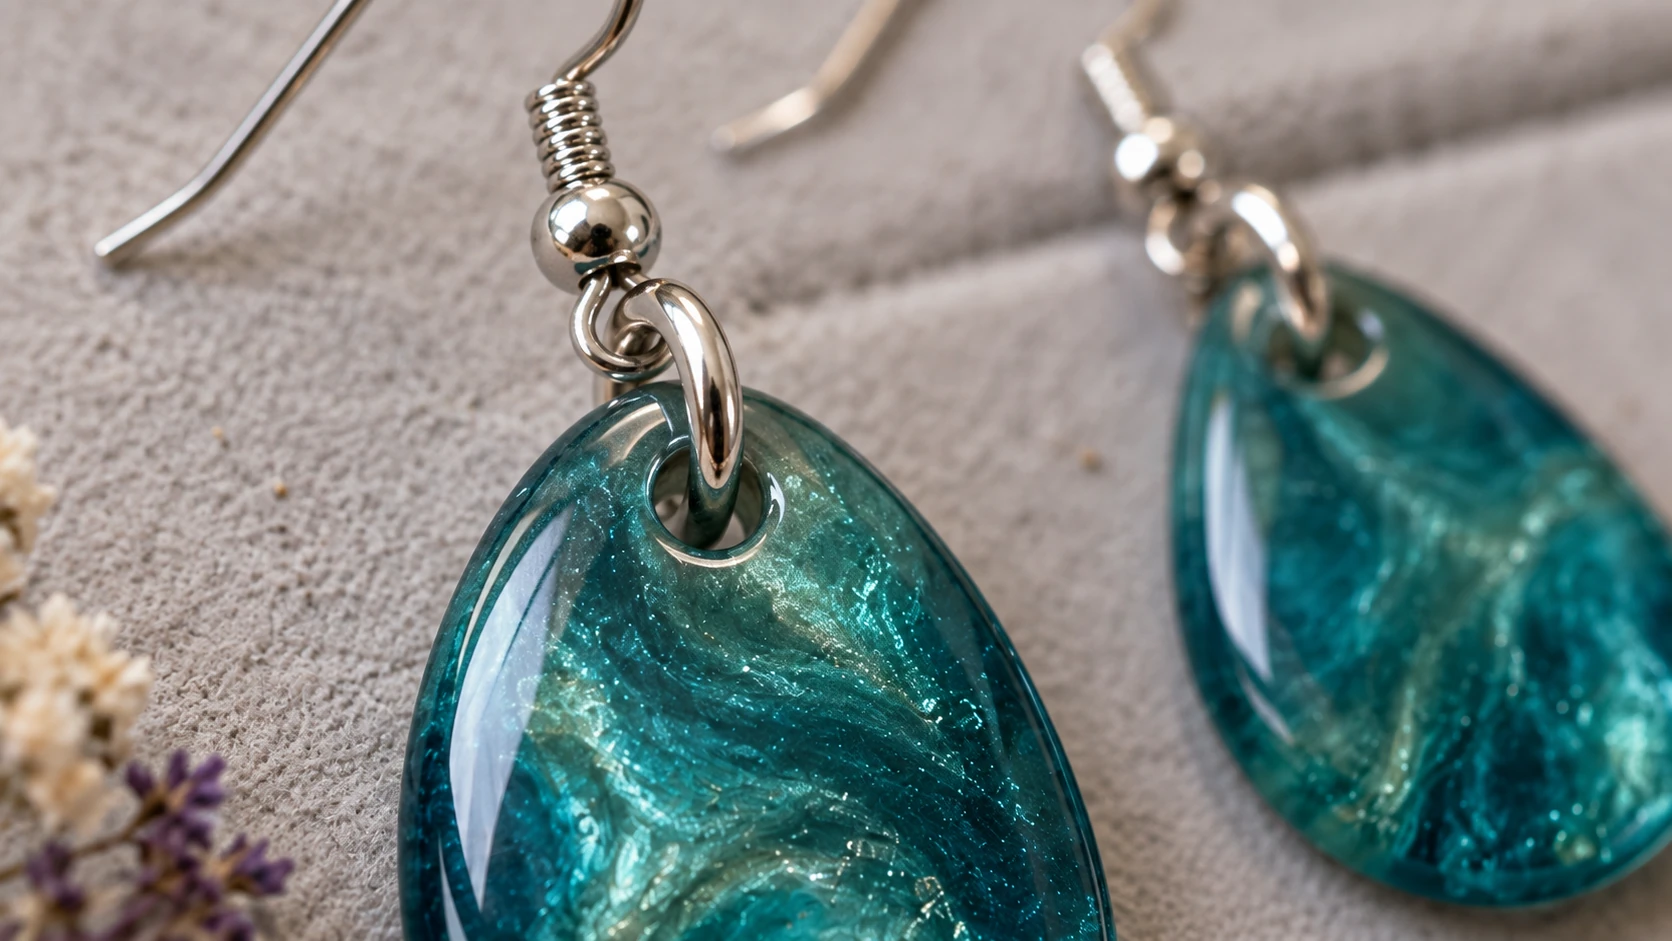
Segui il collegamento dalla resina all’anellino e poi al monachello. Ogni anello deve avere un’apertura completa e una chiusura sicura prima che la coppia sia pronta da indossare.
Estrazione dallo stampo, carteggiatura e finitura effetto vetro
Prima di tutto, pazienza: estrai il pezzo quando lo indica il produttore della resina, non quando la superficie sembra asciutta. Un pezzo estratto troppo presto può deformarsi per sempre lasciando l’impronta di un’unghia. Allontana lo stampo dal pezzo flettendolo, invece di tirare fuori il pezzo dallo stampo.
La maggior parte dei pezzi esce con un piccolo bordo tagliente nel punto in cui la resina incontrava la parte superiore dello stampo, mentre i pezzi in castone aperto sul retro hanno un lato a contatto con il nastro che indurisce diventando leggermente opaco. Entrambi i problemi si risolvono rapidamente:
- Rifinisci eventuali bave sottili con tronchesine a taglio raso o un taglierino.
- Carteggia a umido i bordi e le superfici opache. Immergi la carta vetrata nell’acqua e passa da grane grossolane a molto fini, indicativamente da 400 fino a 2000 o oltre. La carteggiatura a umido riduce notevolmente la polvere dispersa nell’aria e impedisce alla resina di surriscaldarsi, anche se devi comunque seguire le indicazioni del produttore della resina sulla protezione durante la carteggiatura. In questa fase il pezzo apparirà satinato e rovinato. Non lo è.
- Riporta la brillantezza, in uno di due modi. Il metodo rapido è uno strato sottile di finitura lucida: una passata di resina UV indurita sotto la lampada oppure un sottile strato applicato a pennello di resina epossidica miscelata. Il metodo da puristi è usare pasta lucidante su un panno oppure un utensile rotativo con punta in feltro a bassa velocità, lucidando finché l’opacità non diventa vetro.
Per i primi pezzi, scegli la scorciatoia dello strato di finitura. Imparare a ottenere una lucidatura a specchio a mano è un’abilità perfetta da acquisire nel secondo mese, e uno strato lucido UV compatibile ripristina l’aspetto vetroso nel tempo di indurimento indicato sulla bottiglia, di solito pochi minuti.
I tuoi primi tre progetti, in ordine
Ognuno di questi aggiunge esattamente una nuova abilità. Resisti alla tentazione di passare al progetto tre il primo giorno: il ciondolo con il fiore che tutti vogliono iniziare a realizzare è molto meno frustrante come terza colata che come prima.
1. Un ciondolo in stampo a colore unico
Un singolo stampo in silicone per ciondoli con foro integrato, resina epossidica e un colore di mica. Mescola lentamente, raschiando i lati e il fondo del bicchiere, versa e fai scoppiare le bolle superficiali con uno stuzzicadenti oppure con un rapido passaggio di una piccola pistola termica tenuta sopra la superficie, se le istruzioni della tua resina lo consentono. Tieni le fiamme libere lontane dagli stampi in silicone per gioielli: una torcia può bruciarli. Lascia indurire, estrai dallo stampo, carteggia il bordo, aggiungi un anellino e una catena.
Questo progetto insegna le basi senza aggiungere altre variabili: rapporto, miscelazione, bolle ed estrazione dallo stampo. Inoltre, nella maggior parte dei casi è davvero indossabile già al primo tentativo.
2. Un castone aperto sul retro con un fiore essiccato
Premi un castone sul nastro da imballaggio, appoggiato su una superficie piana. Prima uno strato sottile e trasparente, poi fallo indurire; quindi posiziona il fiore pressato con una pinzetta, coprilo con altra resina e lascia indurire di nuovo. Stacca il nastro e, se il lato a contatto con il nastro è opaco, applica uno strato sottile di finitura lucida. La resina UV è ideale perché ogni strato si fissa in pochi minuti, quindi posizionare il fiore è un’operazione tranquilla e non una gara contro il tempo.
Nuove abilità: stratificazione, lavorazione delle inclusioni e realizzazione di un pezzo con i componenti già integrati.
3. Una coppia coordinata di orecchini
Due cavità identiche dello stampo, una dose di resina e un obiettivo: farli combaciare. Dividi in due la resina miscelata prima di aggiungere il colore, così entrambe le cavità ricevono la stessa tonalità; versale nella stessa sessione e falle indurire una accanto all’altra. Poi fora i pezzi o usa i fori integrati, aggiungi anellini e fili per orecchini e controlla che la coppia penda nello stesso verso.
La coerenza è l’abilità che separa chi ha detto «ho provato la resina una volta» da chi sa realizzare gioielli intenzionalmente. È più difficile di quanto sembri e dà enorme soddisfazione quando i due pezzi escono come gemelli.
Dopo questi tre progetti non sei più un principiante: sei semplicemente agli inizi. Da qui, le stesse abilità si applicano anche a svuotatasche, portachiavi e colate decorative più grandi; le nostre 25 idee di arte in resina per principianti sono un intero menu di possibilità per il prossimo passo.
Domande frequenti
Perché la mia resina UV è ancora appiccicosa dopo l’indurimento?
Di solito lo strato era troppo spesso o troppo pigmentato perché la luce lo attraversasse, oppure la lampada non è abbastanza potente per quella resina. Realizza strati sottili, usa poco pigmento e lasciali sotto la lampada più a lungo di quanto sembri necessario. Se la superficie resta appiccicosa, fai indurire di nuovo il pezzo da ogni lato raggiungibile dalla luce e controlla le istruzioni sulla bottiglia; alcuni produttori consigliano di pulire i residui superficiali con alcol, e solo loro sanno se questa procedura è adatta al tuo prodotto.
Posso realizzare anelli e bracciali o solo ciondoli?
Sì, con una precisazione: bangles e anelli in resina ricevono urti quotidiani che ciondoli e orecchini non subiscono mai. Inizia da ciondoli e orecchini e, quando passi agli anelli, usa una resina che il produttore dichiari dura e resistente ai graffi una volta completamente indurita; attendi inoltre il tempo completo di indurimento prima di indossarla.
I pezzi in resina ingialliscono con il tempo?
Le resine trasparenti possono ingiallire nel tempo a causa dell’esposizione ai raggi UV. Le resine vendute con stabilizzatori UV o pubblicizzate come resistenti all’ingiallimento si scoloriscono molto più lentamente, e i gioielli trascorrono meno tempo alla luce diretta del sole rispetto a un sottobicchiere in resina sul davanzale, quindi il problema è meno rilevante che nell’arte in resina in generale. Vale comunque la pena acquistare una resina che menzioni la resistenza all’ingiallimento.
Quanto costa iniziare?
Un piccolo kit per gioielli in resina, uno o due stampi con più cavità, un kit campione di mica e un assortimento base di componenti rappresentano un investimento iniziale modesto per gli standard dell’hobbistica, e la resina dura a lungo quando ogni pezzo ne usa pochi grammi. La lampada UV serve solo se scegli la resina UV; molte lampade per unghie funzionano, ma verifica le istruzioni della tua resina.
Quando ti blocchi durante una colata
I problemi con la resina hanno un tempismo pessimo. Una volta miscelata la resina epossidica, il tempo scorre secondo il tempo di lavorazione consentito dalla bottiglia, e la risposta che ti serve è sepolta in una discussione di forum di anni fa. È proprio questo il momento in cui serve Craft Chat: chiedigli perché la resina si sta scaldando nel bicchiere, se i tuoi fiori sono abbastanza asciutti da poter essere inglobati o a quale grana passare, e riceverai una risposta mentre il pezzo è ancora recuperabile. È gratuito con un numero mensile di messaggi incluso in ogni account.
Questa settimana prendi uno stampo e una piccola bottiglia di resina e tieni aperto Craft Chat accanto alla postazione per la prima colata. Il primo ciondolo richiede pochi grammi di resina e una breve sessione al banco, oltre al tempo di indurimento indicato sulla bottiglia, ed è il percorso più rapido di tutta la creazione di gioielli per ottenere qualcosa che sembri uscito da un negozio.
Vuoi provare questi strumenti?
Registrati gratuitamente, senza carta di credito. Gli strumenti gratuiti sono subito disponibili.
Inizia gratis