

Laserové gravírování krájecích prkének: Kompletní průvodce
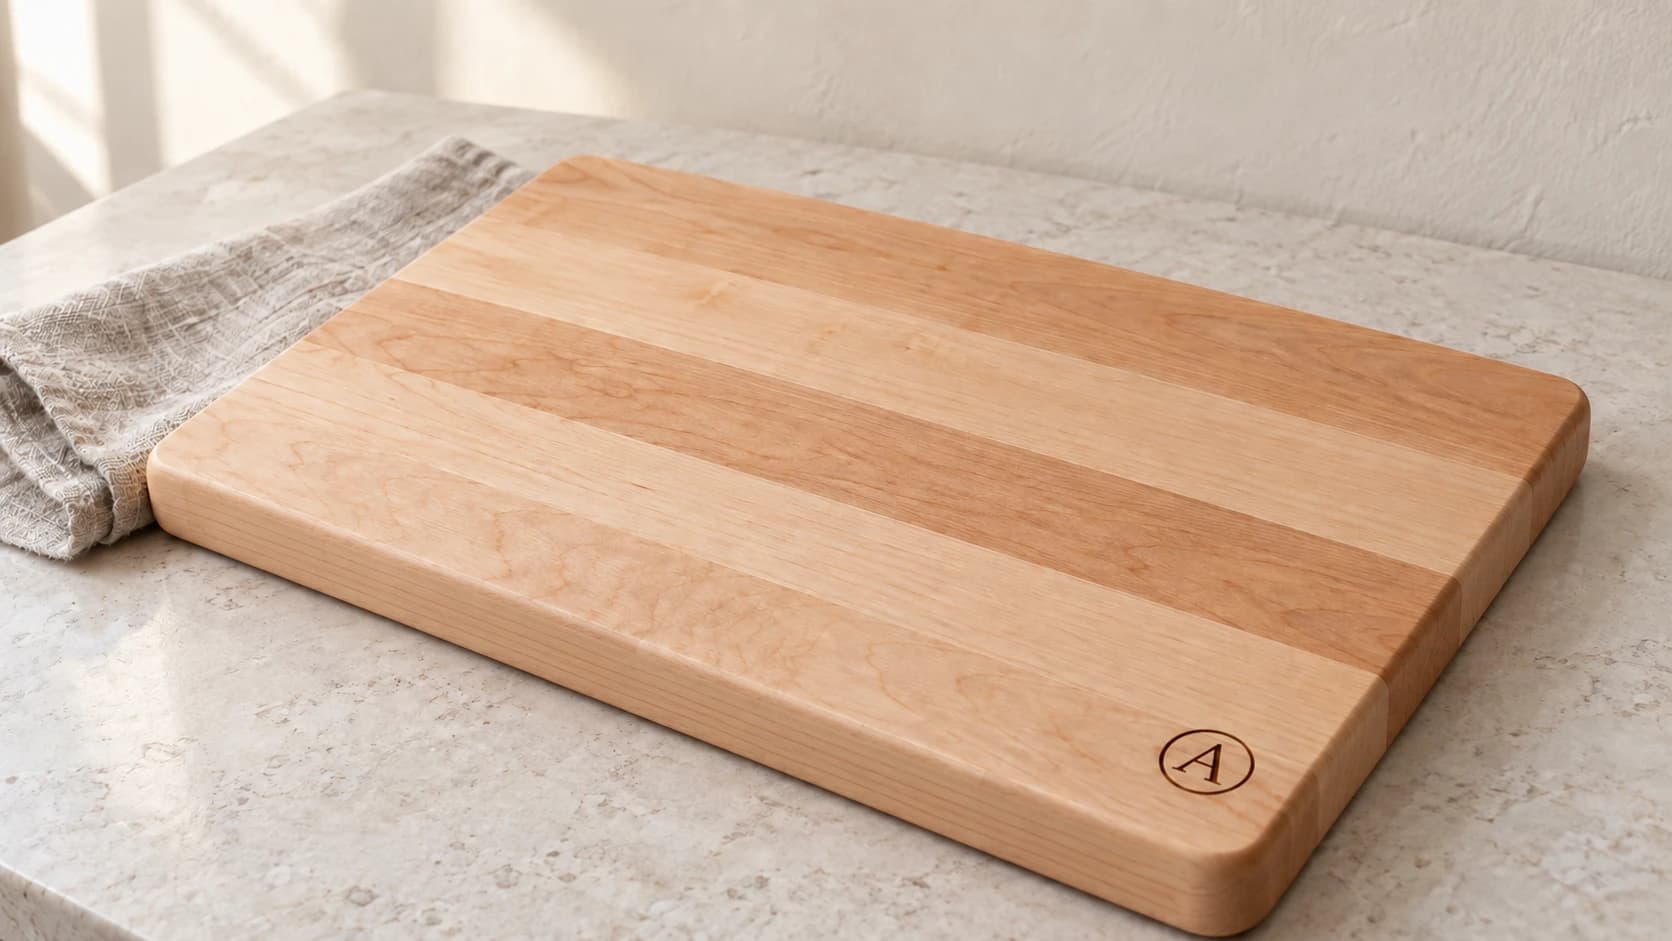
Krájecí prkénko je vstupní drogou do světa laserového gravírování. Je to jedna z prvních věcí, které mnoho lidí vyrobí, když jim dorazí stroj, stálice v každé makerské skupině kolem svatební sezóny a spolehlivý prodejní artikl na řemeslných trzích. Je to také místo, kde se mnoho prvních pokusů pokazí: flekatý výpal na bambusovém prkénku, monogram, který na obrazovce vypadal obrovský, ale na dřevě drobný, nebo krásné gravírování umístěné přesně uprostřed strany, na které se někdo právě chystá krájet cibuli.
Žádná z těchto chyb nesouvisí s laserem. Jde o prkénko, návrh a plán. Tento průvodce prochází všemi třemi oblastmi: výběrem přířezu, který se dobře gravíruje, volbou motivů, které lidé skutečně chtějí, správným umístěním a zarovnáním, nastavováním parametrů bez zničení materiálu a upřímným přístupem k otázce styku s potravinami, aby vám zákazníci důvěřovali.
Výběr přířezu: Na prkénku záleží víc než na laseru
O polovině úspěchu gravírovaného prkénka se rozhodne ještě před prvním výstřelem laseru. Druh dřeva, konstrukce vláken a stav povrchu určují, jak dobře může výpal vypadat.
Druhy tvrdého dřeva a kontrast
Gravírování je tmavá značka, takže kontrast vzniká díky světlému dřevu. Tato jediná skutečnost rychle rozdělí běžné druhy:
| Druh | Základní barva | Kontrast gravírování | Poznámky |
|---|---|---|---|
| Tvrdý javor | Bledě krémová | Vynikající | Výchozí dřevo pro krájecí prkénka z dobrého důvodu: hustá uzavřená struktura a světlý povrch, díky kterému výpal vynikne |
| Třešeň | Teplá načervenalá hnědá | Dobrý | Gravíruje se sytě a tmavě; celé prkénko věkem a slunečním světlem tmavne, takže se kontrast během let zjemní |
| Buk | Světle hnědá | Dobrý | Cenově dostupná alternativa javoru s podobným chováním |
| Ořech | Čokoládově hnědá | Nízký | Tmavý výpal na tmavém dřevě; krásné prkénko, decentní gravírování. Vhodnější pro motivy založené na textuře než na jemných detailech |
| Bambus | Bledě zlatá | Nekonzistentní | Viz upozornění níže |
Pokud vybíráte mezi druhy dřeva pro konkrétní projekt, náš průvodce druhy dřeva pro laserovou práci porovnává dvanáct druhů podrobněji, včetně chování při opalování a ceny.
Podélná struktura vs. čelní struktura
Většina gravírovacích přířezů má podélnou strukturu: dlouhé proužky slepené plochami k sobě, přičemž vlákna vedou rovnoběžně s povrchem. Podélná struktura se gravíruje předvídatelně, protože laser opaluje vlákna, která vedou stejným směrem.
Prkénka s čelní strukturou, tedy řeznické špalky připomínající šachovnici, směřují dřevěná vlákna přímo vzhůru k laseru. Povrch paprsek absorbuje a protože se orientace vláken jednotlivých bloků střídá, mohou sousední čtverce shořet do viditelně odlišných hloubek a odstínů. Výsledek působí flekatě i při stejném nastavení. Prkénka s čelní strukturou se skvěle hodí ke krájení, ale špatně se gravírují. Pokud na nich zákazník trvá, nejprve testujte na stejné konstrukci a držte se výrazného a jednoduchého návrhu.
Bambusová výjimka
Bambusová prkénka jsou všude, protože jsou levná, a právě proto lákají. Vězte, do čeho jdete. Bambus je technicky tráva a prkénka se skládají z úzkých laminovaných proužků slepených k sobě. To znamená lepicí spoje procházející návrhem, proužky, které mohou hořet mírně odlišně od sousedních, a obecně světlejší značky s nižším kontrastem, než jaký získáte u tvrdého javoru.
Z bambusu lze bez problémů vyrobit prodejné prkénko. Jemné detaily a práce s fotografiemi ho však nemilosrdně odhalí. Nechte ho na výrazný text a robustní grafiku a reprezentativní návrhy dávejte na javor.
Doporučení
Bez ohledu na druh dřeva si kupte několik náhradních přířezů přesně toho prkénka, které plánujete prodávat. Ne podobná prkénka, ale stejné SKU. Budou sloužit jako testovací materiál a testování na skutečném výrobku je celý trik ke konzistentním výsledkům.
TISKNĚTE. ŘEŽTE. DLABEJTE.



- Více formátů (SVG, DXF, PNG)
- Návrhy testované na strojích
- Komerční licence
Sponzorováno PrintCutCarve.com
Návrhy, které se skutečně prodávají
Kupující krájecích prkének jsou většinou nakupující dárků a ti chtějí personalizaci. Téměř vše, co se prodává, pokrývá pět rodin návrhů.
Monogramy a iniciály. Klasika. Jedno ozdobné písmeno nebo klasický monogram ze tří iniciál, obvykle uprostřed nebo v rohu. Bezplatný Monogram Generator vytváří dělené i klasické monogramy s fonty, rámečky a okraji a exportuje laserové SVG, takže z iniciál zákazníka vznikne soubor připravený ke gravírování asi za minutu. Podrobnější pohled na styly monogramů a fonty, které přežijí gravírování, najdete v našem průvodci vlastními monogramy.
Rodinná jména a data založení. „The Andersons, Est. 2019“ je svatební dárek, který se nepřestává prodávat. Nejlépe fungují s ozdobným ornamentem nad textem nebo pod ním, aby návrh působil dokončeně, nikoli jako prostý text.
Receptová prkénka. Ručně psaný rodinný recept vygravírovaný na prkénku je dárek, který o Vánocích dojme k slzám. Skutečný babiččin rukopis naskenovaný ze zašpiněné kartičky s receptem je celým smyslem. Taková prkénka mohou mít prémiovou cenu z jednoduchého důvodu: návrh existuje přesně v rukopisu jedné rodiny, takže ho nelze koupit nikde jinde.
Prkénka s fotografiemi a portréty. Portréty domácích mazlíčků a rodinné fotografie převedené na perokresbu se na javoru krásně gravírují. Photo Converter převede fotografii na čistou perokresbu připravenou pro gravírování, čímž obejdete kašovitou změť, která vzniká při gravírování surové fotografie do dřeva. Jeden kredit za převod.
Ozdobné okraje a ornamenty. Okraj promění obyčejné textové prkénko v něco, co působí jako promyšlený návrh. DecoFill vyplní libovolný tvar ornamenty v 65 stylech, od viktoriánského po severský, za jeden kredit a zachová text uvnitř tvaru, takže můžete celou plochu prkénka obklopit ornamentem kolem rodinného jména.
Pokud přemýšlíte, že tato prkénka budete prodávat místo pouhého darování, náš průvodce personalizovanými dárky popisuje, které kategorie se prodávají a jak je vystavit v nabídce.
Umístění a velikost
Tady vás obrazovky klamou. Návrh, který zaplní monitor, může na prkénku o rozměrech 12 × 18 palců vypadat jako poštovní známka. Několik praktických pravidel:
- Nejprve určete pohledovou stranu. Většina gravírovaných prkének leží na lince jednou stranou nahoru a při skutečném krájení se otočí. Gravírujte stranu s hezčí strukturou a pokud má prkénko na jedné straně nožičky nebo žlábek na šťávu, rovná strana je obvykle vaše plátno.
- Respektujte žlábek na šťávu. Pokud ho prkénko má, držte návrh uvnitř a ponechte pohodlný okraj. Gravírování přes žlábek vypadá jako nehoda.
- Rohové návrhy jsou u pracovních prkének lepší než středové. Monogram v dolním rohu zůstane viditelný i s bochníkem chleba na prkénku. Umístění uprostřed se hodí pro prkénka, která budou viset nebo stát opřená jako dekorace.
- Velikost textu určujte podle prostoru, ne podle prkénka. Vytiskněte návrh v plné velikosti na papír, vystřihněte ho a položte na skutečné prkénko. Deset sekund kontroly na papíře zachránilo více prkének než jakýkoli náhled v softwaru.
- Myslete na rukojeť. U prkének ve tvaru pádla buď rukojeť zapojte do kompozice, nebo návrh držte zřetelně mimo ni. Nic mezi tím.
Zarovnávací přípravek si vyrobte dřív, než ho budete potřebovat
Jedno prkénko pečlivě umístěné od oka je v pořádku. U třetího prkénka v sérii nebo u náhrady za právě špatně vypálené prkénko se přípravek sám zaplatí.
Nejjednodušší verze zabere pět minut:
- Položte na lože laseru kus odpadní lepenky nebo sololitu a upevněte ho tak, aby se nemohl posunout.
- Vyřízněte nebo nízkým výkonem obkreslete obrys krájecího prkénka a umístěte ho tam, kde návrhový soubor očekává prkénko.
- Vložte prkénko do výřezu. Nyní sedí pokaždé přesně na stejném místě.
Každé prkénko stejného SKU zapadne do přípravku, soubor se nikdy neposune a gravírování dopadne na stejné místo u prkénka jedna i u prkénka čtyřicet. Pokud má váš stroj kameru, použijte ji pro jednotlivé kusy, ale fyzický přípravek je pro série stále rychlejší a opakovatelnější. Označte přípravek SKU prkénka a názvem souboru a uschovejte ho. Vaše budoucí já, které bude v listopadu znovu objednávat stejné přířezy, vám poděkuje.
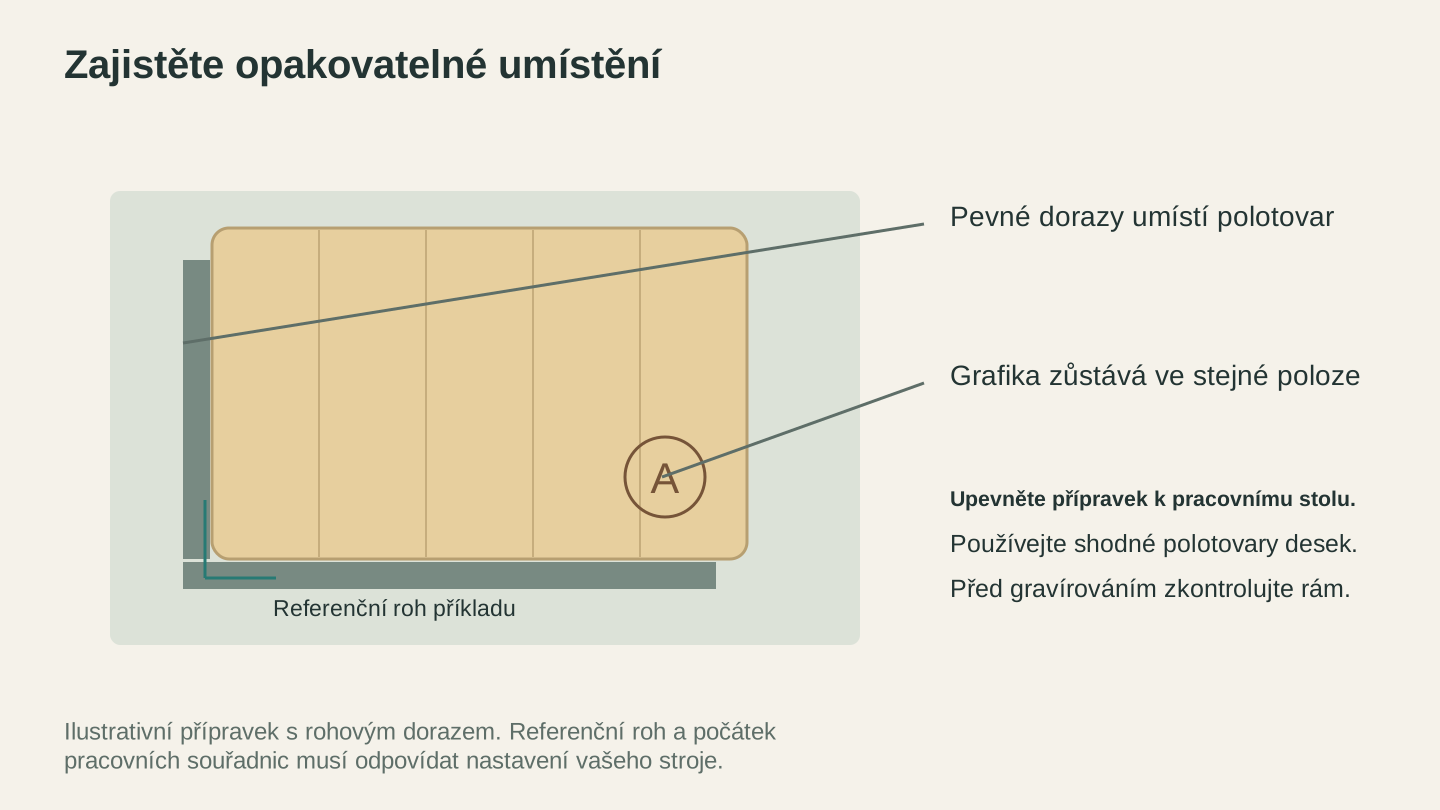
Pevný rohový přípravek pomáhá umisťovat shodné polotovary konzistentně. Nastavte počátek obrobku podle přípravku a poté ověřte polohu grafiky.
Nastavení: Testovací čtverec spusťte pokaždé
Nepříjemná pravda o nastavení gravírování zní: čísla někoho jiného nejsou vaše čísla. Jiný stroj, jiná čočka, jiný ofuk, jiná várka javoru. Kopírování nastavení z příspěvku na Facebooku je cesta, jak z prkének vyrobit palivové dřevo.
Metoda, která skutečně funguje, je mřížka testovacích čtverců spuštěná na náhradním přířezu stejného prkénka:
- Nakreslete mřížku malých vyplněných čtverců, každý přibližně 10mm.
- Měňte výkon ve sloupcích a rychlost v řádcích a procházejte rozsah, který váš stroj umožňuje.
- Každý čtverec označte jeho nastavením vygravírovaným hned vedle, aby výsledky samy dokumentovaly použité parametry.
- Spusťte mřížku na skutečném přířezu prkénka, otřete ho a prohlédněte si ho při dobrém světle.
Hledáte čtverec, který vytvoří rovnoměrnou tmavou značku bez viditelné hloubky nebo silného ohoření na okrajích. U krájecího prkénka obecně chcete co nejmělčí výpal, který poskytne plný kontrast. Hluboké gravírování kuchyňského předmětu jen vytváří prohlubně a prohlubně na kuchyňském náčiní nejsou ničí přítel.
Náš stručný přehled nastavení pro dřevo podrobněji vysvětluje, jak sestavit testovací mřížku, a nabízí počáteční rozsahy, na které můžete mřížku vycentrovat. Vše v něm berte jako výchozí bod pro vlastní test, nikdy jako konečnou odpověď.
Varování
Testujte na skutečném přířezu, který budete prodávat, ne na odřezku překližky. Tvrdé dřevo krájecího prkénka a překližka o tloušťce 3mm se chovají úplně jinak a mřížka spuštěná na nesprávném materiálu vám neřekne nic použitelného.
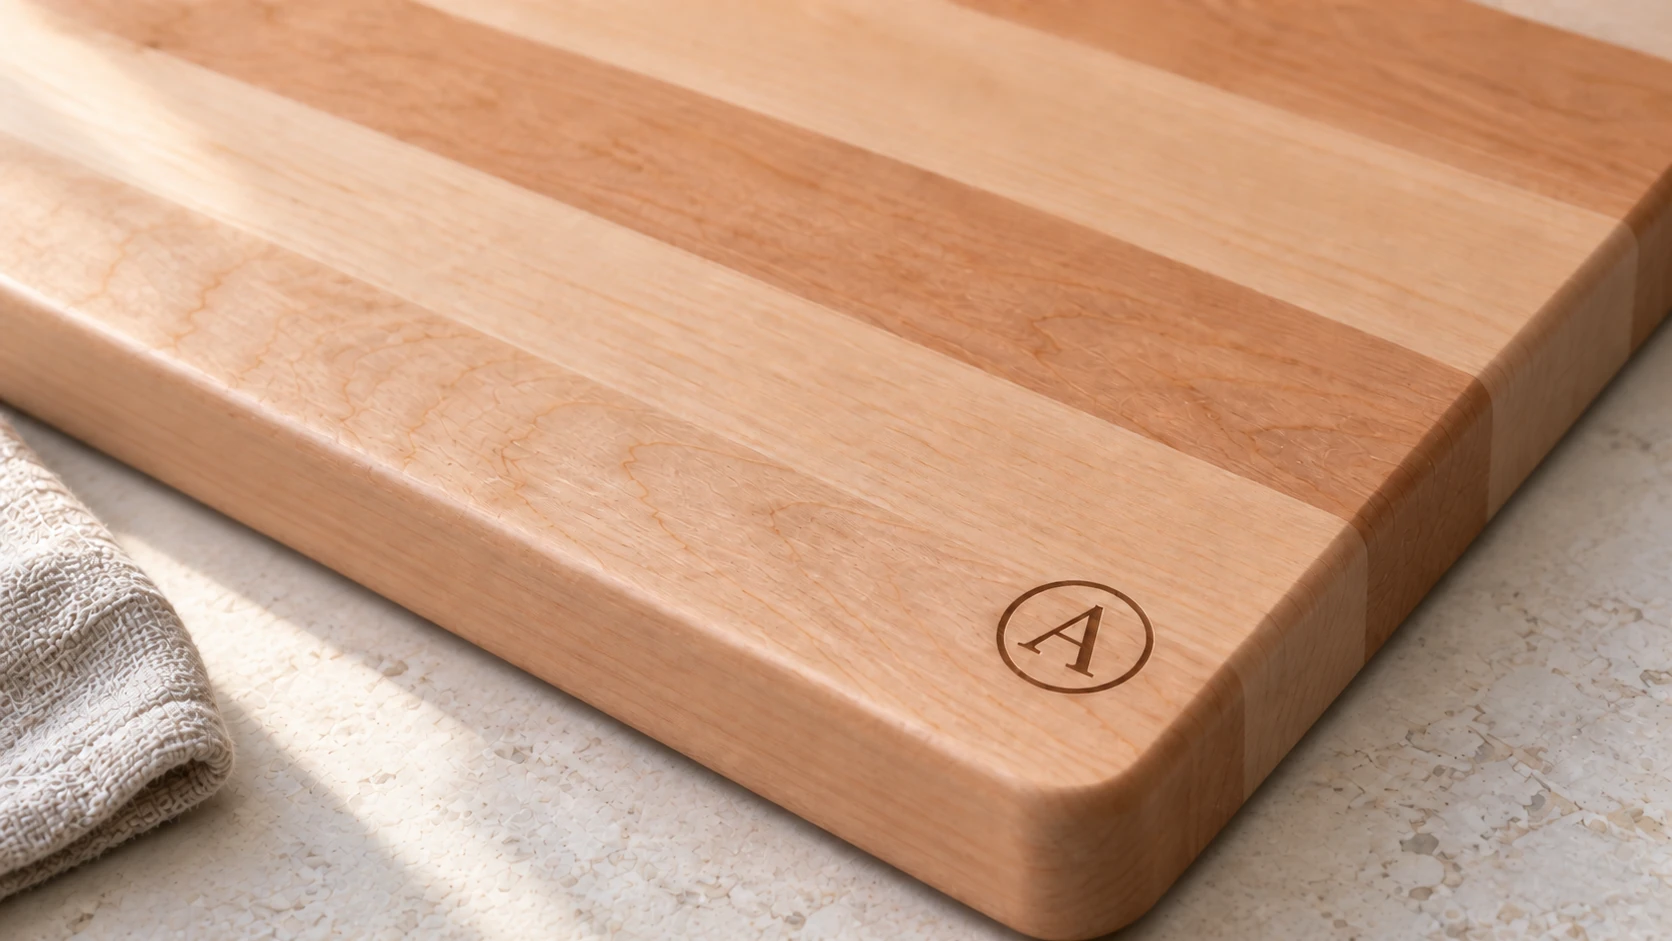
Malá značka ponechává většinu plochy prkénka volnou. Kresba dřeva pokračuje přes mělké hnědé písmo a okraj.
Otázka styku s potravinami: upřímná odpověď
Zákazníci se budou ptát, zda je gravírované prkénko bezpečné pro potraviny. Měli byste mít přímou odpověď a ta začíná u toho, co gravírování skutečně je.
Na neošetřeném masivním dřevě je laserové gravírování mělká vrstva zuhelnatělých dřevěných vláken. Laser nepřidává inkoust ani povrchovou úpravu; zanechává po sobě opálené dřevo. Proto záleží i na samotném přířezu: lepidla, předchozí povrchové úpravy a nátěry také hoří, takže začněte surovým prkénkem prodávaným pro použití s potravinami a při povrchové úpravě se řiďte pokyny výrobce přířezu. Nic z toho není formální certifikace bezpečnosti potravin a neměli byste to tak prezentovat.
Z toho vyplývají tyto poctivé postupy:
- Dokončete prkénko olejem bezpečným pro styk s potravinami, přesně podle doporučení výrobce prkénka. Potravinářský minerální olej je standard, přičemž běžným vylepšením je vosk na prkénka (minerální olej a včelí vosk). Naolejujte vygravírovanou oblast stejně jako zbytek.
- Netvrďte, že přes gravírování používáte speciální povrchovou úpravu bezpečnou pro potraviny, pokud skutečně nepoužíváte výrobek určený pro styk s potravinami a nedodržujete jeho pokyny. Většina gravírovaných prkének se jednoduše naolejuje a tak je v pořádku to říct.
- Veďte zákazníky k používání vygravírované strany jako pohledové. Opakované krájení přes gravírování návrh stejně zničí, takže tato rada chrání vaši práci a zároveň odpovídá na otázku bezpečnosti potravin.
- Na krájecích plochách vynechte hluboké gravírování. Usilujte o mělkou značku s výrazným kontrastem a hladkým povrchem. V hlubokých kapsách se hromadí zbytky jídla a vlhkost.
Věcný přístup k této otázce buduje větší důvěru než neurčité „naprosto bezpečné pro potraviny!“. Prodáváte lidem, kteří vaří. Oceňují tvůrce, který nad tím přemýšlel.
Ke každému prkénku přiložte kartu s pokyny k péči
Nejrychlejší cesta k jednohvězdičkové recenzi je zákazník, který dá dřevěné prkénko do myčky. Malá vytištěná karta s pokyny k péči ochrání vaši práci a výrobek díky ní působí prémiově. Měla by říkat přibližně toto:
- Myjte ručně teplou mýdlovou vodou. Nikdy v myčce a nikdy ho nenechávejte dlouho namočené.
- Ihned osušte a postavte na hranu, aby k oběma stranám proudil vzduch.
- Každý měsíc znovu naolejujte, nebo kdykoli dřevo vypadá suché, potravinářským minerálním olejem či voskem na prkénka.
- Chraňte před přímým teplem a dlouhodobým slunečním světlem.
- Vygravírovanou stranu používejte k servírování a vystavení; krájejte na druhé straně.
- Pokud bylo k prkénku přiloženo vlastní doporučení k péči, řiďte se jím.
Jednou vytiskněte celou hromádku a jednu vložte do každého balíčku. Stojí pár haléřů a šetří prkénka, recenze i vratky.
Často kladené otázky
Mohu gravírovat na krájecí prkénko, které už někdo vlastní?
Ano, pokud je povrch čistý a suchý. Musí být také přiměřeně rovný, aby paprsek zůstal zaostřený. Před gravírováním nejprve obruste veškerý stávající olej nebo vosk, protože povrchové úpravy hoří jinak než holé dřevo a kolem gravírování mohou zanechat svatozář. Po gravírování znovu naolejujte.
Mám nové prkénko gravírovat před olejováním, nebo po něm?
Nejprve gravírujte na surové dřevo a potom olejujte. Olej v povrchu mění způsob hoření dřeva a může způsobit nerovnoměrnou značku. Pokud přířez dorazí předem naolejovaný, lehké přebroušení před gravírováním povrch sjednotí.
Mohu gravírovat obě strany?
Můžete, ale většina tvůrců gravíruje jednu stranu a druhou ponechává jako pracovní plochu. Pokud gravírujete obě, počítejte s tím, že návrh na „krájecí“ straně se opotřebuje.
Začněte návrhem
Prkénko, přípravek a testovací mřížka představují řemeslnou část. Návrh je místo, kde vám Craftgineer uvolní ruce. Vytvořte dělený nebo klasický monogram v bezplatném nástroji Monogram Generator, proměňte fotografii domácího mazlíčka v čárovou grafiku připravenou ke gravírování pomocí Photo Converter nebo obklopte rodinné jméno viktoriánským ornamentem pomocí DecoFill. Každý z nich exportuje laserové SVG připravené k použití, takže soubor, který získáte, je soubor, který vypálíte.
Vezměte javorový přířez a zkušební odřezek a vyrobte prkénko, které si někdo ponechá dvacet let.
Související nástroje
Monogram Generator
Vytvářejte dělené nebo klasické monogramy s výběrem písem a rámečků.
Photo Converter
Převeďte fotografii na čárovou kresbu pro gravírování, s běžným nebo invertovaným výstupem.
DecoFill
Generujte dekorativní grafiku uvnitř nahraného obrysu a připravte výstup PNG nebo vektorizovaný SVG.
Chcete tyto nástroje vyzkoušet?
Zaregistrujte se zdarma, bez nutnosti platební karty. Bezplatné nástroje jsou k dispozici okamžitě.
Začít zdarma