

So fügst du einem Holzprojekt ein individuelles Gravurschild hinzu
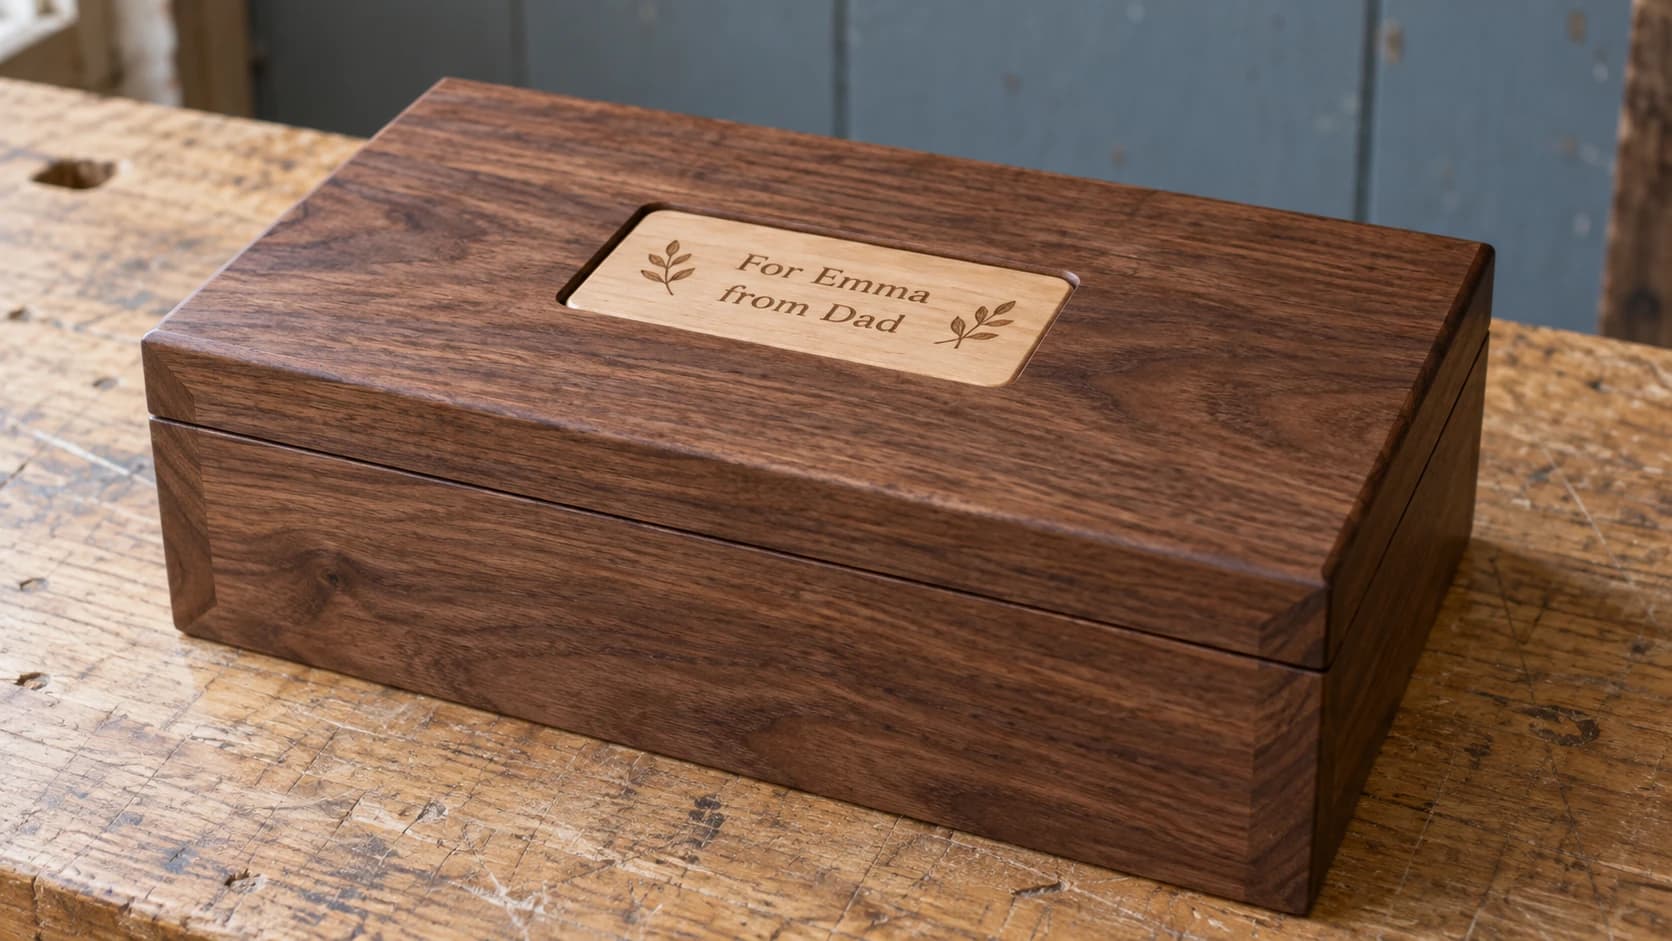
Die Kiste ist verleimt, mit 220er-Körnung geschliffen und trägt bereits ihre erste Ölschicht. Sie sieht gut aus. Und trotzdem wirkt sie, als könnte sie von überallher stammen, weil nichts darauf verrät, wer sie gefertigt hat, für wen sie bestimmt ist oder warum es sie gibt.
Ein graviertes Schild, eine Plakette oder ein Herstellerzeichen schafft an einem Nachmittag Abhilfe. Eine Wiege mit dem Namen des Babys auf einer kleinen Holzplakette ohne Messing wird zum Erinnerungsstück. Eine Bank mit „Built by Grandpa, 2026“ unter der Sitzfläche wird zu der Bank, die niemand wegwerfen darf. In diesem Beitrag geht es darum, dieses Zeichen an etwas anzubringen, das du bereits gebaut hast – ein anderes Problem, als ein Schild als komplettes Projekt zu bauen. Wenn du eigentlich ein eigenständiges Schild möchtest, zeigen dir unser CNC-Schild-Guide und unser Guide für Namensschilder mit dem Laser, wie du von einem leeren Brett aus vorgehst.
Hier ist das Holz bereits zugeschnitten, möglicherweise schon mit Finish versehen und eventuell zu groß für jede Maschine. Das verändert jede Entscheidung. Beginne damit, was das Zeichen aussagen soll.
Entscheide, was das Zeichen aussagen soll (und wie auffällig es sein darf)
Bevor du mit dem Design beginnst, entscheide, um welche Art von Zeichen es sich handelt. Es gibt im Grunde drei Stufen, und wenn man sie verwechselt, sieht ein schönes Stück schnell wie ein Pokal aus.
- Ein Herstellerzeichen. Klein und meist versteckt: deine Initialen, ein Logo, ein Datum. Unterseite der Kiste, Unterseite des Regals, hintere Leiste der Wiege. Es ist für die Person, die es in vierzig Jahren entdeckt.
- Eine Widmung. Ein Name, ein Datum, eine kurze Zeile wie „Für Emma, von Papa“. Sichtbar, aber nicht dominant. Die Innenseite eines Deckels ist der klassische Platz, weil das Zeichen den Besitzer begrüßt, ohne Gästen entgegenzuschreien.
- Ein Schild. Das Stück verkündet etwas: ein Familienname an einer Garderobe, „Gartengeräte“ auf einem Schrank, eine Hausnummer auf einem Pflanzkübel. Nur bei dieser Stufe soll die Gravur aus einiger Entfernung im Raum lesbar sein.
Schreib den genauen Wortlaut jetzt auf, einschließlich des Datumsformats, und lass ihn von jemand anderem lesen. Jeder Maker, der schon einmal „Emliy“ graviert hat, weiß, warum dieser Schritt nicht optional ist. Holz hat keine Rückgängig-Schaltfläche.
Tipp
Kürzere Texte halten besser. „The Hendersons, Est. 2026“ wirkt auch in vielen Jahren noch passend. Vier Verszeilen quer über einen Deckel tun das selten – und sie zwingen die Buchstaben so klein zu werden, dass sie sich mit Finish füllen.
DRUCKEN. SCHNEIDEN. GRAVIEREN.



- Mehrere Formate (SVG, DXF, PNG)
- Maschinengetestete Designs
- Gewerbliche Lizenzen
Gesponsert von PrintCutCarve.com
Das Stück direkt gravieren oder eine separate Plakette anfertigen?
Das ist die größte Weggabelung, und die ehrliche Antwort lautet: Die separate Plakette ist öfter die bessere Wahl, als viele erwarten.
Eine direkte Gravur wirkt integriert und dauerhaft, und später muss nichts aufgeklebt werden. Sie bringt jedoch echte Einschränkungen mit sich: Das Stück muss physisch in oder unter deine Maschine passen, ein montiertes Projekt liegt selten eben auf, und ein Fehler markiert das Projekt selbst. Eine Wiege passt nicht in einen Laser. Eine Werkbank passt nirgendwo hinein.
Eine separate Plakette dreht all das um. Du gravierst einen kleinen, flachen Rohling – die einfachste Aufgabe, die ein Laser oder eine CNC erledigen kann – und wenn der erste Versuch misslingt, hast du nur ein Reststück statt des gesamten Projekts verschwendet. Danach befestigst du sie: eingeleimt in eine flach ausgefräste Vertiefung für eine bündig eingelassene Optik oder einfach verleimt und leicht überstehend angepinnt wie eine traditionelle Präsentationsplakette.
| Direkte Gravur | Separate Plakette | |
|---|---|---|
| Das Stück muss in die Maschine passen | Ja | Nein, nur der Rohling muss passen |
| Risiko bei einem Fehler | Das gesamte Projekt | Ein Reststück |
| Testläufe möglich | Nur auf einem Stück derselben Holzart | Unbegrenzt, auf dem tatsächlichen Rohlingmaterial |
| Für montierte/gebogene Stücke geeignet | Selten | Ja |
| Kontrastkontrolle | Durch das Holz des Projekts begrenzt | Wähle jede gewünschte Holzart |
| Wirkung | Nahtlos und integriert | Gerahmt und leicht förmlich |
Die Plakette löst außerdem das Kontrastproblem. Lasermarkierungen sind dunkel und erscheinen daher am zuverlässigsten auf hellem Holz. Bei einem dunklen Projekt wie Nussbaum kann eine direkte Gravur fast Ton-in-Ton ausfallen – nur ein Test auf einem Reststück zeigt dir, was du tatsächlich bekommst. Eine Ahorn- oder Lindenholzplakette im Nussbaumdeckel sorgt für klaren Kontrast und nebenbei für ein schönes zweifarbiges Detail.
Info
Rohes oder nur leicht versiegeltes Holz ist der einfachste Fall für Lasermarkierungen, und nachträglich aufgetragenes Finish vertieft den Kontrast normalerweise. Daher ist Gravieren vor dem Finish die fehlertolerante Reihenfolge. Das Gravieren durch eine vorhandene Beschichtung hängt vom Finish ab: Manche lassen sich problemlos bearbeiten, bei anderen werden die Kanten matschig, und manche sollten überhaupt nicht gelasert werden. Wenn das Stück bereits fertig behandelt ist, hol dir zuerst ausdrücklich Hinweise zur Laserbearbeitung vom Hersteller der Beschichtung. Nutze dazu das Sicherheitsdatenblatt, um festzustellen, welche Stoffe enthalten sind, und teste die Optik erst danach an einem Reststück mit demselben Finish.
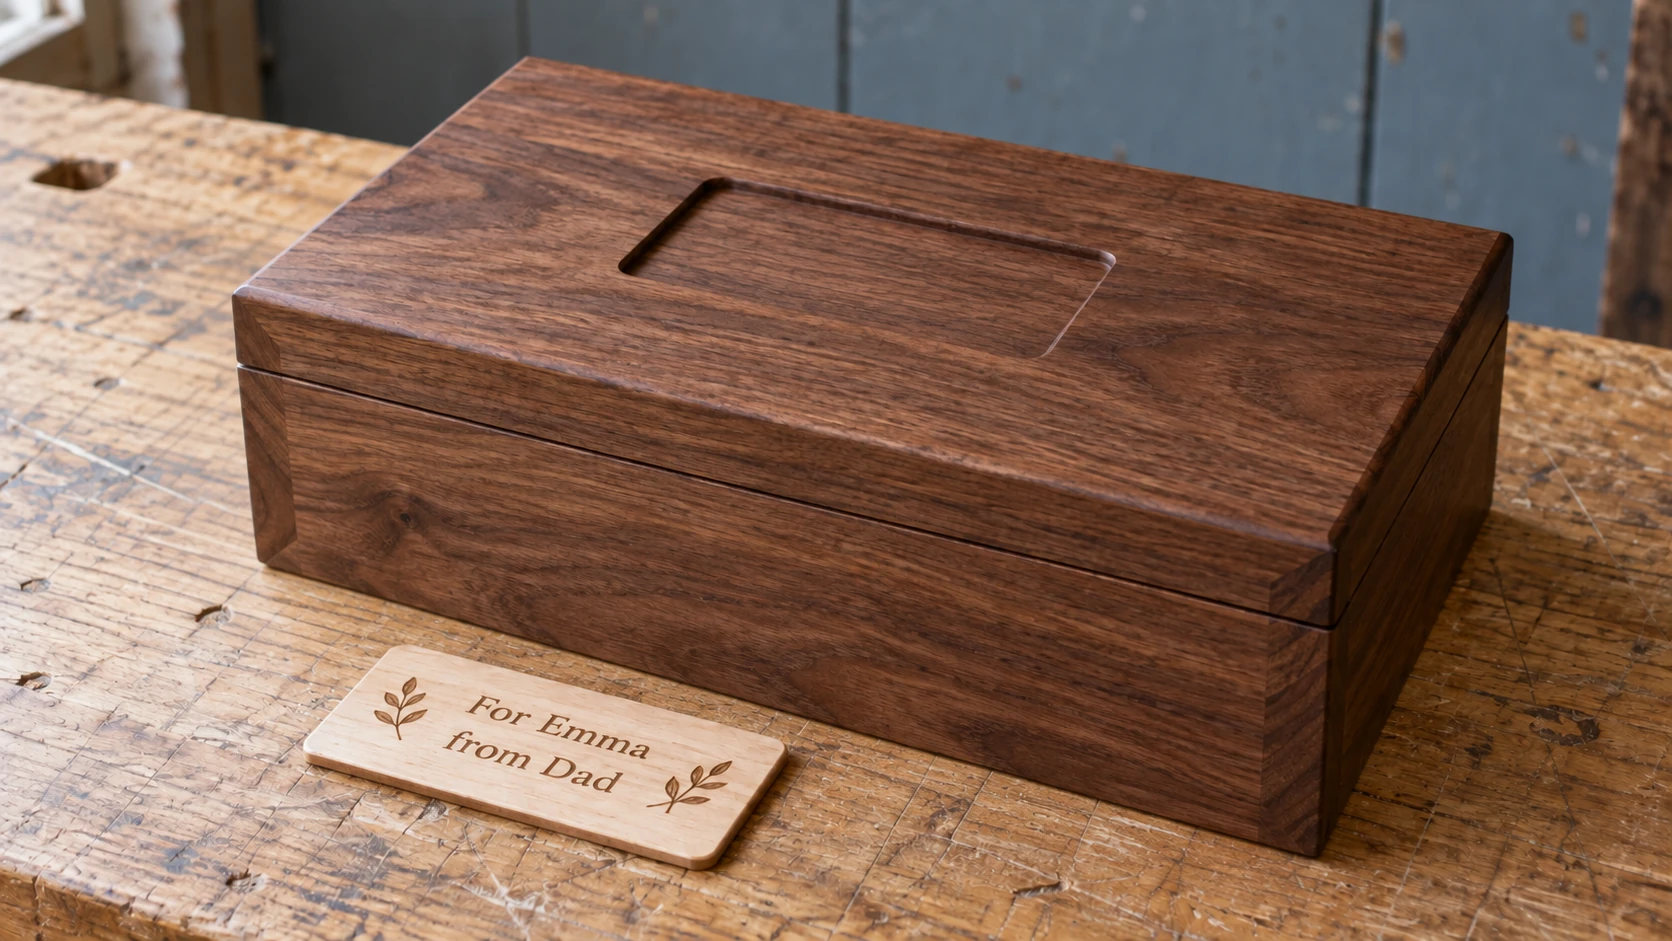
Mit einer separaten Plakette kannst du die Gravur fertigstellen, bevor du sie am größeren Projekt befestigst. Prüfe Größe und Position vor dem Verkleben anhand der Aussparung.
Gestalte das Motiv
Ein Zeichen braucht ein Motiv, und „Ich habe meinen Namen in einer Standardschrift eingetippt“ ist beim Gravieren das Äquivalent zu einem einfachen Baumarkt-Türknauf. Du brauchst Vektorgrafiken: klare Konturen und Flächen, denen ein Laser oder eine CNC folgen kann, kein unscharfes Foto.
Wenn du beschreiben kannst, was du möchtest, erzeugt Vector Studio daraus für 1 Credit eine maschinenfertige SVG-Datei. Beschreibe das Zeichen so, wie du es einem Freund erklären würdest: „ein rundes Herstellerzeichen mit einem Eichenblatt und Eicheln, Platz für Initialen in der Mitte, im Stil eines Vintage-Holzschnitts“ oder „ein einfacher botanischer Kranz als Rand für eine rechteckige Plakette“. Wähle einen Stil, generiere das Motiv und lade die SVG-Datei herunter. Da Vector Studio dir eine maschinenfertige SVG-Datei liefert, ist zwischen Design und Maschine kein separates Nachzeichnen oder Bereinigen erforderlich.
Einige Gestaltungsregeln sind bei Holz wichtiger als auf dem Bildschirm:
- Bevorzuge kräftige Linien. Haarfeine Details verschwinden in der Maserung. Alles, was schmaler als die Breite der Maserungslinien ist, wirkt wie Rauschen.
- Halte Text bei kleinen Größen kompakt. Dünne Serifen und Schreibschriften laufen zusammen oder zerfallen, wenn die Buchstaben kleiner werden. Wann genau das passiert, hängt von deinem Holz, deiner Maschine und deinen Einstellungen ab. Teste daher die tatsächliche Schrift auf einem Reststück, bevor du dich festlegst. Fette, einfache Buchstabenformen überstehen kleine Größen am besten.
- Stimme das Motiv auf das Stück ab. Ein botanischer Kranz passt zu einer Erinnerungsbox. Ein Abzeichen mit Zahnrad und Banner passt zu einem Werkzeugschrank. Das Zeichen sollte wirken, als wäre es aus dem Projekt heraus entstanden.
- Lass Luft. Wähle die Größe des Motivs so, dass es von einem Rand aus leerem Holz umgeben ist, der mindestens so breit wie der höchste Buchstabe ist. Eine beengte Gravur sieht wie ein Fehler aus.
Bring die Datei ins richtige Format
Dein Motiv ist eine SVG-Datei. Ob deine Maschine dieses Format benötigt, hängt vollständig von der Maschine ab – und genau hier geraten viele erste Plakettenversuche für einen Abend ins Stocken.
Viele Laser- und CNC-Programme akzeptieren SVG, manche verlangen DXF und viele kommen mit beiden Formaten zurecht. Prüfe daher, welche Importe deine konkrete Software unterstützt, bevor du an der Maschine stehst. Wenn sie ein Format verlangt, das du nicht hast, konvertiere die Datei: File Converter wandelt SVG in DXF, DXF in SVG und SVG in PDF um, ohne Tool-Credits zu verwenden. Den vollständigen Ablauf einschließlich der Prüfungen nach der Konvertierung findest du in unserem Guide zur Umwandlung von SVG in DXF. Zum Herunterladen der konvertierten Datei ist ein aktiver kostenpflichtiger Tarif erforderlich.
Speziell bei CNC gilt: Der Vektor ist nur die Kontur. Deine CAM-Software entscheidet weiterhin, wie sie gefräst wird: Ein V-Bit, das den Linien folgt, erzeugt die klassische Optik eines geschnitzten Schilds, während ein kleiner Schaftfräser, der die Flächen ausräumt, flache Vertiefungen erzeugt, die du mit Farbe füllen kannst. Für eine kleine Plakette ist ein V-Bit mit 60 oder 90 Grad bei geringer Tiefe ein üblicher Ausgangspunkt – zuerst auf einem Reststück erprobt, bevor es den echten Rohling berührt.
Position und Größe
Wo das Zeichen sitzt, ist genauso wichtig wie das, was es aussagt. Einige Platzierungen funktionieren zuverlässig:
- Erinnerungsbox: mittig auf dem Deckel für ein Zeichen der Schild-Stufe, innen im Deckel für eine Widmung, auf der Unterseite für ein Herstellerzeichen.
- Regal oder Bank: Vorderkante oder Zarge für ein sichtbares Schild, Unterseite für die zurückhaltende Variante.
- Wiege oder Kindermöbel: Das Kopf- oder Fußteil eignet sich gut für einen Namen; eine kleine Plakette an der hinteren Leiste trägt das Baudatum.
- Schneidebrett (das klassische Geschenk): eine Ecke der Oberseite oder die gesamte Rückseite, wenn das Brett tatsächlich benutzt werden soll. Eine Gravur auf der Arbeitsfläche wird von Messern abgenutzt.
Für die Größenwahl schneidest du ein Papierrechteck in der geplanten Größe aus und klebst es auf das Stück. Tritt auf die Entfernung zurück, aus der das Stück normalerweise betrachtet wird. Wenn du es nicht lesen kannst, mach es größer; wenn es das Erste ist, was dir auffällt, mach es kleiner. Dreißig Sekunden mit Papier sind besser, als eine Plakette neu anzufertigen.
Als visueller Ausgangspunkt, nicht als Spezifikation: Ein Herstellerzeichen ist oft etwa 25 bis 50 mm breit, eine Widmungsplakette auf einem Kastendeckel etwa 60 bis 100 mm breit, und ein Schild, das aus einiger Entfernung im Raum lesbar sein soll, braucht Buchstaben von mehr als 20 mm Höhe. Dein Papiertest hat Vorrang, weil er die tatsächliche Betrachtungsentfernung berücksichtigt.
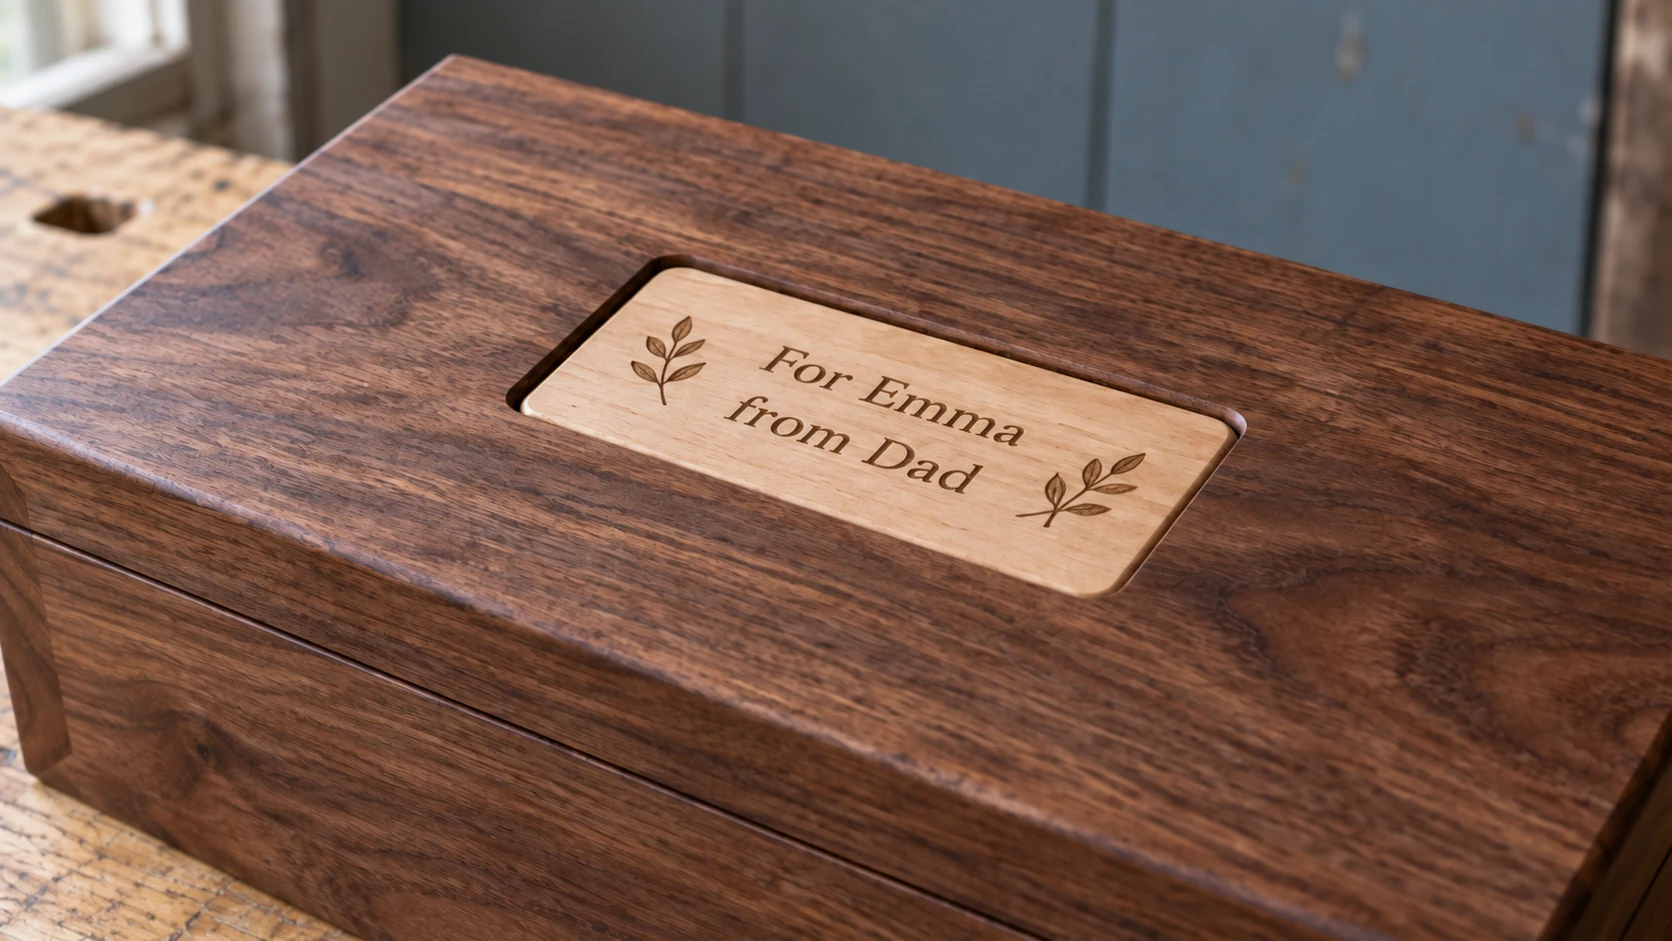
Die helle Plakette hebt die Beschriftung vom Walnussholz ab. Achte darauf, dass die Widmung lesbar bleibt, und lass ausreichend Platz um die Wörter.
Kein Laser oder keine CNC? Du hast trotzdem Möglichkeiten
Für eine gravierte Plakette brauchst du keine eigene Maschine. Genau hier spielt die Variante mit der separaten Plakette ihre Stärke aus, weil sich ein kleiner Rohling leicht weitergeben lässt.
- Offene Werkstätten. Viele Städte haben eine, und ein Lasercutter gehört zu den häufigsten Maschinen dort. Die Details unterscheiden sich je nach Werkstatt, aber üblich sind eine kurze Einführung und anschließend Maschinenzeit zum Stunden- oder Mitgliedertarif – für einen Bruchteil der Kosten einer eigenen Maschine. Das Personal ist daran gewöhnt, Einsteiger durch ihre erste Gravur zu führen.
- Lokale Pokal- und Gravurgeschäfte. Sie kalkulieren ständig kleine Einzelaufträge. Wenn du eine saubere Vektordatei statt einer Skizze auf einer Serviette mitbringst, wird der Auftrag meist günstiger, weil du die Designarbeit bereits erledigt hast.
- Online-Gravurdienste. Lade die Datei hoch, wähle das Holz, erhalte die Plakette per Post und klebe sie auf.
- Ein Freund mit Maschine. Die Hälfte der Laserbesitzer, die du kennst, sucht nach Gründen, die Maschine laufen zu lassen. Wenn du mit einer fertigen SVG-Datei und einem schönen Reststück auftauchst, kann man dir diesen Gefallen ganz leicht tun.
In jedem Fall sind die oben beschriebenen Design- und Dateiformatschritte identisch. Du erledigst den Teil, der das Zeichen zu deinem macht; die Maschine eines anderen übernimmt das Einbrennen.
Wenn du durch diesen Beitrag nach Holzprojekten Ausschau hältst, die von vornherein ein Zeichen verdienen, ist unsere Liste von Holzprojekten fürs Wochenende voller Bauprojekte, die innerhalb von zwei Tagen fertig werden und am dritten Tag ein Herstellerzeichen verdienen.
Häufig gestellte Fragen
Sollte ich vor oder nach dem Finish gravieren?
Normalerweise vorher. Rohes oder leicht versiegeltes Holz nimmt Lasermarkierungen sauber an, und das anschließende Finish vertieft den Kontrast und schützt die Gravur. Speziell für Laser geeignete Beschichtungen gibt es ebenfalls. Sie können sogar das Entfernen von Rauchresten erleichtern. Dafür musst du jedoch genau wissen, um welches Finish es sich handelt. Wenn das Stück bereits fertig behandelt ist und du die Beschichtung nicht kennst, umgehst du die Frage vollständig, indem du eine separate Plakette auf unbehandeltem Holz gravierst.
Welches Holz graviert sich mit dem besten Kontrast?
Gute Kandidaten sind Ahorn, Linde, Birke und Erle: helle Hölzer mit gleichmäßiger Maserung, auf denen der dunkle Brand eines Lasers deutlich hervortritt. Dunkles oder stark gemasertes Holz verbirgt das Zeichen. Das ist ein weiteres Argument für eine helle Plakette auf einem dunklen Projekt.
Kann ich ein graviertes Zeichen an einem Projekt anbringen, das für jede Maschine zu groß ist?
Ja, genau dafür ist die separate Plakette gedacht. Graviert wird ein kleiner Rohling, der in jede Maschine passt; anschließend klebst du ihn in eine flache Vertiefung oder befestigst ihn an der Oberfläche. Das Projekt selbst muss sich nie bewegen.
Stell das Projekt richtig fertig
Die Holzarbeiten haben Tage gedauert. Das Zeichen braucht einen Abend: Schreib die Worte auf, generiere das Motiv, konvertiere die Datei, gravier eine Plakette und kleb sie auf. Dieses letzte Prozent macht aus einem schönen Bauprojekt ein signiertes Einzelstück.
Beschreibe dein Zeichen gegenüber Vector Studio, und du erhältst für 1 Credit eine maschinenfertige SVG-Datei. Wenn deine Maschine oder deine offene Werkstatt stattdessen DXF benötigt, konvertiert File Converter die Datei, ohne Tool-Credits zu verwenden. Das Projekt ist bereits gebaut. Signiere es. Zum Herunterladen der konvertierten Datei ist ein aktiver kostenpflichtiger Tarif erforderlich.
Passende Tools
Bereit, diese Tools auszuprobieren?
Kostenlos registrieren – keine Kreditkarte erforderlich. Kostenlose Tools sind sofort verfügbar.
Kostenlos starten