

Cómo despiecear una plancha completa de contrachapado de forma segura y a escuadra
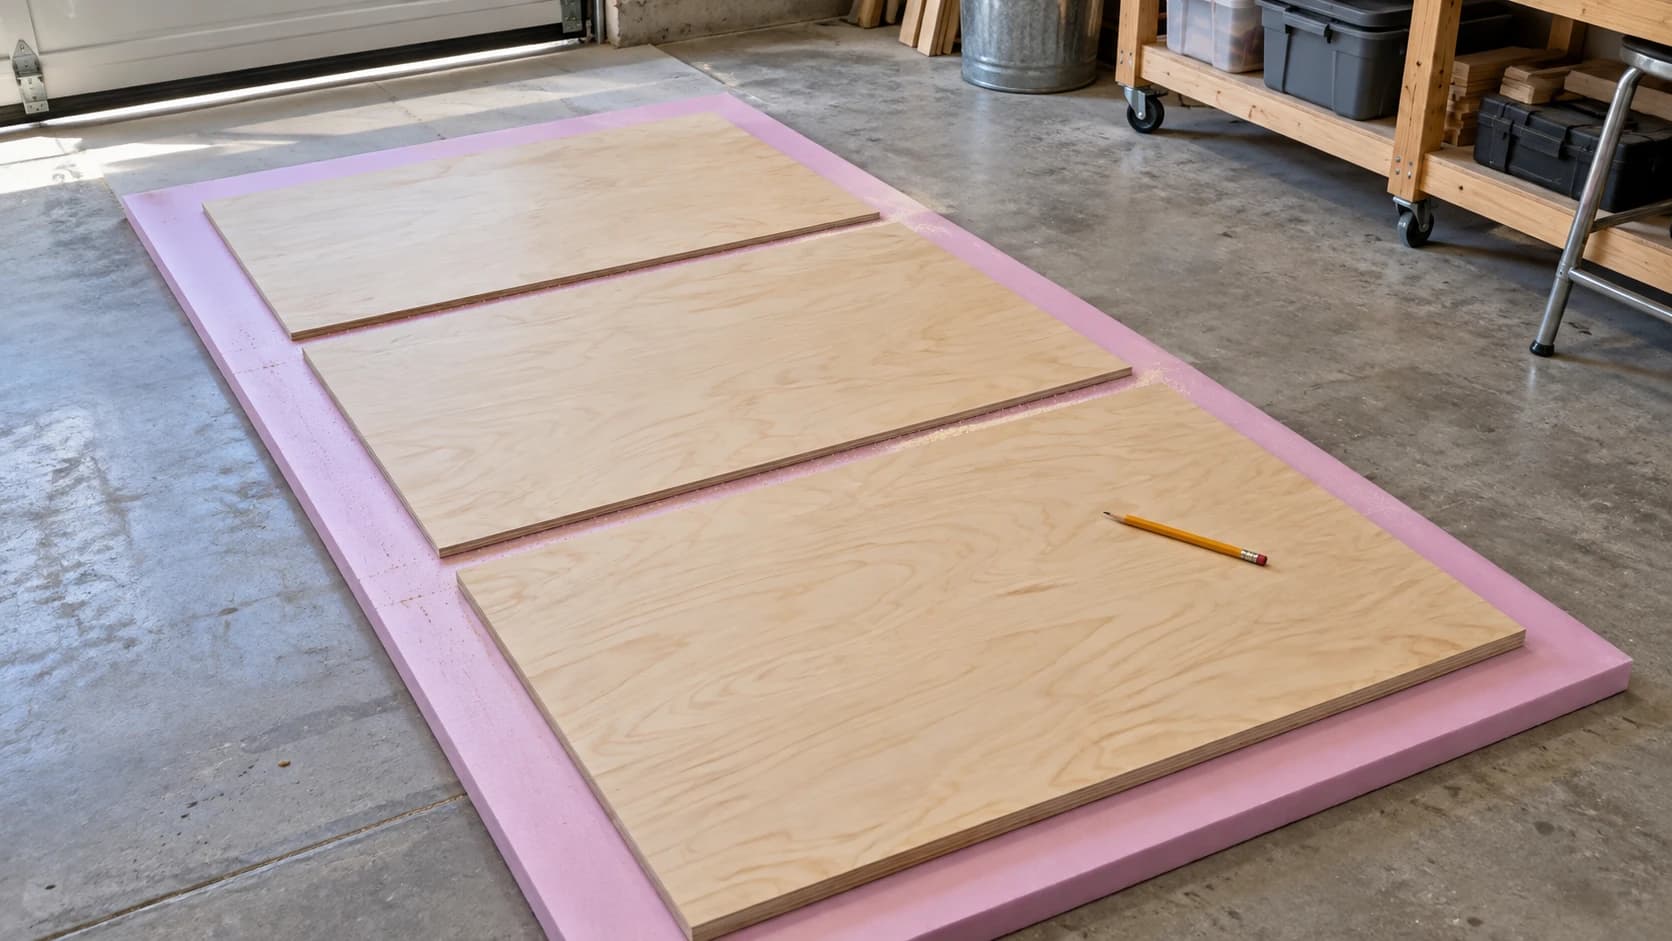
Una plancha completa de contrachapado mide ocho pies de largo, cuatro pies de ancho y pesa más de lo que parece en la tienda. Además, es flexible exactamente en la dirección en la que no quieres que lo sea.
Por eso el primer intento clásico suele ser así: la subes a pulso a la sierra de mesa, se comba por el centro a mitad del corte, el extremo más alejado cae, la hoja se atasca y ahora tienes un caro trozo de leña con una curva.
La solución no es tener más fuerza, sino hacer los cortes en otro orden.
Consejo
Respuesta corta: no intentes hacer cortes finales en una plancha completa. Primero divídela en piezas manejables, corta ligeramente sobredimensionado y después lleva esas piezas a la sierra de mesa para obtener las dimensiones finales. Apoya toda la plancha por debajo mientras trabajas, no solo los extremos.
Primero los cortes bastos y después los cortes finales
Este es el único hábito que diferencia un despiece limpio de una pelea.
Los cortes bastos convierten una plancha inmanejable en varios paneles manejables. Se hacen donde está colocada la plancha, normalmente con una sierra circular o una sierra de incisión, y se cortan deliberadamente con un exceso de aproximadamente un cuarto a media pulgada.
Los cortes finales llevan esos paneles manejables a la medida exacta, en una sierra de mesa donde tienes verdadera precisión y control.
Nadie intenta alcanzar una dimensión final mientras equilibra ocho pies de contrachapado. El corte basto solo tiene que ser aproximadamente correcto y razonablemente recto, algo mucho más fácil de exigirte.
IMPRIME. CORTA. TALLA.



- Varios formatos (SVG, DXF, PNG)
- Diseños probados en máquinas
- Licencias comerciales
Patrocinado por PrintCutCarve.com
Apoya toda la plancha
Una plancha apoyada solo en los extremos se combará, y una plancha combada se cerrará sobre la hoja a mitad del corte. Ese pellizco es lo que provoca atascos y retrocesos, y es la forma más habitual de que esto salga mal.
Hay dos montajes que funcionan bien:
Espuma en el suelo. Coloca una plancha de espuma rígida aislante sobre el suelo del garaje y el contrachapado encima; ajusta la profundidad de la hoja para que sobrepase justo el grosor del contrachapado. La hoja marca ligeramente la espuma sin causar daños y todo permanece apoyado durante el corte completo. Es barato, estable y la espuma dura años.
Una retícula sacrificable sobre caballetes. Coloca madera barata atravesando los caballetes, en la misma dirección que las líneas de corte, para que el recorte quede apoyado mientras se separa. La altura de la cintura es más cómoda para la espalda que el suelo.
Lo que no funciona son dos caballetes y esperar que todo salga bien.
Advertencia
Ajusta la profundidad de la hoja para que apenas atraviese el material, aproximadamente un octavo de pulgada más. Esa es, de todos modos, la profundidad correcta para controlar y trabajar con seguridad y, en un montaje sobre espuma, es lo que evita que cortes el suelo.
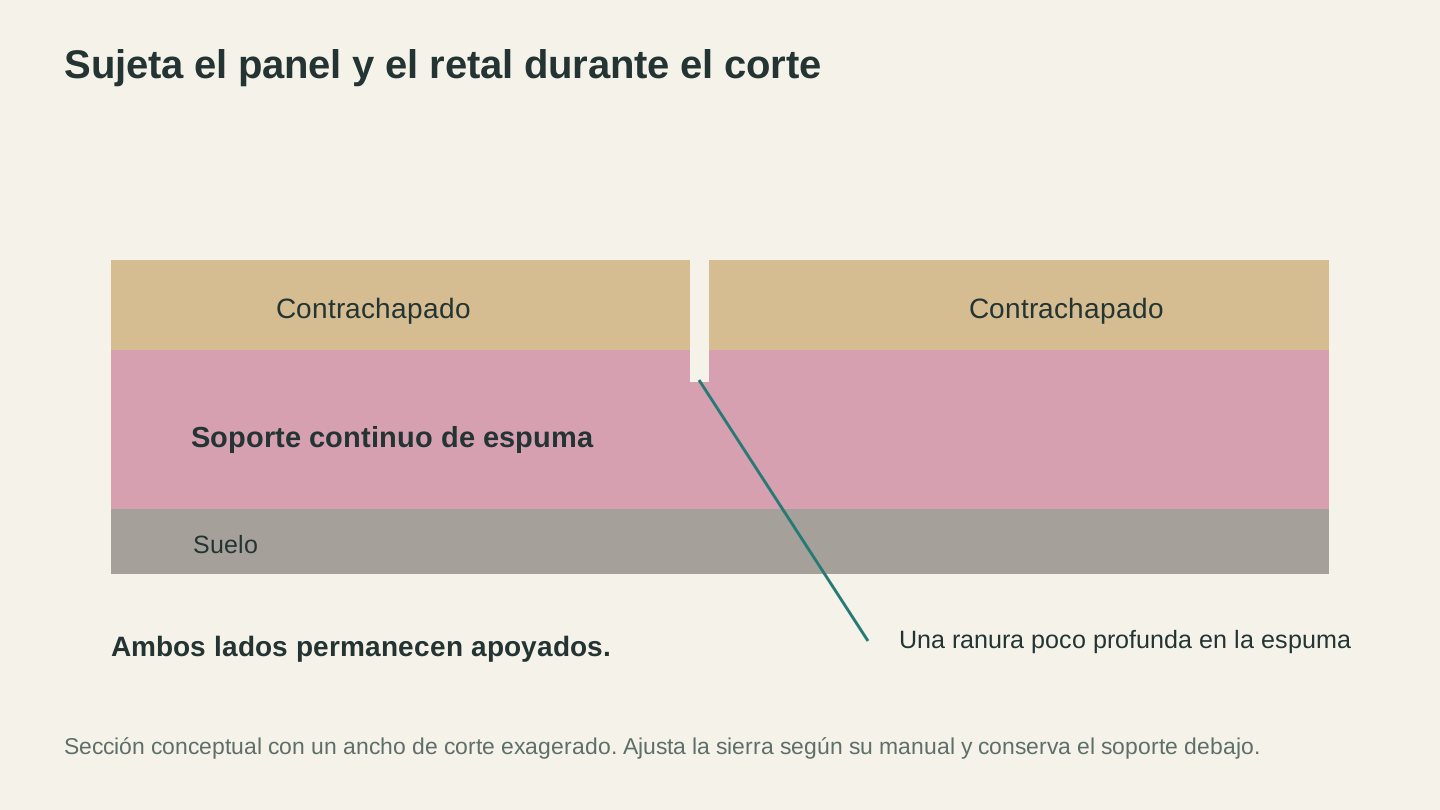
El soporte continuo mantiene ambas piezas en su sitio mientras termina el corte. El marcado superficial penetra en la espuma sacrificable sin llegar al suelo.
Cortes longitudinales y transversales, y por qué importa el orden
Un corte longitudinal sigue el largo de la plancha, la dirección de ocho pies. Un corte transversal la atraviesa, en la dirección de cuatro pies.
El orden importa por una razón práctica: después del primer corte tienes dos piezas, y cada corte posterior debe hacerse en una de ellas. Corta en el orden equivocado y acabarás intentando apoyar un recorte pequeño contra una guía sin nada que lo sujete, o descubrirás que la pieza que necesitas está ahora dividida en dos.
La secuencia habitual para una plancha completa es:
- Haz un corte que reduzca la plancha a mitades manejables. La dirección depende de tus piezas, pero este es el corte que facilita todo lo que viene después.
- Haz los cortes longitudinales de las dimensiones largas en las piezas que los necesiten.
- Haz los cortes transversales a la longitud a partir de ahí.
- Corta las piezas pequeñas al final, aprovechando lo que quede.
Una secuencia de cortes generada sigue exactamente esta lógica. CutPlan la escribe por ti en orden, colocando los cortes longitudinales antes que los transversales y los cortes divisores antes de las series de piezas iguales, con una letra en cada pieza del diagrama para que una instrucción como «coge la pieza B, mide 24 1/8 desde el borde izquierdo y corta de arriba abajo» siempre nombre algo que puedas identificar en el banco de trabajo. Planificar es gratis.
Mantenerlo recto y a escuadra
No te fíes del borde de fábrica. A menudo está recto, pero no siempre. Compruébalo contra una regla que sepas que es recta antes de usarlo como referencia. Si no lo está, tu primer trabajo consiste en establecer un borde verdaderamente recto, y todo lo demás se mide desde ahí.
Usa una guía, no una línea de lápiz. Una sierra de incisión está hecha para esto. Una sierra circular apoyada contra una regla recta fijada con sargentos hace el mismo trabajo por mucho menos dinero, siempre que tengas en cuenta el desplazamiento entre el borde de la base de la sierra y la hoja. Mide ese desplazamiento una vez y escríbelo en la guía.
Comprueba las diagonales, no las esquinas. Un rectángulo con diagonales iguales está a escuadra. Que las esquinas parezcan correctas no es una prueba.
Toma siempre la referencia desde un mismo borde cuando puedas. Medir cada corte desde el corte anterior acumula cada pequeño error sobre el anterior. Medirlo todo desde un mismo borde no lo hace.
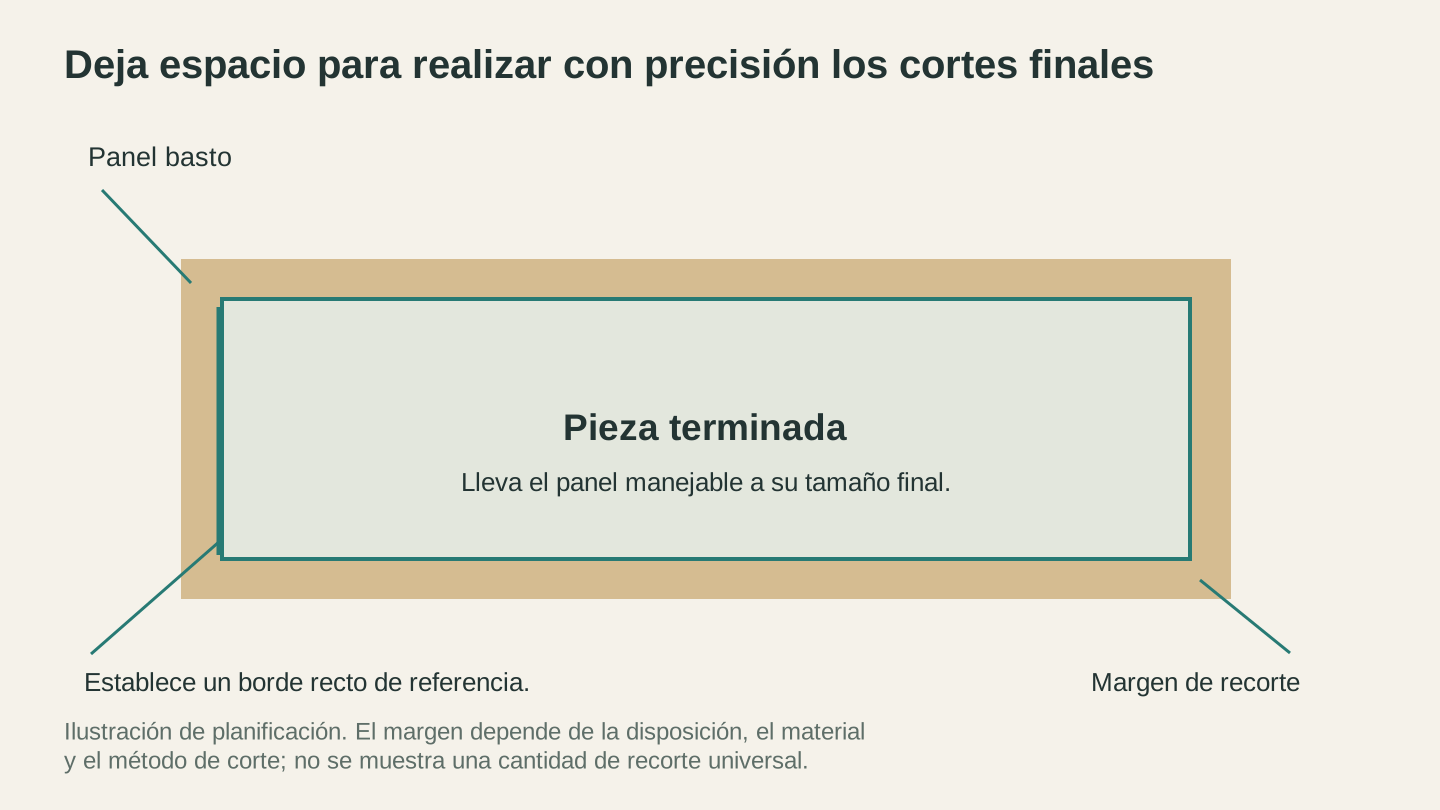
Deja un pequeño margen para el recorte al desbastar el panel y establece después un borde recto de referencia antes de llevarlo a su tamaño final.
Desgarros y qué cara debe quedar arriba
El contrachapado se desgarra en el lado por el que los dientes de la hoja salen del material, así que la cara que debes proteger depende de la herramienta:
| Herramienta | Dirección de la hoja | Cara buena |
|---|---|---|
| Sierra de mesa | Los dientes entran por la cara superior y cortan hacia abajo en la parte delantera de la hoja | Cara buena hacia arriba |
| Sierra circular | Los dientes cortan hacia arriba a través de la plancha | Cara buena hacia abajo |
| Sierra de carril | Los dientes cortan hacia arriba; el protector antiaserrín instalado sostiene el borde superior | Cara buena hacia arriba, protector antiaserrín sobre la línea de corte |
Hay otras tres cosas que ayudan:
Una hoja con más dientes. Una hoja de uso general atraviesa el contrachapado; una hoja con más dientes deja un borde más limpio y necesita menos lijado.
Una pasada de marcado. Haz el corte una vez con una profundidad muy reducida y después repítelo a toda profundidad. La primera pasada corta las fibras superficiales para que la segunda no pueda levantarlas. Son el doble de pasadas, pero merece la pena en una chapa que te importe.
Cinta sobre la línea de corte. La cinta de carrocero sobre la línea sostiene las fibras superficiales y reduce el astillado, especialmente en el material melamínico y chapado que más se desgarra.
Etiqueta mientras avanzas
Cada pieza recibe un nombre escrito a lápiz en cuanto sale de la plancha, en la cara que no se verá.
Con seis piezas parece excesivo. Deja de parecerlo la primera vez que estás delante de once rectángulos parecidos intentando averiguar cuáles eran los dos laterales y cuáles los dos estantes, después de haberlos cortado todos con media pulgada de diferencia en anchura.
Lo mismo ocurre con los recortes. Decide antes de cortar qué sobrantes merece la pena conservar y márcalos, porque una pieza sin etiqueta se convierte en chatarra por defecto en una semana.
Antes de todo esto, ten un plan
Todo lo anterior presupone que sabes qué piezas necesitas. Plantarte delante de una plancha completa con una cinta métrica y una idea vaga es la forma de llegar casi hasta el final y descubrir que las dos últimas piezas no caben.
Escribe primero la lista de cortes. Nuestra guía para convertir un diseño en una lista de cortes cubre los cálculos de la estructura, y nuestro recorrido por CutPlan explica cómo colocar esas piezas en la plancha teniendo en cuenta el ancho de corte y la dirección de la veta. Veinte minutos delante de una pantalla salen más baratos que desperdiciar una plancha y mucho más baratos que hacer un segundo viaje.
Preguntas frecuentes
¿Cómo se corta una plancha completa de contrachapado estando solo?
Colócala sobre espuma rígida en el suelo o sobre una retícula sacrificable entre caballetes, de modo que quede apoyada en todas partes. Divídela en piezas manejables con una sierra circular o de incisión, cortando ligeramente sobredimensionado, y después haz los cortes finales en la sierra de mesa.
¿Es mejor hacer primero un corte longitudinal o uno transversal en el contrachapado?
Normalmente, el primer corte es el que reduzca la plancha a piezas manejables; después vienen los cortes longitudinales, los transversales y, por último, las piezas pequeñas. Una secuencia de cortes generada los ordena por ti.
¿Qué lado del contrachapado queda arriba al cortar?
La cara buena queda arriba con una sierra de mesa y una sierra de incisión, y abajo con una sierra circular. El desgarro se produce donde los dientes salen del material.
¿Cómo se corta contrachapado sin una sierra de mesa?
Una sierra circular contra una regla recta fijada con sargentos, o una sierra de incisión, hará todo lo que hace una sierra de mesa con materiales en plancha, y son más fáciles de usar con una plancha completa. Solo tienes que tener en cuenta el desplazamiento entre el borde de la base de la sierra y la hoja.
¿Por qué se desgarra el contrachapado a lo largo del corte?
La hoja está saliendo por tu cara buena, tiene muy pocos dientes o has omitido una pasada de marcado. Dale la vuelta a la plancha, usa una hoja con más dientes o marca primero.
¿Debo usar el borde de fábrica como referencia?
Compruébalo primero. Los bordes de fábrica suelen estar suficientemente rectos, aunque en ocasiones no lo están. Si está desviado, establece un borde verdaderamente recto y toma todas las referencias desde ahí.
Planifica y después corta
La próxima vez que trabajes con una plancha, prueba la secuencia completa: primero la lista de cortes, después la distribución en CutPlan con el ancho de corte y la veta fijados, y luego sigue la secuencia de cortes en pantalla mientras despieceas la plancha sobre espuma con una sierra guiada, antes de que nada toque la sierra de mesa. Leerlo en pantalla es gratis; exportar el paquete imprimible requiere un plan de pago.
La primera vez que trabajes una plancha siguiendo un orden escrito en lugar de improvisar, la diferencia no tiene que ver realmente con la precisión. Es que todo deja de parecer una lucha.
Herramientas relacionadas
¿Quieres probar estas herramientas?
Regístrate gratis, sin necesidad de tarjeta. Las herramientas gratuitas están disponibles de inmediato.
Empezar gratis