

Cajas con uniones de dedos cortadas con láser que realmente cierran
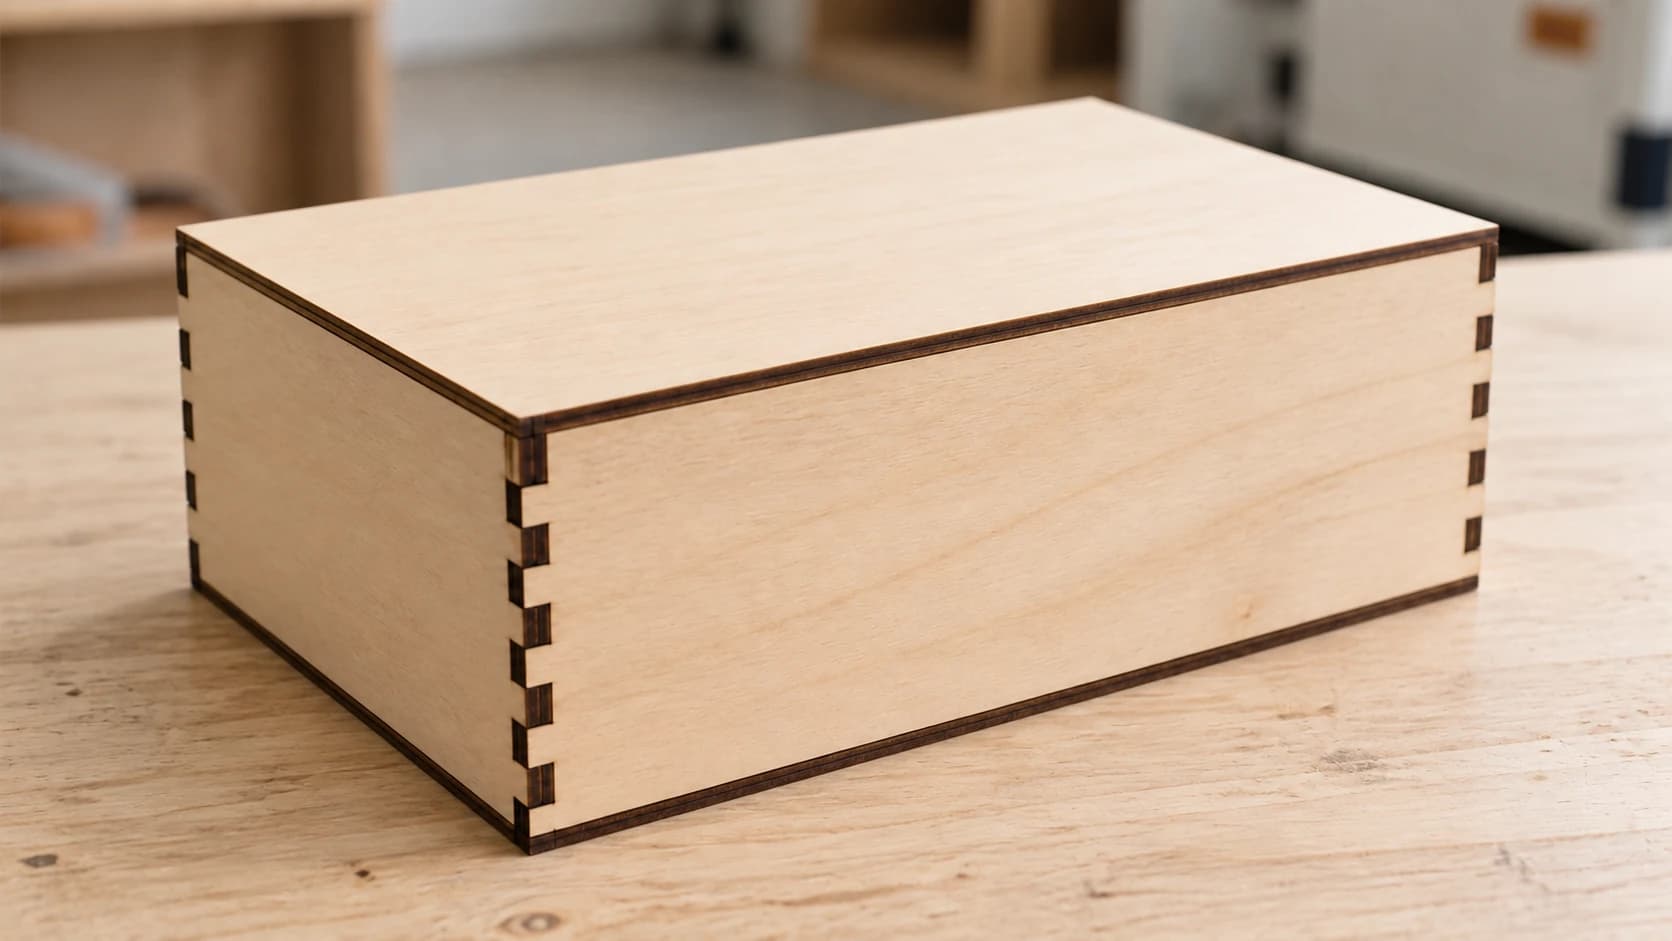
Has descargado el archivo, has cortado los seis paneles y has cogido dos para comprobar el ajuste.
Encajan al caer. No hacen clic ni tienes que empujarlos: simplemente caen, con una holgura visible en cada dedo. Así que vuelves atrás, cortas un segundo juego con la tolerancia ajustada en la dirección contraria y ahora no encajan en absoluto. El tercer juego rompe un dedo cuando lo golpeas suavemente para colocarlo.
La caja no ha hecho nada mal, y tú tampoco. El archivo describía una geometría, y tu láser ha cortado algo ligeramente más pequeño que esa geometría, porque eso es lo que hacen los láseres.
Consejo
Respuesta breve: una unión de dedos cortada sin compensación del kerf acaba quedando suelta aproximadamente el doble de tu kerf, porque la ranura se ensancha un kerf mientras el dedo se estrecha otro. Mide el kerf una vez, introduce ese número en el campo de kerf del generador de cajas y las uniones quedarán más firmes.
El motivo por el que siempre queda suelta
Tu láser elimina una franja de material al cortar. Esa franja es el kerf y suele estar en el orden de las fracciones de milímetro, lo que parece demasiado pequeño para importar.
Pero sí importa. Al cortar una ranura, el haz retira material de ambos lados de la línea, por lo que la ranura acaba siendo aproximadamente un kerf más ancha de lo dibujado. Al cortar un dedo, el haz retira material de todo su exterior, por lo que el dedo acaba siendo aproximadamente un kerf más estrecho de lo dibujado.
Introduce el dedo más estrecho en la ranura más ancha y la holgura se acumula:
| Dibujado | Cortado | Cambio | |
|---|---|---|---|
| Anchura de la ranura | 6.00mm | 6.00 + kerf | Más ancha |
| Anchura del dedo | 6.00mm | 6.00 menos kerf | Más estrecho |
| Holgura total | 0 | Aproximadamente 2 x kerf | Suelta |
Con un kerf de 0.2mm, eso supone aproximadamente 0.4mm de juego en una unión que debía encajar a presión. Multiplícalo por cuatro esquinas y la caja se descuadra, no se asienta en ángulo recto y depende por completo del pegamento.
IMPRIME. CORTA. TALLA.



- Varios formatos (SVG, DXF, PNG)
- Diseños probados en máquinas
- Licencias comerciales
Patrocinado por PrintCutCarve.com
Mide el kerf una vez
Todas las tablas de ajustes de internet están haciendo suposiciones sobre tu máquina. El kerf cambia según el láser, la lente, el enfoque, la velocidad y el material que tengas delante, así que el único número que merece la pena tener es uno que hayas medido.
El método más rápido:
- Dibuja un rectángulo de unos 100mm de largo en el material elegido.
- Córtalo en diez tiras iguales con nueve cortes a lo largo, todos con los ajustes que realmente utilizas.
- Vuelve a juntar las diez tiras, apretándolas bien, y mide la longitud total.
- Resta ese valor a 100mm y divide entre 9. Ese es tu kerf por corte.
Hacerlo con nueve cortes en lugar de uno es lo que aporta precisión. Un solo kerf es demasiado pequeño para medirlo de forma fiable con un calibre manual, pero nueve juntos ya no. Nuestro explicador sobre el kerf cubre el concepto con más profundidad si quieres conocer el contexto.
Escribe el número en el retal, junto con el material y el grosor, y guárdalo. Lo utilizarás para cada caja que cortes con ese material.
Advertencia
El kerf no es un único número para tu máquina: es un número para cada combinación de material y ajustes. El acrílico, el contrachapado de abedul de 3mm y el MDF de 6mm te darán respuestas diferentes, y cortar el mismo material más rápido o más despacio volverá a cambiarlo. Guarda varios retales etiquetados en lugar de uno solo.
El grosor decide más de lo que crees
La longitud de los dedos debe coincidir con el grosor del material. Si los dedos son más largos que el grosor del panel, sobresalen por la cara. Si son más cortos, quedan hundidos y dejan un hoyuelo en cada unión.
El problema es que los materiales en plancha no dicen la verdad sobre su grosor. El material vendido como 3mm suele medir otra cosa, y el contrachapado, en particular, varía entre hojas y a veces incluso dentro de una misma hoja.
Por tanto, mide el panel real con un calibre e introduce ese valor medido en el campo de grosor del generador. No el número de la etiqueta ni el número de la última hoja que compraste.
Ya que estás, comprueba que la hoja esté plana. Un panel combado cambia su distancia respecto a la lente mientras se desplaza el cabezal, lo que cambia el kerf a mitad del corte y hace que acabes con dos esquinas apretadas y dos sueltas en la misma caja.
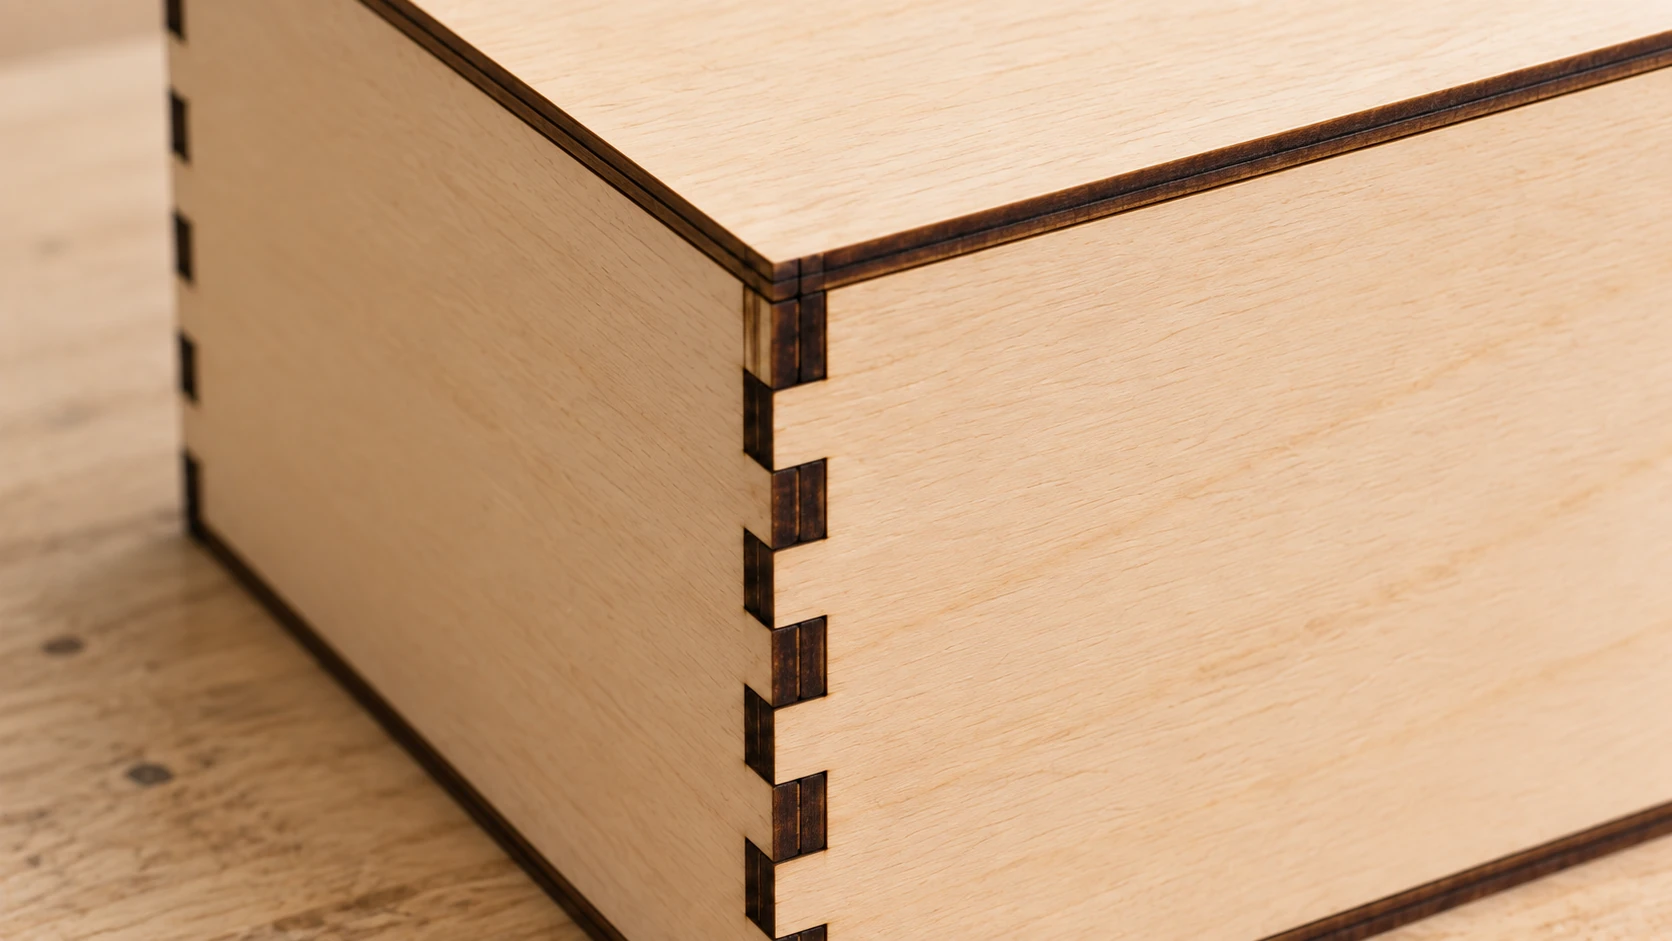
Observa la esquina a lo largo: los extremos de los dedos quedan al ras de la cara contigua. Una vista cercana facilita detectar extremos salientes, extremos hundidos y huecos abiertos.
Decisiones de diseño que facilitan las cajas
Anchura de los dedos. Para cajas cortadas con láser, un punto de partida cómodo es aproximadamente entre dos y tres veces el grosor del material: los dedos más estrechos se vuelven frágiles y difíciles de montar en contrachapado fino, mientras que los más anchos dejan de parecer una unión. Es una recomendación práctica, no una regla de carpintería, y las uniones de caja tradicionales suelen cortarse bastante más estrechas. Corta una unión de prueba y elige lo que te parezca adecuado.
Número de dedos. Un número impar por borde hace que el patrón se refleje correctamente en las esquinas, con un dedo en ambos extremos de un panel y una ranura en ambos extremos del panel vecino.
Dogbones y alivio. Los cortes láser dejan esquinas interiores afiladas, así que esto importa sobre todo en una fresadora, no en un láser. Si cortas el mismo diseño en una CNC, la fresa no puede cortar una esquina interior afilada y necesitarás cortes de alivio.
Grabar antes del montaje. Cualquier decoración de los paneles es mucho más fácil de hacer mientras están planos. Si vas a calcar un diseño para una tapa, MonoTrace convierte una imagen en vectores limpios gratis.
Busca un ajuste deslizante, no a presión
El ajuste que buscas es uno que puedas montar empujando con la mano, quizá con un ligero golpe de un mazo de goma. No uno que requiera mucha fuerza.
Una unión demasiado apretada es peor que una ligeramente suelta. La madera no se comprime mucho, así que un ajuste a presión puede no asentarse, partir un dedo o encajar una vez y destruirse cuando lo desmontes para encolarlo.
También hay una razón práctica para dejar un mínimo de espacio: el pegamento necesita algún sitio donde ir. Una unión apretada como metal contra metal raspa todo el adhesivo de las superficies al introducirla.
Si has compensado el kerf y el ajuste sigue siendo un poco ceñido, lija ligeramente las caras de los dedos en lugar de volver a cortar. Si sigue estando un poco suelto, para eso sirve el pegamento, y nadie lo verá.
Consejo
Corta una sola esquina de prueba antes de comprometer una hoja entera. Dos paneles pequeños con tres dedos cada uno te dicen todo lo que diría una caja completa, cuestan casi nada y requieren un par de minutos. Este hábito ahorra más material que cualquier otro de esta página.
Montaje en el orden correcto
- Haz un montaje en seco de toda la caja sin pegamento. Confirma que encaja y queda a escuadra antes de aplicar el adhesivo.
- Lija el carbonizado de las caras de unión. Las superficies carbonizadas pueden debilitar la unión, ya que el pegamento entra en contacto con carbono suelto en lugar de madera limpia. Una pasada ligera sobre los dedos es un buen punto de partida, aunque la preparación que necesita una unión varía según la especie y la intensidad del corte.
- Aplica pegamento uniformemente a todas las caras de contacto, y trabaja dentro del tiempo abierto indicado en la etiqueta del adhesivo en lugar de montar una esquina cada vez y volver más tarde.
- Encinta las esquinas exteriores a medida que avanzas. La cinta de carrocero funciona sorprendentemente bien como sargento en cajas pequeñas.
- Comprueba la escuadra con una escuadra, no a ojo, mientras el pegamento siga abierto.
- Limpia inmediatamente el exceso de pegamento. El pegamento seco sella la madera y aparece como una mancha pálida bajo cualquier acabado.
Cortar más de una
Una caja utiliza unos pocos paneles. Diez cajas para una feria artesanal son otro problema, y colocarlas sin planificar te costará una hoja que no necesitabas comprar.
Coloca los paneles de toda la serie en el tamaño real de tu hoja en CutPlan, utilizando el modo CNC, que anida las piezas individualmente en lugar de asumir cortes que van de borde a borde. La planificación es gratuita y te indica claramente cuándo las piezas no caben en el material que tienes. Exportar los archivos por hoja requiere un plan de pago.
Si el archivo de la caja ha llegado como DXF y tu software láser quiere SVG, o al revés, File Converter gestiona ambas direcciones sin coste en créditos; para descargar el archivo convertido necesitas un plan de pago.
Preguntas frecuentes
¿Por qué están sueltas mis uniones de dedos cortadas con láser?
El kerf. El haz ensancha cada ranura y estrecha cada dedo, así que una unión sin compensar acaba quedando suelta aproximadamente el doble de tu kerf. Introduce el kerf medido en el generador de cajas y vuelve a cortar.
¿Cómo mido el kerf de una cortadora láser?
Corta una tira en diez piezas con nueve cortes, vuelve a juntar las piezas, mide el total y divide la longitud que falta entre 9. Medir varios cortes es mucho más preciso que intentar medir uno solo.
¿Qué valor de kerf debo usar para contrachapado de 3mm?
Utiliza tu propia medición. El kerf varía según la máquina, la lente, el enfoque, la velocidad y el material, así que el número de la configuración de otra persona es, como mucho, una primera estimación.
¿Las uniones de dedos deben encajar muy apretadas a presión?
No. Busca un ajuste que puedas montar empujando con la mano o asentar con un ligero golpe de mazo. Un ajuste a presión parte los dedos y raspa el pegamento al introducirlo.
¿Por qué encaja una esquina y otra no?
Normalmente, por un panel combado, que cambia la distancia de enfoque a lo largo de la hoja, o por una variación del grosor dentro del contrachapado. Comprueba que la hoja esté plana y mide su grosor en más de un punto.
¿Tengo que lijar el carbonizado del láser antes de encolar?
Sí, en las caras de unión. El carbonizado es carbono suelto y el pegamento se adhiere a él en lugar de a la madera, una causa habitual de que las uniones fallen más adelante.
Corta primero una esquina
Antes de cortar la caja, corta dos paneles pequeños con tres dedos cada uno, utilizando exactamente el material y los ajustes que piensas usar.
Únelos empujando. Si se separan, el número de kerf es demasiado pequeño. Si no asientan, es demasiado grande. Ajusta una vez, vuelve a cortar la pareja y solo entonces compromete la hoja.
Diez minutos en esta prueba son la diferencia entre una caja que encaja como si estuviera hecha para ello y un montón de paneles que sigues pensando lijar.
Cuando el ajuste esté afinado y estés listo para cortar una serie, coloca los paneles en tu hoja real en CutPlan y deja que File Converter resuelva el formato de archivo si el archivo de tu caja y tu software láser no se ponen de acuerdo.
Herramientas relacionadas
File Converter
Convierte entre las combinaciones compatibles de formatos vectoriales, documentos, imágenes de mapa de bits y mallas 3D.
Se necesita un plan para descargar
MonoTrace
Convierte fotos e ilustraciones en contornos SVG gratis, con un modo boceto opcional.
CutPlan
Planifica cortes en tableros con piezas, distribuciones y secuencias de corte. Exporta informes y planos de los tableros.
Se necesita un plan para descargar
¿Quieres probar estas herramientas?
Regístrate gratis, sin necesidad de tarjeta. Las herramientas gratuitas están disponibles de inmediato.
Empezar gratis