

Gratis optimerare för kaplistor av plywood och skivmaterial
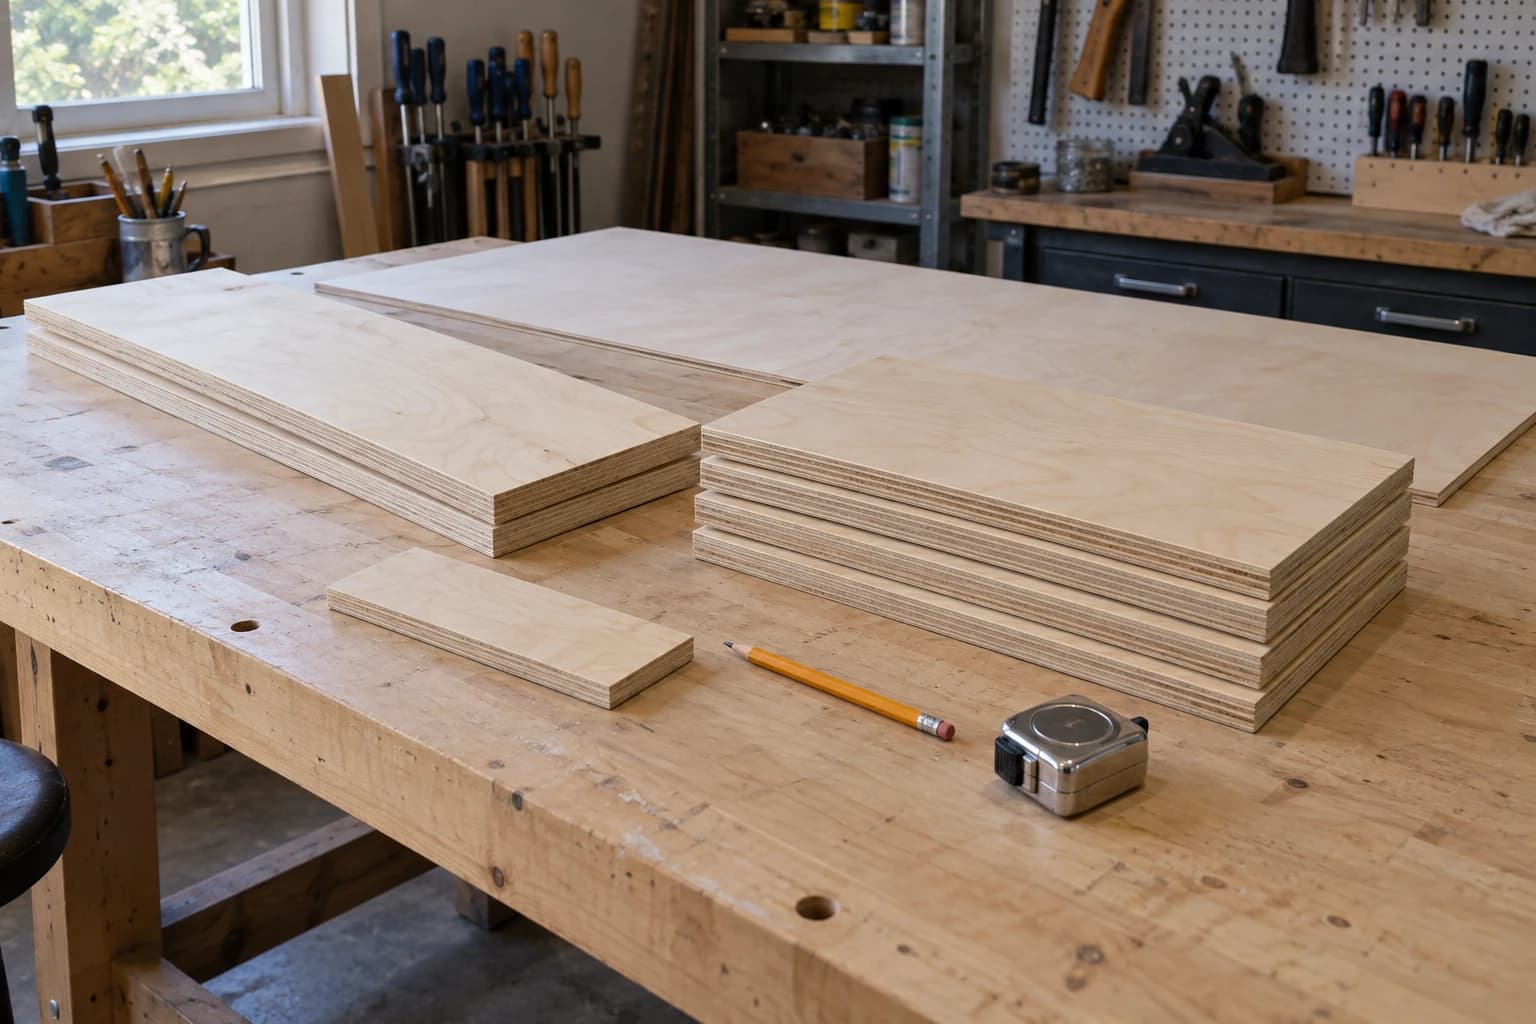
Du har en dellista för en uppsättning garagehyllor. Du har en skiva 3/4 plywood som kostade mer än du vill erkänna. Mellan de två sakerna ligger ungefär tjugo minuters huvudräkning på baksidan av ett kvitto, och den räkningen går bra ända fram till de sista tre delarna, när det visar sig att skivan är full och du får sätta dig i bilen igen.
Vi har alla gjort varianten där man höftar också. Den slutar med ett vackert skåp och en hög spillbitar som alla är fyra tum för smala för att någonsin bli något.
Tips
Kort svar: CutPlan är en gratis optimerare för kaplistor. Skriv in dina delar och måtten på lagerskivan, så placerar den delarna på skivorna, talar om hur många skivor du faktiskt behöver och skriver ut kapsekvensen i rätt ordning. Den hanterar sågspår och fiberriktning och fungerar i tum eller millimeter.
Skivmatematiken är värre än den ser ut
Att passa in rektanglar i en större rektangel låter som ett pussel du borde kunna lösa i huvudet. Fyra saker gör det faktiskt svårt:
Sågspår. Varje snitt förvandlar en trälist till sågspån. En åttondels tum låter inte som mycket förrän du har gjort fyrtio snitt och den sista hyllan blir för kort. Om sågspår är nytt för dig har vi skrivit ett helt inlägg om det.
Fiberriktning. En skåpsida som roterats nittio grader passar vackert men ser fel ut för alltid. Vissa delar kan roteras och andra absolut inte, och layouten förändras helt beroende på vilken som är vilken.
Spillbitar. Två layouter kan använda samma antal skivor och lämna dig i helt olika lägen. Den ena lämnar en restbit på 40 gånger 12 som blir en hylla nästa månad. Den andra lämnar fem smala remsor på väg till brasan.
Själva sågen. Vanligt sågarbete består av snitt som går hela vägen tvärs över delen framför klingan, från kant till kant, och varje del du behåller är resultatet av ännu ett sådant snitt. Du frigör inte en rektangel från mitten av en skiva. De flesta snygga nestningsdiagram du hittar på nätet bortser tyst från det, vilket är varför de faller samman så fort du står vid en riktig såg.
SKRIV UT. SKÄR. FRÄS.



- Flera format (SVG, DXF, PNG)
- Maskintestade motiv
- Kommersiella licenser
Sponsrad av PrintCutCarve.com
Sågläge och CNC-läge löser olika problem
CutPlan har två kapningsmetoder, och att välja rätt är det första du gör.
| Sågläge | CNC-läge | |
|---|---|---|
| Kapstil | Raka snitt som går hela vägen tvärs över delen | Nestade delar som kapas individuellt |
| Delarnas former | Rektanglar | Rektanglar plus importerade SVG-former |
| Avsett för | Bordssåg, skena, panelsåg | CNC-fräs, laserskärare |
| Exportfiler | PDF plus en SVG per skiva | PDF, SVG och en DXF per skiva |
Sågläget tar hänsyn till klingans fysik. CNC-läget behöver inte göra det, eftersom en fräs eller laser kan gå ner mitt i en skiva och skära ut en sluten form ur den.
Du kan växla mellan dem och hela planen konverteras. När du går från CNC tillbaka till såg tas importerade former bort, eftersom en såg inte kan kapa dem, och CutPlan varnar dig innan det sker.
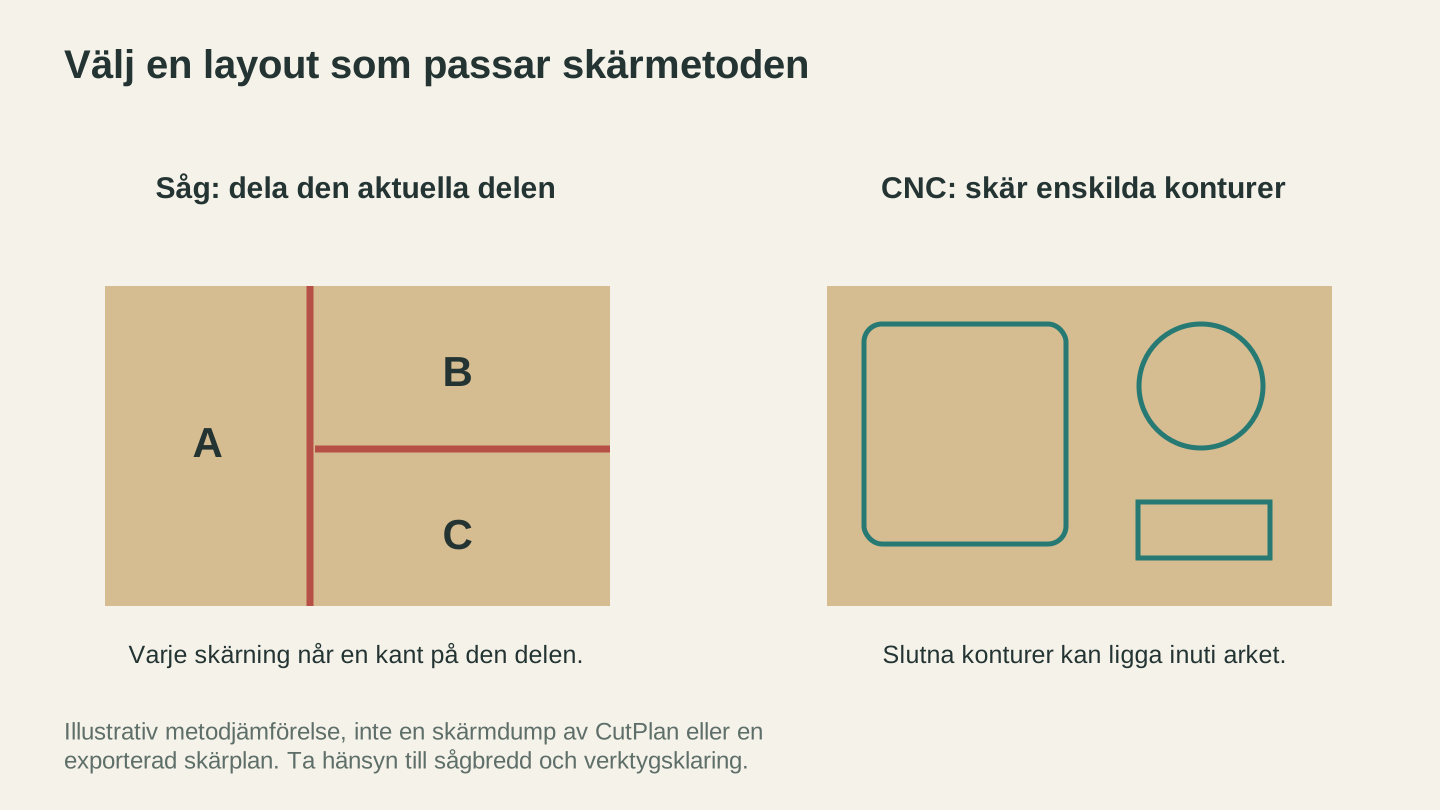
Såglayouter behöver en fungerande sekvens av raka snitt. CNC-layouter kan placera enskilda slutna former i skivan. Detta är en metodillustration, inte en programvaruexport.
Det finns ingen optimeringsknapp
Det här är det som känns annorlunda jämfört med alla andra kaplisteprogram. Det finns ingen knapp. Du skriver in en del på den tomma raden längst ned i listan och den hamnar på skivan. Ändra en kvantitet från 4 till 6 så byggs layouten om. Lägg till en del som inte får plats så öppnas en andra skiva.
Eftersom den löser om planen hela tiden kan du använda den som ett verktyg för att tänka, snarare än som ett rapportverktyg. Prova 11 1/4 hyllor i stället för 12. Se om det sparar en skiva. Det tar vanligtvis ungefär fyra sekunder att få reda på det.
Det finns också en sidväxlare ovanför skivorna när CutPlan hittar mer än ett bra svar. De alternativen använder samma antal skivor men lämnar olika spillbitar. Bara du kan avgöra om en stor användbar restbit är bättre än tre små, så du får välja i stället för att låta programmet gissa.
Kapsekvensen är det som räddar lördagen
En layoutbild visar var delarna ska ligga. Den talar inte om vad du ska göra först, och vid en bordssåg är ordningen inte valfri. Kapa i fel ordning och du försöker balansera en 3 fot lång spillbit mot ett anhåll utan något att referera mot.
CutPlan skriver ut ordningen som instruktioner:
Ta skivan. Mät 24 1/8 från vänsterkanten och kapa uppifrån och ned. Det ger del A och del B.
Längsgående snitt kommer först. Delningssnitt görs före en serie likadana snitt. Varje instruktion namnger en bokstavsmärkt del som motsvarar en bokstav på skivdiagrammet, så du vet alltid vilken plywoodskiva det handlar om. Rester märks som spillbitar, så du vet vilka delar du ska lägga åt sidan i stället för att kapa sönder dem.
En regel är viktig och värd att läsa två gånger: varje mått är ett färdigt mått. Klingan tar bort sitt sågspår på linjens bortre sida. Mät till linjen, kapa på spillsidan, så blir delen rätt.
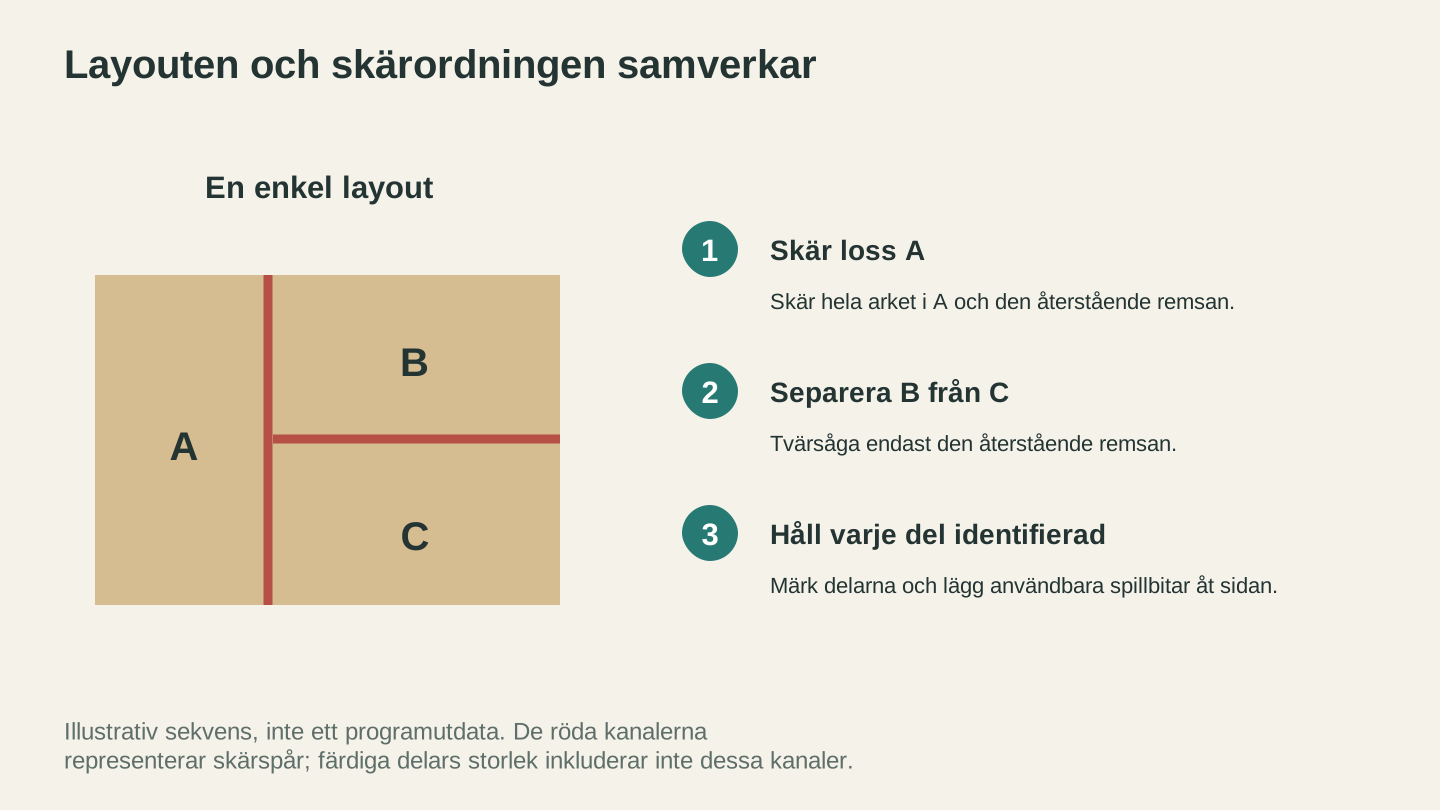
En kompakt layout behöver också en körbar snittordning. Här separerar man först A, så att den återstående rektangeln sedan kan delas i B och C.
Inställningarna som är värda att få rätt
Sågspår i sågläge. I planinställningarna anger du hur mycket trä klingan förvandlar till sågspån. Standardvärdet 1/8 tum är en vanlig utgångspunkt för en vanlig bordssågsklinga, och en klinga med tunt sågspår ligger oftast närmare 3/32. Klingor varierar, så kontrollera klingans specifikation eller mät ditt eget snitt en gång och använd det måttet.
Fräs och avstånd i CNC-läge. CNC-läget använder inte sågspår. I stället har varje material en fräsdiameter samt valfritt extra avstånd och kantmarginal. CutPlan håller redan delarna en fräsdiameter från varandra och en halv fräsdiameter innanför skivkanten, så de två fälten lägger till extra utrymme ovanpå detta i stället för att ersätta det.
Fiberriktning i båda lägena. Varje delrad har en fiberriktningsknapp. Låst betyder att delens längd löper längs skivans fiberriktning och att optimeraren inte kan rotera den. Olåst betyder att den får roteras fritt.
Tips
Lås upp fiberriktningen på delar som ingen någonsin kommer att se: lådbottnar, skåpsbakstycken, klossar och verkstadsjiggar. Två eller tre olåsta delar är ofta skillnaden mellan en plan med tre skivor och en med två, och ingen inspekterar fiberriktningen på baksidan av dina garagehyllor.
Ta in former som inte är rektanglar
Rektanglar täcker det mesta av arbetet med skivmaterial, men CNC-läget kan också hantera importerad grafik. Importera en sluten, fylld SVG-form, bekräfta dess verkliga färdiga längd, så nestar CutPlan den tillsammans med allt annat med proportionerna låsta.
Det är avsiktligt petigt och talar om varför det avvisar en fil:
- Filer över 5 MB, tomma filer och allt som inte är en SVG avvisas direkt
- Öppna banor och banor som bara består av linjer avvisas, eftersom de inte omsluter en faktisk del
- Skript, länkar och SVG-funktioner som inte stöds avvisas för att hålla filen säker
- Flera separata fyllda delar avvisas, eftersom en importerad fil motsvarar en del
- Grafik över 5,000 punkter avvisas eftersom den är för detaljerad för tillförlitlig nestning och export
Om formen började som en bild kör du den först genom MonoTrace. Det är gratis och ger dig den slutna, fyllda kontur som CutPlan behöver. Om formen är en DXF från någon annans CAD konverterar File Converter den till SVG, men nedladdning av den konverterade filen kräver ett betalabonnemang.
Varning
SVG- och DXF-konturerna som CutPlan exporterar är färdiga delkanter, inte verktygsbanor. Lägg till din verktygskompensation i CAM-programmet eller laserprogrammet, precis som du skulle göra med vilken annan delfil som helst. Kapa rakt längs linjen så blir delarna för små: ungefär verktygsdiametern på en CNC och lika mycket som ditt uppmätta strålsågspår på en laser.
Det du faktiskt tar med till verkstaden
Exporterade filer kommer i en ZIP. Sågplaner innehåller en PDF och en SVG per skiva. CNC-planer lägger till en DXF per skiva.
PDF-filen är den du skriver ut och fäster på väggen: skivdiagram med bokstavsmärkta delar, dellistan och den skriftliga kapsekvensen. SVG- och DXF-filerna per skiva är de du matar in i en fräs eller laser.
Delarnas färger fyller två funktioner här. På skärmen och i PDF-filen hjälper de dig att snabbt se vilka delar som hör ihop. I den exporterade SVG-filen kommer de igenom som linjefärger, som laserprogram kan koppla till separata operationer.
Info
CutPlan är gratis och kostar inga krediter. Export av filmpaketet kräver valfritt Craftgineer-abonnemang, som börjar på $4.99 per månad. Gratiskonton kan spara 1 plan; abonnenter kan spara 25. Precis som alla verktyg på Craftgineer kräver det ett inloggat konto.
Ett realistiskt arbetsflöde
- Lägg till ditt lagermaterial. Ett material är en skiva du faktiskt skulle köpa: 96 gånger 48, 3/4 plywood. Ange tjockleken så att delar från olika lagermaterial aldrig blandas ihop.
- Välj läge och enheter. Såg eller CNC, tum eller millimeter.
- Ställ in sågspåret. Trettio sekunder nu innebär inga korta hyllor senare.
- Skriv in dina delar. Namn, längd, bredd, antal. Se hur skivorna fylls medan du arbetar.
- Justera fiberriktningen. Lås delarna som syns. Lås upp dem som inte gör det.
- Titta på alternativen. Samma antal skivor, bättre rester, ingen extra kostnad.
- Skriv ut PDF-filen eller exportera skivorna som SVG eller DXF för CNC-maskinen eller lasern.
Vanliga frågor
Är CutPlan gratis?
Ja. Planering, optimering och kapsekvensen på skärmen kostar inga krediter. Du behöver ett kostnadsfritt Craftgineer-konto för att använda det, och export av det utskrivbara och maskinfärdiga filmpaketet kräver ett betalabonnemang.
Fungerar det i millimeter?
Ja. Enheter är en planinställning, så du kan arbeta i tum eller millimeter och skriva in mått som du säger dem högt, till exempel 23 3/4 eller 600.
Tar det hänsyn till sågklingans sågspår?
Ja. Du ställer in sågspåret i planinställningarna och varje layout och mätning tar hänsyn till det. Alla mått som anges är färdiga delmått.
Kan jag använda det för laserskärning?
Ja, använd CNC-läge. Det nestar delarna individuellt i stället för att anta snitt över hela bredden, och exporterar en DXF och en SVG med färgkodade konturer för varje skiva.
Kan jag importera en DXF-del?
Inte direkt. Importen är en sluten, fylld SVG-form i taget, i CNC-läge. Konvertera först en DXF till SVG med File Converter och importera den sedan.
Hur många skivor kan det planera samtidigt?
Tillräckligt för riktiga möbel- och skåpbyggen. Det är bara vid mycket stora planer som du kan nå en gräns, och CutPlan säger tydligt när en plan är för stor för att optimeras helt, så att du kan dela upp den i två.
Fyll en skiva
Öppna CutPlan, lägg till en skiva på 96 gånger 48 och skriv in delarna för det som står näst på din lista. Det första de flesta lägger märke till är inte optimeringen. Det är att upptäcka att projektet de var säkra på skulle kräva tre skivor faktiskt kräver två.
Det är en hel plywoodskiva du slapp köpa, redan på den första planen.
Relaterade verktyg
CutPlan
Planera kapning av skivmaterial med delar, layouter och kapordningar. Exportera rapporter och skivritningar.
Abonnemang krävs för nedladdningar
MonoTrace
Gör om foton och illustrationer till SVG-konturer gratis, med ett valfritt skissläge.
File Converter
Konvertera mellan de kombinationer av vektor-, dokument-, rasterbilds- och 3D-meshformat som stöds.
Abonnemang krävs för nedladdningar
Redo att prova de här verktygen?
Registrera dig gratis – inget kreditkort krävs. Gratisverktyg är tillgängliga direkt.
Kom igång gratis