

CNC Toolpath Basics: Profiles, Pockets, Tabs, and Ramps
Your first CNC project is drawn, the board is clamped, and the CAM software is staring at you with a menu full of words like "profile," "pocket," "ramp," and "tabs." Skip past them with the defaults and there's a decent chance your part comes out a bit too small, gets flung across the shop, or snaps your bit.
None of these concepts are hard. They just aren't obvious until someone explains what each one is protecting you from.
Profiles: Inside, Outside, or On the Line
A profile toolpath cuts along a line, usually to cut a shape out or cut a hole into it. The key question is which side of the line the bit should travel on.
| Option | Bit travels | Use it for |
|---|---|---|
| Outside | Outside the line | Cutting a part out at the drawn size |
| Inside | Inside the line | Cutting a hole at the drawn size |
| On the line | Centered on the line | Decorative grooves, engraved lines |
Get this wrong and every part is off by the full width of the bit. A 1/4 inch bit cutting "on the line" around a part makes it 1/8 inch smaller on every side than you drew.
Tip
Draw your parts at their finished size and let the CAM software offset for the bit. Don't shrink or grow the drawing yourself.
Pockets: Clearing an Area
A pocket toolpath removes all the material inside a shape down to a set depth, like hollowing out a recess for an inlay or a tray. The bit sweeps back and forth or spirals until the whole area is cleared.
Two settings matter most:
- Stepover is how much each pass overlaps the last. Smaller stepover leaves a smoother floor but takes longer.
- Depth is how deep the pocket goes in total, which is split into several passes (see below).
Depth Per Pass
Hardly any cut happens in a single pass. The CAM software cuts a little deeper each time until it reaches full depth. Too deep per pass and you overload the bit, burn the wood, or break the bit. Too shallow and the job takes forever.
The right depth depends on your bit, material, and machine. Our feeds and speeds guide explains how to find it, and CNC bits explained covers which bit does what.
Tabs: Keeping Parts From Flying Loose
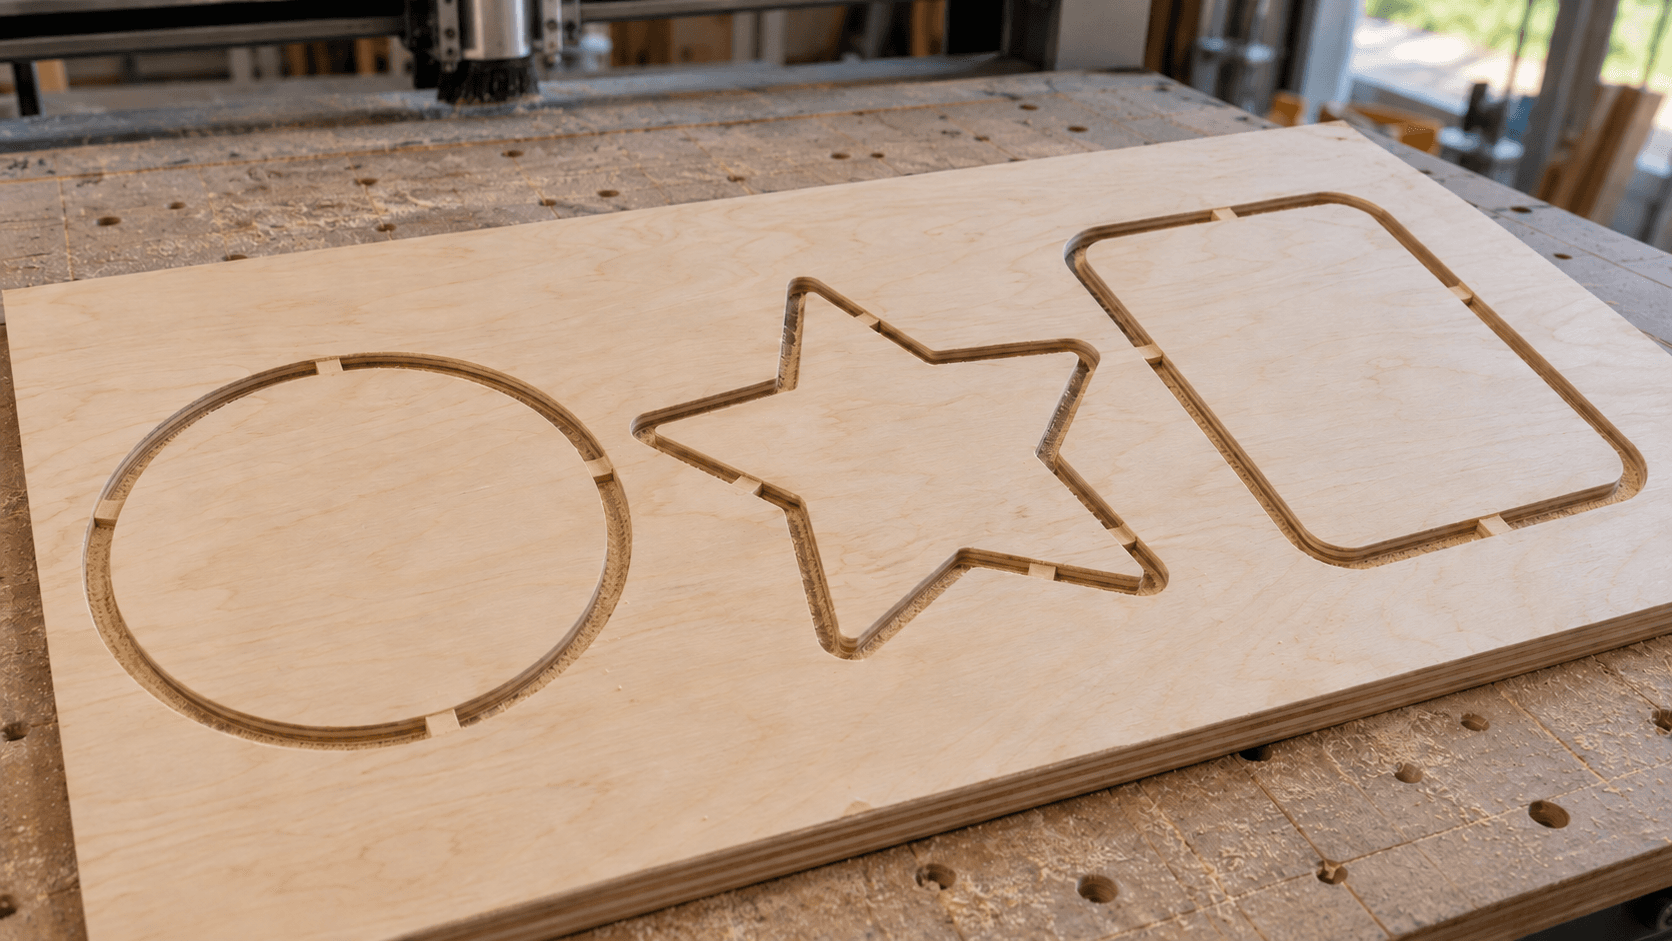
When a profile cuts all the way through, the final pass frees the part. A loose part can shift into the spinning bit, get gouged, or get thrown. Tabs fix this.
Holding tabs are small bridges of material the toolpath deliberately leaves uncut, so the part stays attached to the sheet until the job is done. Afterward, you cut the tabs with a flush-cut saw or chisel and sand them smooth.
- Use more tabs on small or long parts. They're the ones that move.
- Place tabs on straight sections, not curves, so they're easy to clean up.
- Make them thick enough to hold, but not so thick that removing them is a chore.
Warning
Tabs aren't a substitute for clamping the sheet. The stock itself still needs to be held firmly. Our CNC workholding guide covers clamps, screws, and tape methods.
Ramps: Easing the Bit Into the Cut
Plunging a bit straight down into wood is hard on it. Many bits aren't designed to cut much at their tip, so a straight plunge generates heat and stress.
Ramping solves this by having the bit enter the cut at a shallow angle along the toolpath, like walking down a slope instead of jumping off a ledge. It's gentler on the bit and often leaves a cleaner entry point. Most CAM programs offer a ramp option on profile and pocket toolpaths.
Order of Operations
When a project has several toolpaths, the order matters:
- Engraving and V-carving first, while the whole sheet is solid and held flat.
- Pockets and holes next.
- Outside profiles last, so parts stay attached to the sheet until the very end.
Getting Your Files Ready
Most CAM software imports SVG or DXF. If your design is in one format and your CAM wants the other, convert it with File Converter. Converting is free; downloading the converted file needs a paid plan. Our DXF vs SVG post explains when each format is the better choice.
If a toolpath is behaving strangely, describe your bit, material, and settings to Craft Chat and ask what to check.
Before your next cut, look at each toolpath and ask three questions: which side of the line, are there tabs, and is it ramping in? Those three checks prevent most first-project disasters.
Keep reading
Related Tools
Ready to try these tools?
Sign up free, no credit card required. Free tools available immediately.
Start Free