

How to Make and Sell Stickers with a Cutting Machine
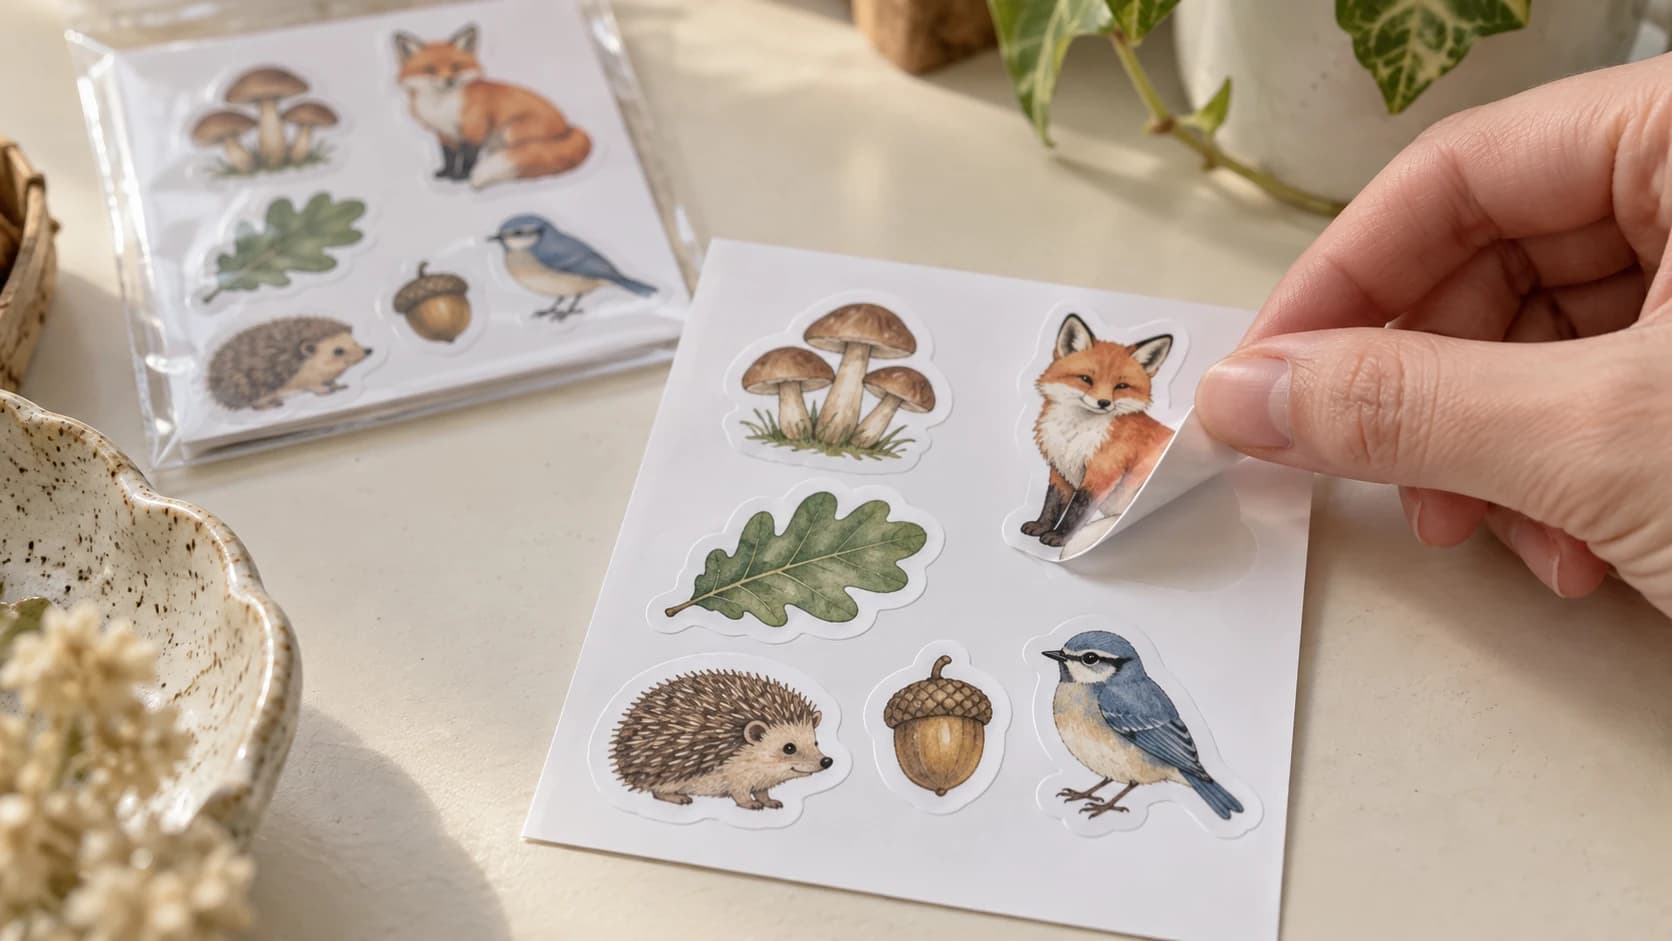
Somewhere on your phone there is a drawing, a doodle, or a design that would make a great sticker. The gap between that file and a peelable, sellable sticker is smaller than most people think: a cutting machine you may already own, an inkjet printer, and a small starter pack of printable vinyl and laminate. The part nobody explains well is the workflow in the middle, and that workflow has a name: print then cut.
Quick fork in the road first. If you want single-color designs cut from rolls of colored adhesive vinyl, the kind you weed and apply with transfer tape, that is a different process with different materials, and our vinyl decal guide covers it step by step. This post is about printed stickers: full-color artwork printed onto sticker material, then cut out by the machine. Illustrated stickers, sticker sheets, the stuff you see on laptops and water bottles and in every stationery shop on Etsy.
How Print Then Cut Works
The concept is simple. You lay out your artwork in your machine's software, which adds registration marks around it, usually a black box or a set of corner marks. You print that page on a regular printer.
Then you load the printed page into the cutting machine, and its optical sensor scans the marks to work out exactly where the artwork sits on the page. It then cuts precisely around each printed design.
That sensor step is the whole trick. The printer and the cutter never talk to each other, and paper never loads perfectly straight. The registration marks let the machine correct for all of it, so a cut line lands within a hair of where you drew it.
Two cut types matter, and you will use both:
- Kiss cut: the blade cuts through the sticker material but not the backing paper. You get a full sheet of peelable stickers. This is how sticker sheets are made.
- Die cut: the blade cuts through everything, backing included. Each sticker becomes its own free-floating piece, cut to the shape of the artwork.
Same machine, same blade. The difference is mostly cut pressure, though thicker materials and laminates can also want a deeper blade setting or a second pass. Run a test cut whenever you change materials, and both cut types are within reach on the mainstream machines.
PRINT. CUT. CARVE.



- Multiple formats (SVG, DXF, PNG)
- Machine-tested designs
- Commercial licenses
Sponsored by PrintCutCarve.com
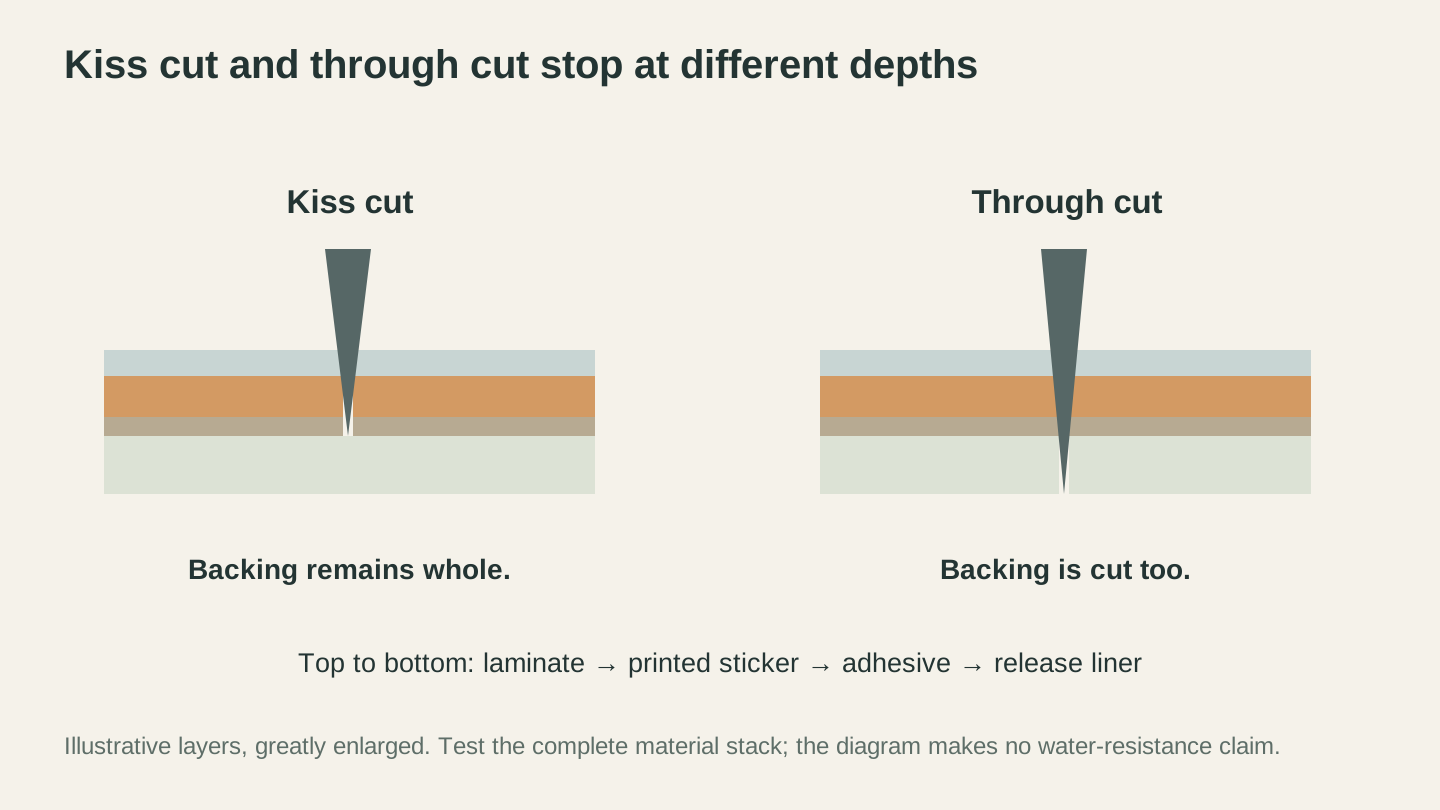
A kiss cut leaves the liner whole; a through cut separates the backing too. Test with the same laminate and sticker material you will use for the finished batch.
Sticker Paper vs Printable Vinyl
Walk into the sticker material aisle and you will find two families: printable sticker paper and printable vinyl. They look identical in the package and behave very differently on a water bottle.
| Sticker paper | Printable vinyl | |
|---|---|---|
| Rough cost per letter sheet | Cheaper, roughly $0.25 to $1 depending on pack size | Pricier, roughly $0.75 to $1.50 |
| Water resistance | Poor, even laminated edges wick moisture | Good, excellent when laminated |
| Flexibility | Stiff, can tear on peel | Flexible, conforms to curves |
| Feel | Paper, matte or glossy coating | Soft plastic film |
| Best for | Planner stickers, packaging labels, indoor decor | Laptops, bottles, cars, anything handled or washed |
The honest version: sticker paper is for stickers that live indoors on flat things. Printable vinyl is for stickers that get handled, carried, and rained on. If you plan to sell, buyers assume a sticker can survive a water bottle, so most sellers standardize on printable vinyl plus lamination and price accordingly.
Lamination is the upgrade that turns a nice print into a durable product. It is a clear film applied over the printed sheet before cutting: either self-adhesive laminate sheets you squeegee on by hand or rolls fed through a small cold laminator. It shields inkjet ink from water, a UV-rated laminate adds fade protection on top, and it gives the sheet a professional gloss, matte, or holographic finish. Laminate first, cut second, always, so the film edge gets sealed into the cut line.
Warning
Glossy and holographic laminates can reflect light straight into the machine's registration sensor and make it fail to read the marks. If your machine keeps erroring on laminated sheets, try a matte laminate, shade the machine from overhead light, or check your brand's help pages for a sensor calibration routine. Reflection is the frustration you will hit most with laminated sheets, though smudged marks, a shifted sheet, and calibration can all cause the same error.
The Printer Matters More Than the Cutter
Most current cutting machine models handle print then cut, though a few compact ones skip the sensor, so check your exact model. Once the cutter clears that bar, the printer is where sticker quality is actually decided, and there are two things to check.
Inkjet vs laser. Inkjet is the default for stickers. Most printable vinyl is coated for inkjet ink and can melt or fail in a laser printer's hot fuser, so check the package before feeding vinyl into a laser machine. Laser-rated sticker materials exist and toner shrugs off water, but the selection is thinner and toner can crack when a sticker flexes around a curve, so test on your exact material before committing to a batch.
Dye ink vs pigment ink. This one blindsides people. Many home inkjets ship with dye-based ink: vivid colors that tend to smear on contact with water. Pigment ink sits on the surface as solid particles and generally resists water and fading much better, though the exact result depends on the ink, the coating on the material, and the laminate.
An easy check: print a scrap, let it dry, and drag a wet finger across it. Plenty of sellers still use dye printers successfully because lamination does the waterproofing, but pigment gives you a second line of defense and better fade resistance in sunlight.
You do not need a wide-format machine or anything exotic. A modest pigment-ink inkjet and letter-size sheets will carry a sticker shop a long way.
Designing Stickers That Cut Cleanly
A sticker design has two layers: the artwork people see and the cut line the machine follows. Getting both right is where Craftgineer earns its spot in this workflow.
Drawing and cleanup: Canvas Pro. Canvas Pro is a free, full browser-based editor with layers, brushes, shapes, and text. Draw sticker art from scratch, or import a scan of a pen drawing and clean it up: erase the coffee stain, bump the contrast, recolor, add a background shape. Export as PNG when the art is done.
One habit that pays off immediately: design on a transparent or white background and give every sticker a solid white outline, 2 to 3 mm. It reads as "sticker" instantly and hides small registration drift, because a cut that wanders slightly stays inside white instead of slicing into your art.
Cut lines: MonoTrace. Your machine needs a vector outline to cut, and tracing one manually around a detailed illustration is miserable. MonoTrace does it for free: upload the PNG and it vectorizes the silhouette into a clean SVG. Import that SVG into your machine's software as the cut layer, drop the PNG artwork under it, and you have a print file and a cut file that match exactly. If you have never moved a PNG into a cutting machine as an SVG before, our PNG to SVG guide for Cricut walks through the whole conversion.
Tip
Simplify the cut line, not the art. A cut path that traces every leaf and whisker looks impressive on screen and peels terribly in real life. Blob the outline into one smooth shape around the artwork. Your art keeps all its detail in print, and the sticker peels in one satisfying pull.
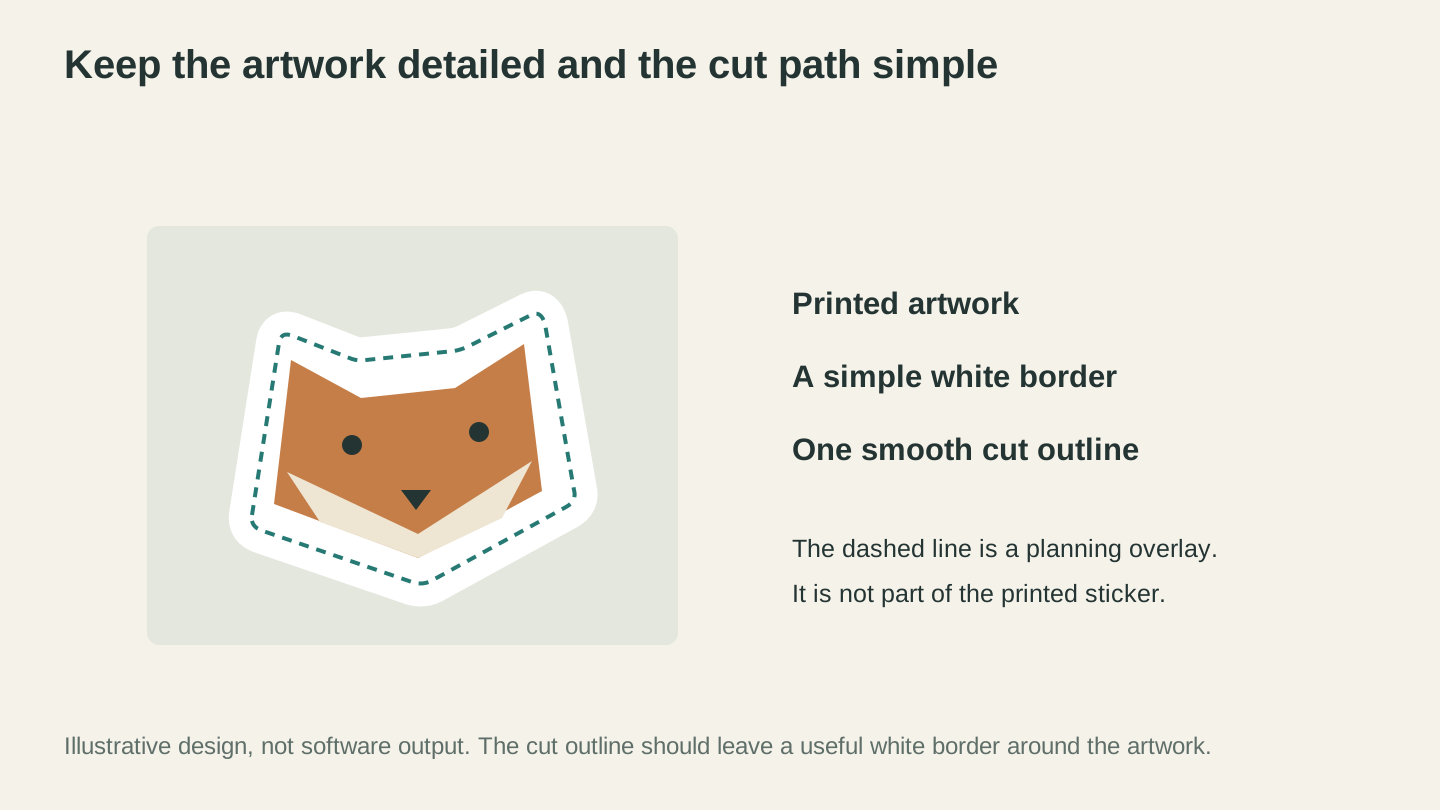
Detailed artwork can use a simple outer cut path. The dashed outline is a planning overlay, not a line to print on the sticker.
The Print Then Cut Workflow, Start to Finish
Here is the full production loop once your designs are ready:
- Lay out the sheet in your machine's software. Fill the printable area with as many stickers as fit, but keep everything inside the machine's print then cut boundary, which is smaller than the full page.
- Print on your sticker material at the printer's highest quality setting. Let inkjet prints dry for a few minutes before touching them.
- Laminate if this batch needs to be waterproof. Smooth the film down from one edge to avoid bubbles.
- Load the sheet on the cutting mat, aligned the way your software shows. A clean, sticky mat matters here: a sheet that shifts mid-cut ruins the registration.
- Let the machine scan the registration marks. If it fails, see the reflection tips above.
- Cut. Kiss cut pressure for sheets, through-cut pressure for die cuts. Run a test cut on a corner of a scrap sheet the first time you use any new material.
- Weed and finish. For kiss-cut sheets, peel away the excess material around the stickers so buyers get that clean bordered look. For die cuts, just pop them off the mat.
Expect your first sheet to take an hour or more with all the checking. By the tenth, the loop shrinks to minutes, and that gap is exactly why stickers batch so well as a product.
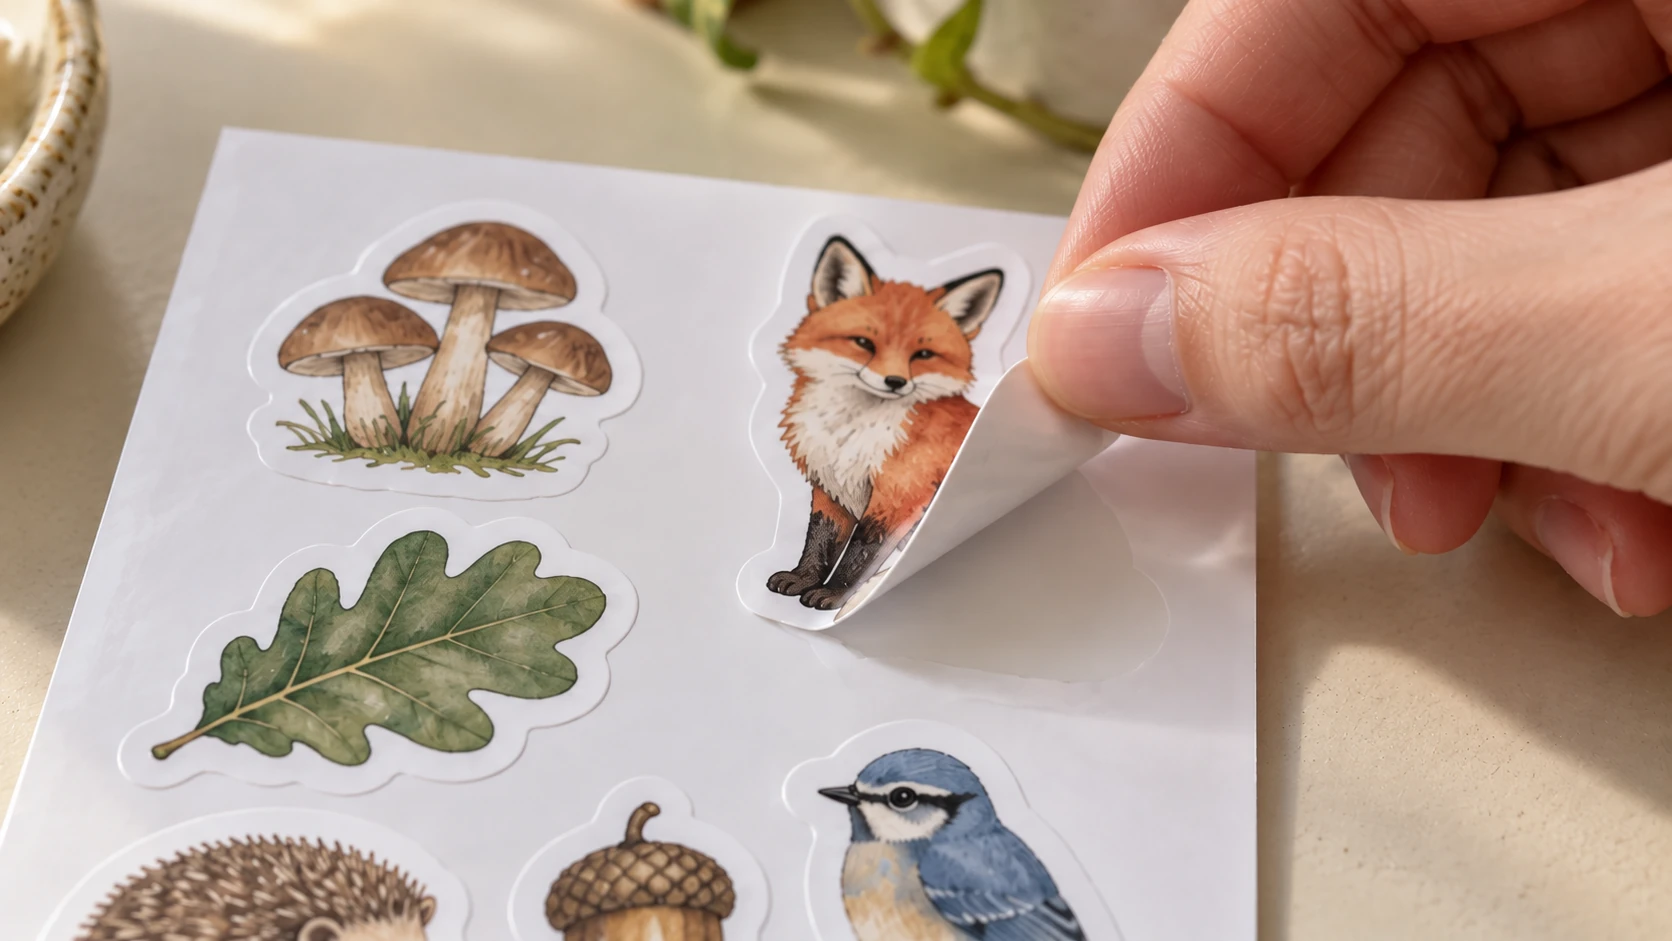
The same sticker sheet up close shows the white border and intact backing as the fox peels away. Inspect a small sample before repeating the cut across a sheet.
Sheets or Singles?
Both formats sell, and they sell differently.
Kiss-cut sheets are the workhorse. One registration pass can yield anywhere from 6 to 20 stickers depending on their size and your machine's printable boundary, they ship flat, and a themed sheet has higher perceived value than the same designs sold separately. Sheets suit planner stickers, themed collections, and anything aimed at people who buy stickers as a category.
Die-cut singles are the impulse buy. One design, cut to shape, usually 2 to 4 inches. They cost more per sticker to produce because each one needs its own weeding and handling, but they are what laptop-sticker buyers want, and they make great add-ons at a market table where someone is already holding a $40 item.
Most sticker sellers end up doing both: sheets as the core listing, singles of the most popular designs as the low-price entry point.
Selling Them
Stickers are one of the friendliest maker products to sell: tiny material cost, flat shipping, no breakage, and buyers who collect them by habit. Here is the business side in brief.
Pricing. Typical asking prices run $3 to $5 for a single die-cut vinyl sticker, $8 to $12 for a kiss-cut sheet, and $10 to $15 for a themed pack of several singles. Material cost per sticker is often under $0.25, which sounds like an enormous margin until you count design time, weeding, packaging, and platform fees. Price to the market, not to the material.
Packaging. A clear cello sleeve with a simple backing card turns a loose sticker into a product. Add a "do not bend" sandwich of thin cardboard for shipping. Most sticker orders can travel as flat letter mail, which keeps postage low, though carriers have thickness and rigidity rules, so check them before buying letter postage. Low shipping is a genuine competitive advantage: build it into the price and advertise it.
Where they sell. Etsy has a huge, active sticker market with buyers who shop the category by habit; our Etsy guide for makers covers setting up shop, fees, and getting found. Beyond Etsy: craft fairs and markets (stickers are the classic under-$5 impulse table item), local shops that take small goods on consignment, and your own site once you have an audience.
Listings. A sticker listing lives or dies on its title, keywords, and photos, and you will be writing a lot of them if you build a catalog. ListingLab drafts titles, descriptions, and SEO keywords from a photo of your product; text generation uses your plan's chatbot messages rather than credits. It can also generate styled AI product photos, lifestyle scenes, seasonal setups and more, at 1 credit per photo, which helps when your only shot is the sheet lying on your desk.
Info
Photograph the peel. The single most convincing sticker photo is one sticker half-lifted from its backing, because it proves the kiss cut is clean and the material is thick. Shoot it near a window, no flash, and let that be your listing's first image.
Frequently Asked Questions
Are laminated inkjet stickers really waterproof?
Laminated printable vinyl generally survives water bottles, handwashing, and rain well, though the exact result depends on the vinyl, ink, and laminate you combine. The honest label is water resistant rather than waterproof: prolonged soaking can eventually find the cut edge. Laminated sticker paper is only splash resistant, because the paper core wicks moisture at the edges. Soak a test sticker overnight before you put durability claims in a listing.
Can I make stickers without a printer?
Not printed ones, but yes to stickers generally. Single-color designs cut from colored adhesive vinyl need no printer at all; that is the process in our vinyl decal guide.
What size should stickers be?
Two to three inches on the long side is a solid starting point for laptop and bottle stickers. Much smaller and weeding gets fiddly while detailed art stops reading. On sheets, mix a couple of larger anchor designs with smaller fillers.
Do I need design skills to start?
You need designs, not necessarily drawing skills. Hand-drawn art scanned and cleaned up in Canvas Pro has exactly the imperfect charm sticker buyers pay for. Photograph a pen doodle, clean it up, trace the cut line with MonoTrace, and it is a product.
Your First Sheet This Week
Start with one sheet of six designs on printable vinyl, laminated, kiss cut. That single sheet teaches you the whole pipeline: layout, printing, lamination, registration, weeding, and packaging. Draw or clean up the art in Canvas Pro, let MonoTrace trace the cut lines for free, and when the sheet peels clean, point ListingLab at a photo of it and open the shop. A simple first batch is very much a weekend project, and the doodle on your phone is closer to a listing than it looks.
Related Tools
MonoTrace
Turn photos and artwork into SVG outlines for free, with an optional sketch mode.
Canvas Pro
Edit images with layers, brushes, shapes, text, and selection tools. Export PNG, JPEG, or WebP.
ListingLab
Create listing text and styled product photos from a product image.
Text uses chat allowance; photos use credits
Ready to try these tools?
Sign up free, no credit card required. Free tools available immediately.
Start Free