

Halloween Projects for Makers (Laser, Cricut, 3D Printer)
It is early September, which means you have about seven weeks until Halloween. That sounds like plenty of time. It is not. Every maker who has ever promised a porch full of decorations knows how those weeks evaporate: two weekends disappear to family stuff, one project needs a redesign, and suddenly it is October 28th and you are gluing something at midnight.
So this roundup is organized two ways. Projects are grouped by machine, and every project comes with an honest difficulty and time estimate, so you can match your ambitions to the weekends you actually have left.
One note before the ideas: Halloween is the most forgiving holiday of the year for makers. Wonky edges read as "haunted." Charred wood is a feature. If there was ever a season to try that technique you have been putting off, this is it.
Plan Backwards From October 31
Here is the whole list in one table, worst-case time included. "Total time" means design plus machine time plus finishing and assembly, spread over however many sessions it takes.
| Project | Machine | Difficulty | Total time |
|---|---|---|---|
| Spooky yard signs | Laser | Easy | 1 weekend |
| Candle luminaries | Laser | Easy | 1 weekend |
| Halloween coasters | Laser | Easy | 1 evening per set |
| Layered shadow-box scene | Laser | Intermediate | 2 to 3 weekends |
| Window decals | Cutting machine | Easy | 1 evening |
| Treat bags | Cutting machine | Easy | 1 evening per batch |
| Shirt iron-ons | Cutting machine | Easy | 1 evening |
| Party banner | Cutting machine | Easy | 1 to 2 evenings |
| Cookie cutters | 3D printer | Easy | 1 evening |
| Candy bowl | 3D printer | Easy | 1 to 2 days (mostly print time) |
| Printed jack-o-lanterns | 3D printer | Intermediate | 1 weekend |
| Full-size props | 3D printer | Hard | 3+ weekends |
The pattern is clear: cutting machine projects are the sprint, laser projects are the middle distance, and big 3D prints are the marathon. If you are reading this in mid-October instead of mid-September, start from the top of the vinyl section and be happy.
PRINT. CUT. CARVE.



- Multiple formats (SVG, DXF, PNG)
- Machine-tested designs
- Commercial licenses
Sponsored by PrintCutCarve.com
Laser Projects
The laser owns Halloween. Silhouettes, shadows, and scorched wood are basically the holiday's whole aesthetic.
Spooky yard signs
Difficulty: easy. Time: one weekend.
A yard sign is a big silhouette on a stake: a witch mid-flight, an arched-back cat, a crooked haunted house. Cut it from 6mm plywood, hit it with flat black spray paint, and it reads perfectly from the street. Seal every face and cut edge with exterior sealer and it should comfortably survive its month outside; store it dry over winter and give it a touch-up coat if you want it back next year.
The design is the only hard part, and it does not have to be. Grab any spooky clip art or public domain silhouette as a PNG, run it through MonoTrace, and you get a clean cutting-ready SVG for free. If you are still hunting for source images, our free SVG files guide lists the best places to find Halloween-friendly artwork you can legally cut.
Tip
Silhouettes with thin connecting parts, like a cat's tail or a witch's broom bristles, snap at the worst moment. As a conservative starting point for 6mm plywood at yard-sign scale, zoom in before cutting and thicken any bridge narrower than about 5mm at your final size, then cut a test piece on your material. Yard signs get bumped.
Candle luminaries with cut-out silhouettes
Difficulty: easy. Time: one weekend for a set.
A luminary is a four-sided box with silhouettes cut out of each panel, and an LED tea light inside that throws haunted houses and flying bats onto the wall. They are dramatic out of all proportion to the effort: four rectangles, some finger joints, and a handful of cut-outs.
This is where DecoFill earns its credit. Take a simple panel shape, pick one of the gothic or Victorian scrollwork styles, and it fills the panel with ornate patterning that would take hours to draw by hand. Cut the scrollwork as openings and the candlelight does the rest. Gothic scrollwork plus flickering light is the cheapest special effect in your whole arsenal.
Use LED tea lights, not real flames. You built a wooden box with ventilation holes. Think it through.
Halloween coasters
Difficulty: easy. Time: one evening per set.
Coasters are the gateway project for a reason: small material, short engrave times, instant gratification. Engrave bats, spiderwebs, or a full ornate DecoFill pattern onto 90mm wood or slate rounds. A set of four in a twine bundle is a party host gift, a craft fair item, or the thing that makes your own coffee table seasonal.
If you sell at fall markets, coasters are also your lowest-risk Halloween inventory. They batch well and anything unsold in November was your practice run.
Layered shadow-box scenes
Difficulty: intermediate. Time: two to three weekends.
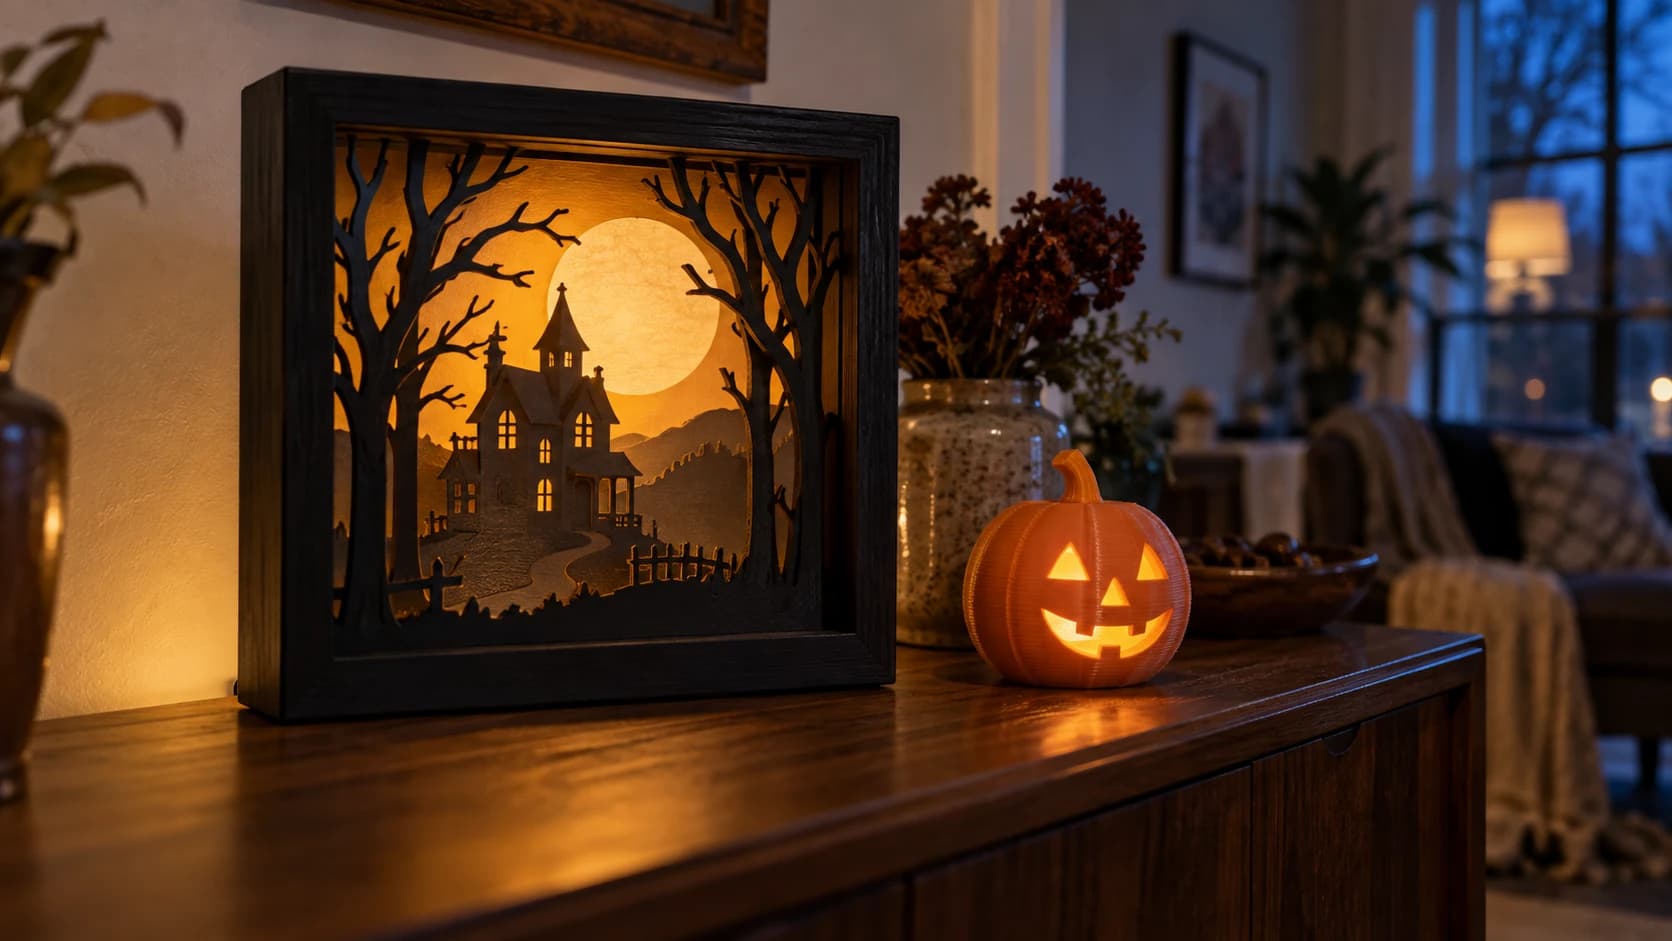
This is the laser showpiece: five or more layers of cut plywood or cardstock stacked with small spacers, back layer lit by an LED strip, each layer a slice of the scene. Gravestones up front, bare trees behind them, the haunted house in the middle distance, a moon glowing at the back. The depth effect stops people mid-sentence.
The design challenge is separating one image into layers that read as depth. MosaicFlow does the heavy lifting here: upload a moody Halloween illustration and it separates the image into distinct color regions, each exported as its own clean SVG layer. You then cut each region from its own sheet and stack them front to back. What it hands you is a puzzle of separated pieces, so plan on adding small tabs or a border frame to keep floating elements like a moon connected to their layer.
Budget real time for this one. The cutting is quick. The test-fitting, spacing, and lighting are where the weekends go. Started in mid-September, it is comfortable. Started October 20th, it is a midnight-glue project.
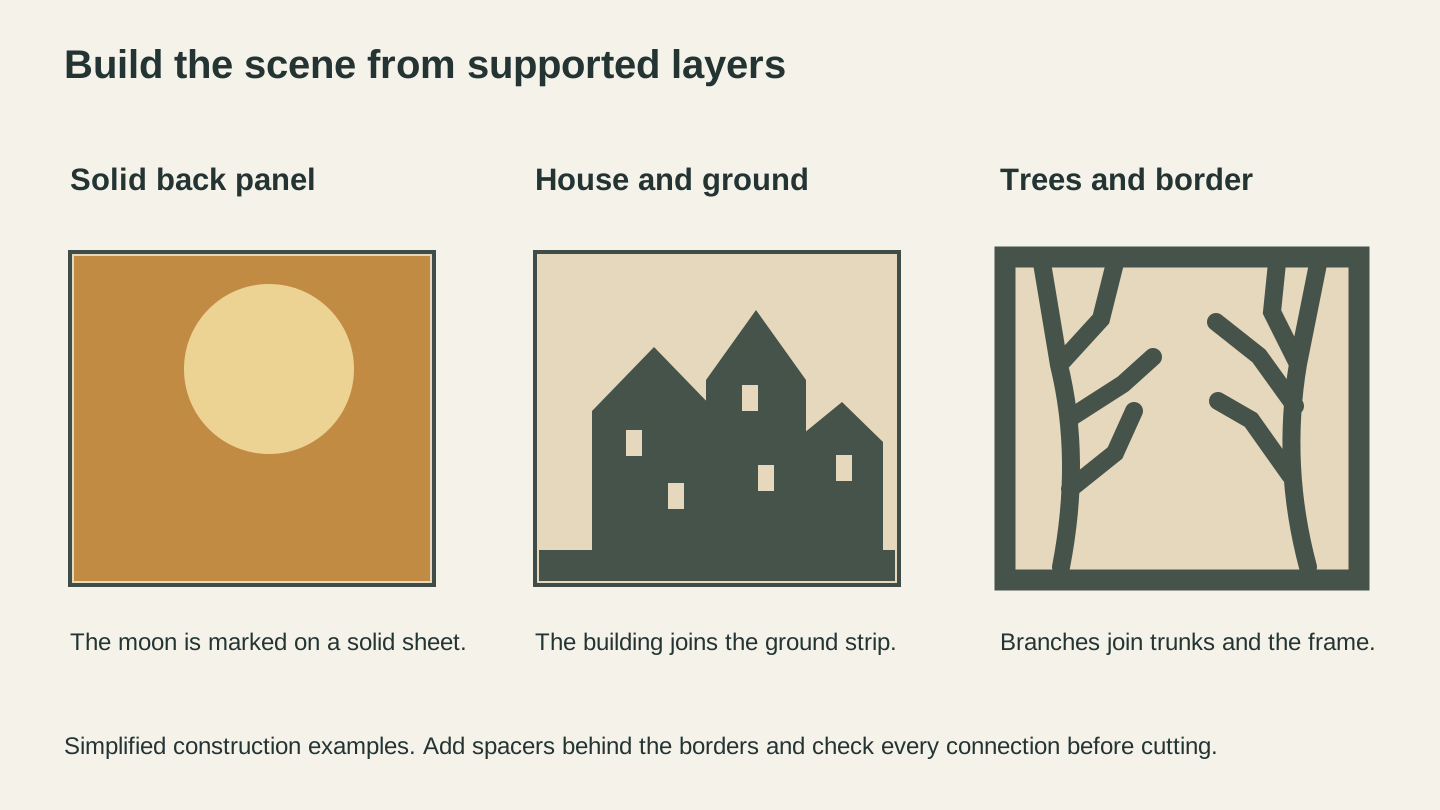
Build support into every layer. A moon can be marked on a solid back panel, while cut houses and trees need connections to the ground or border.
Cutting Machine Projects
Vinyl and cardstock are the fast lane. Most projects in this section go from idea to done in a single evening, which makes the cutting machine the machine of choice once October gets short. If you are still exploring what these machines can do beyond decals, our cutting machine project guide goes much deeper.
Window decals
Difficulty: easy. Time: one evening.
Black removable vinyl, spooky silhouettes, glass. From outside at night, with a light on indoors, a window full of bat and cat silhouettes looks fantastic. Removable vinyl is designed to peel off cleanly in November, which is the whole trick: buy removable, not permanent, or you will be scraping adhesive off in December. Test a corner on your glass first, since removal varies by brand and surface.
Same design pipeline as the yard signs: found artwork through MonoTrace, then cut. One good bat silhouette, duplicated and rotated a dozen times across the machine mat, fills an entire window from a single design.
Treat bags
Difficulty: easy. Time: one evening per batch.
Plain paper bags plus one cut-vinyl or iron-on jack-o-lantern face each, and suddenly it is a personalized party favor. If you know the guest list, add each kid's name. This is the highest gratitude-per-minute project on this list, and a genuinely good one to do with kids, since applying decals is exactly their speed.
Shirt iron-ons
Difficulty: easy. Time: one evening.
One sheet of heat transfer vinyl turns a plain black shirt into a costume. A skeleton ribcage, a mad-scientist design, a glow-in-the-dark ghost. Glow HTV is criminally underused and Halloween is its whole reason to exist. Weed carefully, press per the vinyl maker's temperature instructions, and remember to mirror the design before cutting. We have all pressed a backwards design exactly once.
Party banners
Difficulty: easy. Time: one to two evenings.
Cardstock pennants, one spooky shape or letter each, strung on twine. Banners are the project where an ornate touch pays off: run your pennant shape through DecoFill with a gothic style and score the pattern instead of cutting it through for a Victorian-seance look. Cardstock is cheap enough that a failed experiment costs cents.
3D Printer Projects
The printer brings the third dimension and the longest lead times. Machine time is the trap here: your hours are short, but the printer's hours are long, and October has a fixed number of nights for it to run.
Cookie cutters
Difficulty: easy. Time: one evening.
Bat, ghost, coffin, pumpkin. A cookie cutter is a closed outline extruded twice, once thin for the cutting edge and once thicker for the handle flange, and there are free generators and models everywhere. Print in PLA or PETG. One honest caveat: printed cutters have tiny layer grooves that can trap crumbs, washing does not fully fix that, and even a food-contact-rated filament does not certify the finished print. Treat them as occasional-use party gear or keep them as decorations and gift toppers, not heirloom bakeware. Gift them with a batch of cookies attached, and a custom cutter of someone's pet in a witch hat is the kind of gift people keep for a decade anyway, food-safe or framed.
Candy bowls
Difficulty: easy. Time: one to two days, mostly machine time.
A cauldron, a skull with an open crown, a pumpkin bowl. Print in vase mode where the model allows it and even a large bowl becomes a surprisingly fast, surprisingly sturdy print. Your active time is under an hour; the printer does the rest while you work on something else. Keep an eye on long prints the way your printer's manual recommends, and this project overlaps happily with anything else on this list.
Printed jack-o-lanterns
Difficulty: intermediate. Time: one weekend.
A printed jack-o-lantern in orange filament with an LED inside will not rot on your porch the way the real thing does, and it comes back out of storage every October. If it will live outside for the month, pick a filament that handles weather, PETG or ASA over plain PLA. Thin walls glow beautifully. The intermediate part is scale: a pumpkin worth putting outside is a big print, which may mean sectioning it and gluing, and big prints mean big failure stakes. Print a small test version first to check your wall thickness glow.
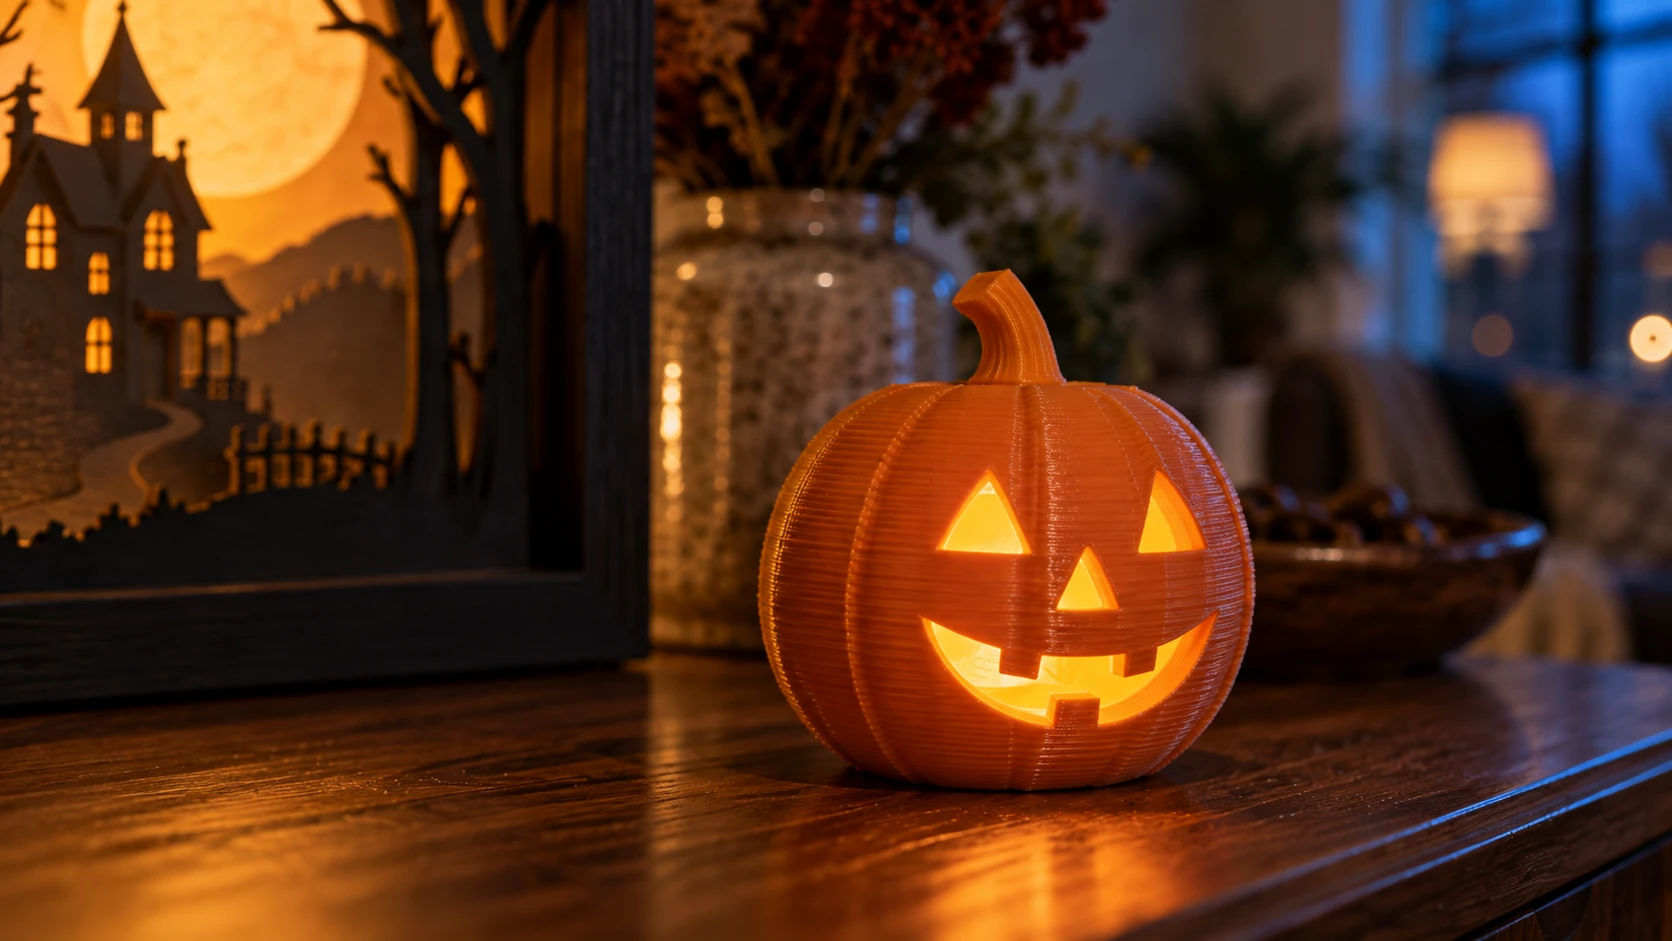
Visible layer lines and openings give the printed pumpkin its character. Use an LED light inside and leave real flames out of the project.
Full-size props
Difficulty: hard. Time: three or more weekends. Start now.
Skulls, tombstone toppers, animatronic housings, a life-size raven for the mantel. Multi-part props are the deep end: dozens of print hours, seam filling, sanding, priming, dry-brush painting. The painting matters more than the printing, because a gray plastic skull looks like gray plastic, while the same skull with a dark wash and bone dry-brush looks like it came from a movie set.
If a big prop is your ambition this year, the math is simple: start it the week you read this or park it for next year. There is no version of this project that starts in mid-October and ends well.
Info
Halloween projects convert directly into holiday-season skills. Layered shadow boxes become Christmas villages, luminaries become snowflake lanterns, and treat bags become gift tags. Our holiday gift guide picks up exactly where this list leaves off.
Pick Your Lane and Start This Weekend
Seven weeks sounds long until you subtract the weekends already spoken for. So pick by calendar, not by ambition: shadow boxes and big props get started this week or not at all, laser signs and luminaries have until early October, and vinyl stays open until the doorbell is literally ringing.
Whichever lane you pick, the design work is the part Craftgineer shortens. MonoTrace turns any spooky image into a cut-ready SVG for free, DecoFill fills your shapes with gothic scrollwork you would never draw by hand, and MosaicFlow separates an illustration into per-color SVG pieces, the raw material for multicolor builds and, with a little framing work, shadow-box layers. Sign in, prep your files tonight, and let October find you cutting instead of designing.
Related Tools
MonoTrace
Turn photos and artwork into SVG outlines for free, with an optional sketch mode.
DecoFill
Generate decorative artwork inside an uploaded outline, then prepare PNG or traced SVG output.
MosaicFlow
Turn uploaded or AI-generated artwork into separate color regions for inlays, with optional 3D exports.
Downloads require a plan or a design unlock
Ready to try these tools?
Sign up free, no credit card required. Free tools available immediately.
Start Free