

Laser Safety for the Home Workshop: Eyes, Fire, and Fumes
Laser safety advice tends to come in two flavors. One is the doom version, where every paragraph implies you are moments from blindness. The other is the shrug, usually from someone who has run an open-frame diode on the kitchen table for a year without incident and concluded the warnings are marketing.
Neither helps you. A laser engraver is a tool in the same category as a table saw: genuinely dangerous if you ignore how it works, and safely used every day by thousands of hobbyists who follow a short list of habits. This post is that list, with the reasoning behind each item so the habits actually stick.
Tip
Short answer: the three risks that matter in a home laser workshop are your eyes (wear glasses rated for your laser's specific wavelength, or operate a Class 1-rated enclosed machine exactly as its label and manual direct), fire (never leave a running laser unattended, keep an extinguisher within reach), and fumes (vent to the outside or through real filtration, and never cut PVC, PVC-containing vinyl, or anything else chlorinated; unidentified vinyl counts as PVC until you have verified otherwise).
How a Laser Hurts You, and How It Doesn't
It helps to be clear about what you are dealing with. A laser engraver concentrates enough light energy into a small spot to burn wood. Three things follow from that.
First, the beam and its reflections can injure eyes at distances far beyond the work area. Second, you are deliberately setting material on fire in a controlled way, which means the fire can stop being controlled. Third, burning material releases smoke and gases, and some materials release genuinely dangerous ones.
Those are the three primary process risks. The machine itself adds a few more, electrical hazards chief among them, which is why everything below is one of those three plus a short section on electricity and one on the other people and animals in your house.
One piece of vocabulary is worth knowing: laser products carry a class rating. A fully enclosed machine with working interlocks is typically sold as a Class 1 laser product, meaning the enclosure and its safety controls keep the accessible beam below hazardous levels during normal use. The laser inside that box is usually a far more dangerous class on its own; the enclosure is what earns the friendly rating. An open-frame diode engraver, with nothing containing the beam, sits at the other end of the scale. Check your own machine's manual and label rather than assuming, and remember that accessories and configurations can change the picture: a pass-through slot in use, a removed panel, or an extension kit can turn a machine that was Class 1 on the label into an open-beam hazard in practice. The label, the manual, and how the machine is actually set up today decide how much of the eye section below applies every time you run a job.
If you are still choosing a machine, this is a real reason enclosed models often cost more. Our buyer's guide to beginner laser engravers weighs that trade-off alongside everything else.
PRINT. CUT. CARVE.



- Multiple formats (SVG, DXF, PNG)
- Machine-tested designs
- Commercial licenses
Sponsored by PrintCutCarve.com
Eyes: Match the Protection to the Wavelength
This is the part most beginners get wrong, and the mistake is almost always the same one: treating laser glasses like sunglasses, where darker means safer.
Laser safety glasses do not work by being dark. They work by absorbing or reflecting a specific band of wavelengths while letting the rest of visible light through. A pair that protects perfectly against one laser can be useless against another. Two things matter, and both are printed on certified glasses: the wavelength ranges they cover, and the protection level in those ranges, marked as an optical density (OD) on many pairs or as an LB rating on European-certified ones. Match both against what your machine's manual calls for.
| Laser type | Typical wavelength | What that means for your eyes |
|---|---|---|
| Blue diode | around 450 nm, visible blue | The beam and its reflections are visible light. Glasses must be rated for that band. |
| Infrared module (often DPSS or fiber) | typically 1064 nm, invisible | You cannot see the beam at all, which makes rated glasses non-negotiable. |
| CO2 | 10,600 nm, far infrared | Strongly absorbed by some common window materials, which is why CO2 machines can be built with rated transparent viewing windows. |
A few rules that fall out of that table:
Generic tinted glasses are not laser glasses. Welding goggles, sunglasses, and unbranded "laser" glasses with no ratings printed on them are gambling equipment. Buy from your machine's manufacturer or a reputable optics supplier, and check the printed wavelength and protection ratings against your manual.
The enclosure window is a filter, not a piece of plastic. Whether a window actually blocks a given laser depends on its material, its thickness, the wavelength, and its tested optical density, none of which you can judge by looking at it. Ordinary clear acrylic is not a verified safety barrier for a blue diode laser, which is why diode enclosures use tinted panels tested and rated for the wavelength. CO2 machines can have transparent viewing windows because suitable window materials absorb far-infrared light strongly, but "suitable" is doing the work in that sentence. The correct move on any machine is the same: use the window the manufacturer fitted and do not substitute your own.
Never bypass an interlock. On a properly interlocked machine, opening the lid stops the beam; your manual will tell you whether yours works that way, and not every enclosed product does. Where the interlock exists, taping the switch down or defeating it in software removes the containment that made the machine Class 1, and can expose you to the far more hazardous laser inside, potentially Class 4 depending on the machine, with no glasses on because the box was supposed to be doing that job. Every interlock bypass trick you find in a forum is someone volunteering to be a cautionary tale.
Watch reflections off bare metal, especially with diodes. A shiny metal surface can reflect a meaningful portion of the beam in an unplanned direction. If you engrave on polished or bare metal with an open-frame diode, treat the whole area around the machine as beam territory, and keep your rated glasses on even when you are "just watching."
If you are brand new to lasers in general, our laser engraving beginner's guide covers the workflow side; consider this post its safety chapter.
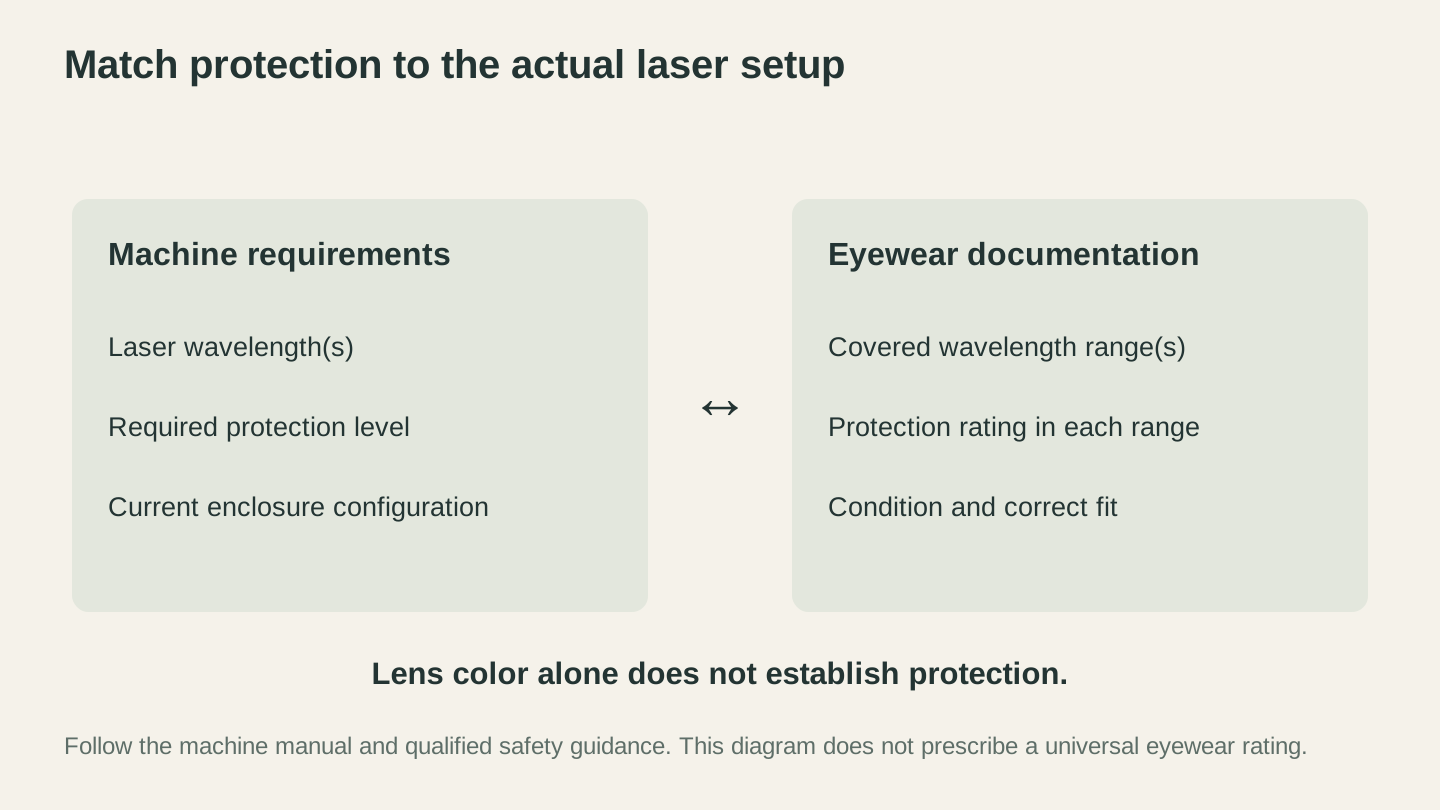
Lens color is not a protection rating. Check the actual wavelength range, required protection level and operating configuration against the equipment documentation.
Fire: The Emergency to Plan For
Eye injuries are the scariest risk. Fire is the emergency you should be ready to handle immediately: you are pointing a burning beam at flammable material, often for an hour at a time, and the safe assumption is that one day you will see a flame. Plan to be standing there when it happens.
Never leave a running laser unattended. This is the one rule with no soft version. Not to answer the door, not "just to grab lunch," not because the job has run fine twenty times before. A cut that flares up can go from a flicker to a machine fire in well under the time a coffee takes. Stay in the room, or pause the job.
Know what normal flame looks like. On many machines, some materials, acrylic especially, show a small flame that travels with the laser head and extinguishes as the head moves on. What counts as normal varies by machine, material, and settings, and your manual's fire section describes it for yours; read it before your first cut. A flame that stays lit after the head has moved away is beyond normal on any machine. Follow your machine's emergency-fire procedure, which is worth reading before you ever need it: typically stop the job, cut power as the manual directs, and smother a small contained flame only if you can do so safely. If the fire is beyond that, get everyone out and call the fire department; no machine is worth staying for. Learning the difference between the two kinds of flame takes one session, and it is exactly why you were in the room.
Air assist is a safety feature, not just a quality feature. The steady stream of air at the nozzle blows combustible gases away from the cut before they can ignite, which reduces flare-ups. Use it the way your machine's material settings and manual direct: for most cutting that means on, though some manufacturers specify exceptions for particular materials and operations. Cleaner edges are the bonus.
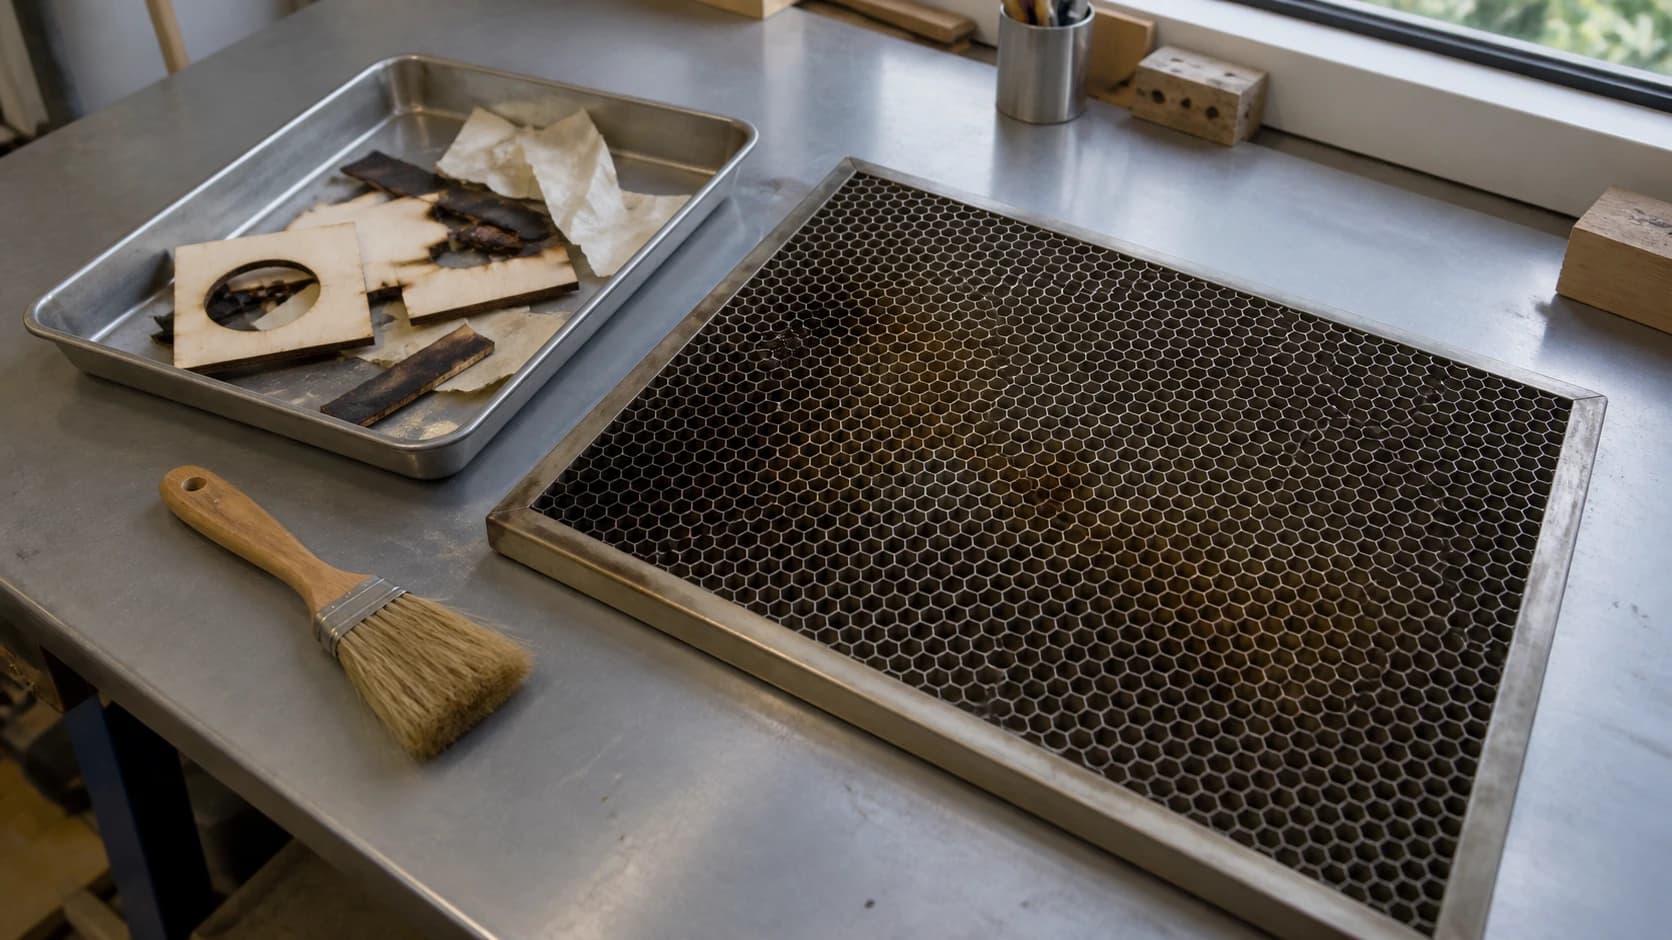
Keep the bed clean. Offcuts, masking-tape scraps, and the charred lattice of previous jobs sitting under the honeycomb are kindling positioned exactly where sparks fall. Clearing debris before each job is the cheapest fire prevention there is.
Have the right extinguisher within reach, not in another room. Pick one whose ratings cover both the fuels involved: the machine is an energized electrical device, and the material in it is usually wood, paper, or plastic. A CO2 extinguisher is popular near electronics because it leaves no powder residue, but it is rated for electrical and flammable-liquid fires, not for Class A materials like wood and paper, which can keep smoldering and reignite after a CO2 blast. Follow your machine manufacturer's and local fire authority's guidance on what to keep, mount it where it is immediately accessible, and take the same guidance on adding a fire blanket for smothering small material fires without soaking your machine.
Respect smoldering. Thick wood and stacked card can keep glowing inside the cut long after the visible flame is gone, and warm offcuts tossed straight into a bin have started fires after the maker left the shop. Stay nearby for a few minutes after a heavy cutting job, and never bin material that is still warm.
We wrote about the mistakes that ruin engravings in our laser engraving mistakes guide. Those cost you material. Fire mistakes are the category you do not get to learn from twice, which is why they get their own post.
Fumes: Ventilation Is Not Optional
Everything a laser touches turns partly into smoke, and that smoke is a mix of fine particles and gases that varies with the material. Wood smoke smells nostalgic and is still not something to fill a room with. Other materials are far worse. The rule is simple: the air the laser makes must leave the room or pass through real filtration before you breathe it.
Vent outside if you possibly can. A duct from the machine's exhaust port to a window or wall vent, with an inline fan pulling air through, is the gold standard, and it is often cheaper than a purpose-built filtration system, though installation costs and local exhaust rules vary. Rigid duct beats sagging flexible hose, and short beats long.
Filtered extraction is the fallback, not the shortcut. Purpose-built fume extractors with layered particulate and activated-carbon filtration exist precisely for workshops that cannot vent out. They work when maintained, and their filters are consumables: a saturated carbon filter is a fan, not a filter. Follow the manufacturer's replacement schedule.
Your nose is a warning system, not a measurement. If you can smell the job strongly at your seat, or the room stays hazy, the airflow is losing and your setup is not done. The reverse is not a pass: faint or absent odor does not prove the air is safe, because some hazardous gases give poor odor warning at harmful levels. Run the extraction your machine's manufacturer specifies regardless of what you smell.
The Materials You Must Never Cut
This is the most important table in this post. It is written for the typical hobby diode and CO2 machines this guide is about; whatever your exact machine's documentation says always wins.
| Material | Verdict | Why |
|---|---|---|
| PVC and PVC-containing vinyl | Never | The chlorine content releases corrosive, toxic gas when burned. It damages lungs and corrodes the machine itself. |
| "Faux leather" of unknown makeup | Not until verified | It is often PVC-based. PU-based synthetic leather is a different material; you must confirm which one you have. |
| Polycarbonate (Lexan) | Avoid unless explicitly approved | Often a poor choice on hobby lasers: may ignite and can produce hazardous fumes. Process it only when your machine's manufacturer and the material supplier approve it. |
| ABS | Avoid | Melts rather than cuts cleanly and produces unpleasant, harmful fumes. |
| Fiberglass and FRP | Only with explicit approval | Resin chemistry varies; confirm the exact composite with the material supplier and machine manufacturer, and use the extraction they specify. |
| Anything you cannot identify | Ask before you cut | Chlorine content is invisible. Mystery plastic is a hard no until you know what it is. |
The PVC rule deserves the extra sentence. Chlorinated plastics release hydrogen chloride gas when burned, which forms hydrochloric acid on contact with moisture, including the moisture in your airways and the condensation inside your machine. This is why experienced laser users treat "is there chlorine in it?" as the first question about any new plastic, and why that innocent-looking roll of craft vinyl is a laser's most famous forbidden material: adhesive craft vinyl may be PVC-based, while some heat-transfer vinyls are polyurethane, so verify the exact product before it goes anywhere near a laser. Cutting machines handle vinyl with a blade for a reason.
The commonly compatible list is long and covers most of what makers actually want: solid wood, laser-grade plywood, cast acrylic, paper and card (with a fire watch), leather explicitly approved for laser processing (commonly vegetable-tanned; leather containing chromium compounds or certain dyes can release hazardous smoke), slate, glass engraving on a CO2 machine, anodized aluminum engraving, and more. Even on that list, coatings, adhesives, and dyes can change the answer, which is why the manufacturer's documentation and the material's safety data sheet are the authorities, not a forum thread.
Warning
When in doubt about any material, stop and check before the job, not during it. Ask Craft Chat "can I laser cut this?" with a description of the material, check the supplier's safety data sheet, or both. Thirty seconds of checking is cheaper than a corroded machine or a lungful of acid.
The Electrical Basics
Nothing exotic here, just the habits that prevent the boring category of accident:
- Plug the machine into a grounded outlet. Do not defeat the ground pin, and avoid daisy-chained power strips for the laser, its chiller, and its extractor.
- Keep liquids away from the electronics. Water-cooled CO2 machines combine water and high voltage by design, so check for leaks around the tube and fittings before running.
- The power supply in a CO2 machine operates at voltages that can injure you and can retain charge after the machine is unplugged, so never assume pulling the plug makes the internals safe to touch. Repairs inside the supply belong to someone qualified following the manufacturer's service documentation, not to a Saturday afternoon.
- Route cables and ducting so nothing rests against the laser tube, the rails, or anything that gets hot.
Kids, Pets, and Everyone Else
A running laser is fascinating, which is exactly the problem. The bright dot draws eyes toward the one place in the room no unprotected eye should look.
Treat the machine like a table saw: it runs when the operator is present and attending, and it is off, and ideally physically locked or key-switched, at every other time. Many machines ship with a key or a software lock for exactly this reason. Use it.
Pets add a detail people miss: their eyes are often at the same height as an open-frame machine's beam. A cat on the workbench during a job is not a cute photo, it is an exposure risk with whiskers. Simplest policy: the door is closed while the laser runs, and small humans and animals are on the other side of it unless they have rated glasses and a reason to be there.
The Setup Checklist
Print this, or copy it onto the shop wall. The one-time list gets your room right; the every-job list keeps it right.
One-time setup:
- Exhaust ducted to the outside, or a maintained filtered extractor
- Rated extinguisher mounted within reach of the machine, fire blanket beside it
- Grounded outlet, no daisy-chained strips
- Interlocks tested and never bypassed
- Certified glasses on hand, wavelength rating checked against the machine's manual
- Key or lockout arrangement so the machine cannot run without you
- House rules agreed: door closed while running, kids and pets out
Before every job:
- Eye protection as your machine's label and manual require: enclosure fully closed, rated glasses on, or both, since some enclosed machines still call for glasses
- Extraction running before the laser fires
- Bed clear of offcuts, scraps, and char
- Material identified, and no chlorinated anything
- Air assist set as the machine manual and material settings require
- You know where the extinguisher is without looking
- You are staying in the room until the job ends, and a few minutes after a heavy cut
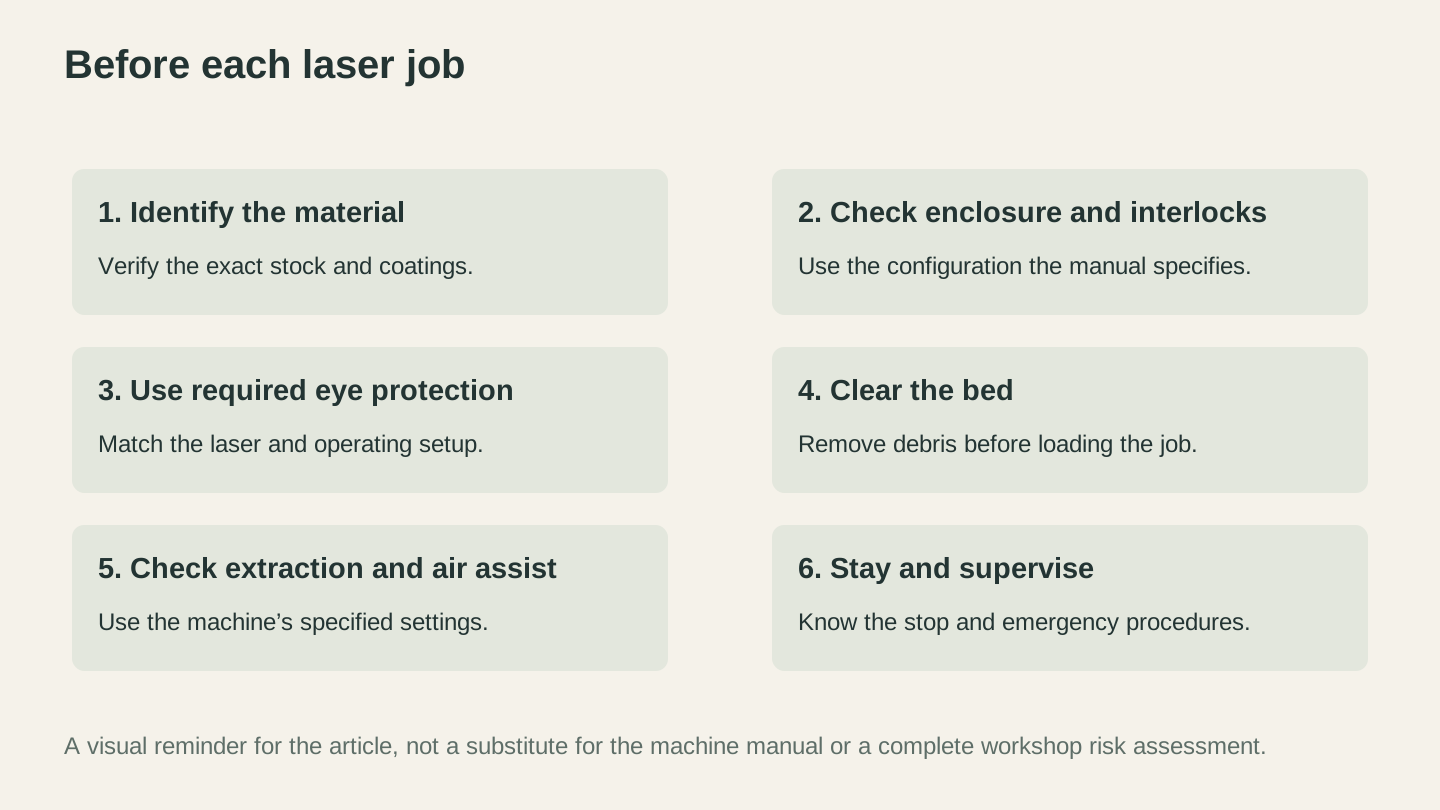
Use this as a reminder alongside the machine manual: identify the material, check the protective setup, clear the bed, run the required extraction and stay with the job.
When in Doubt, Ask Before You Cut
Most laser accidents are not caused by freak failures. They are caused by a question that did not get asked: is this plastic safe, are these glasses right for this wavelength, is it fine to step out for five minutes. The answer to that last one is always no, and the other two take less time to check than the job takes to run.
For the material questions, you do not have to dig through data sheets alone. Ask Craft Chat about the material you are holding, what fumes it produces, and whether it belongs anywhere near your laser. It is free to use with your Craftgineer account, and it is a much better habit than hoping the mystery plastic is polyethylene. Cut safely, and the hobby stays fun for decades.
Ready to try these tools?
Sign up free, no credit card required. Free tools available immediately.
Start Free