

Resin and Wood Together: River Boards, Fills, and Inlays
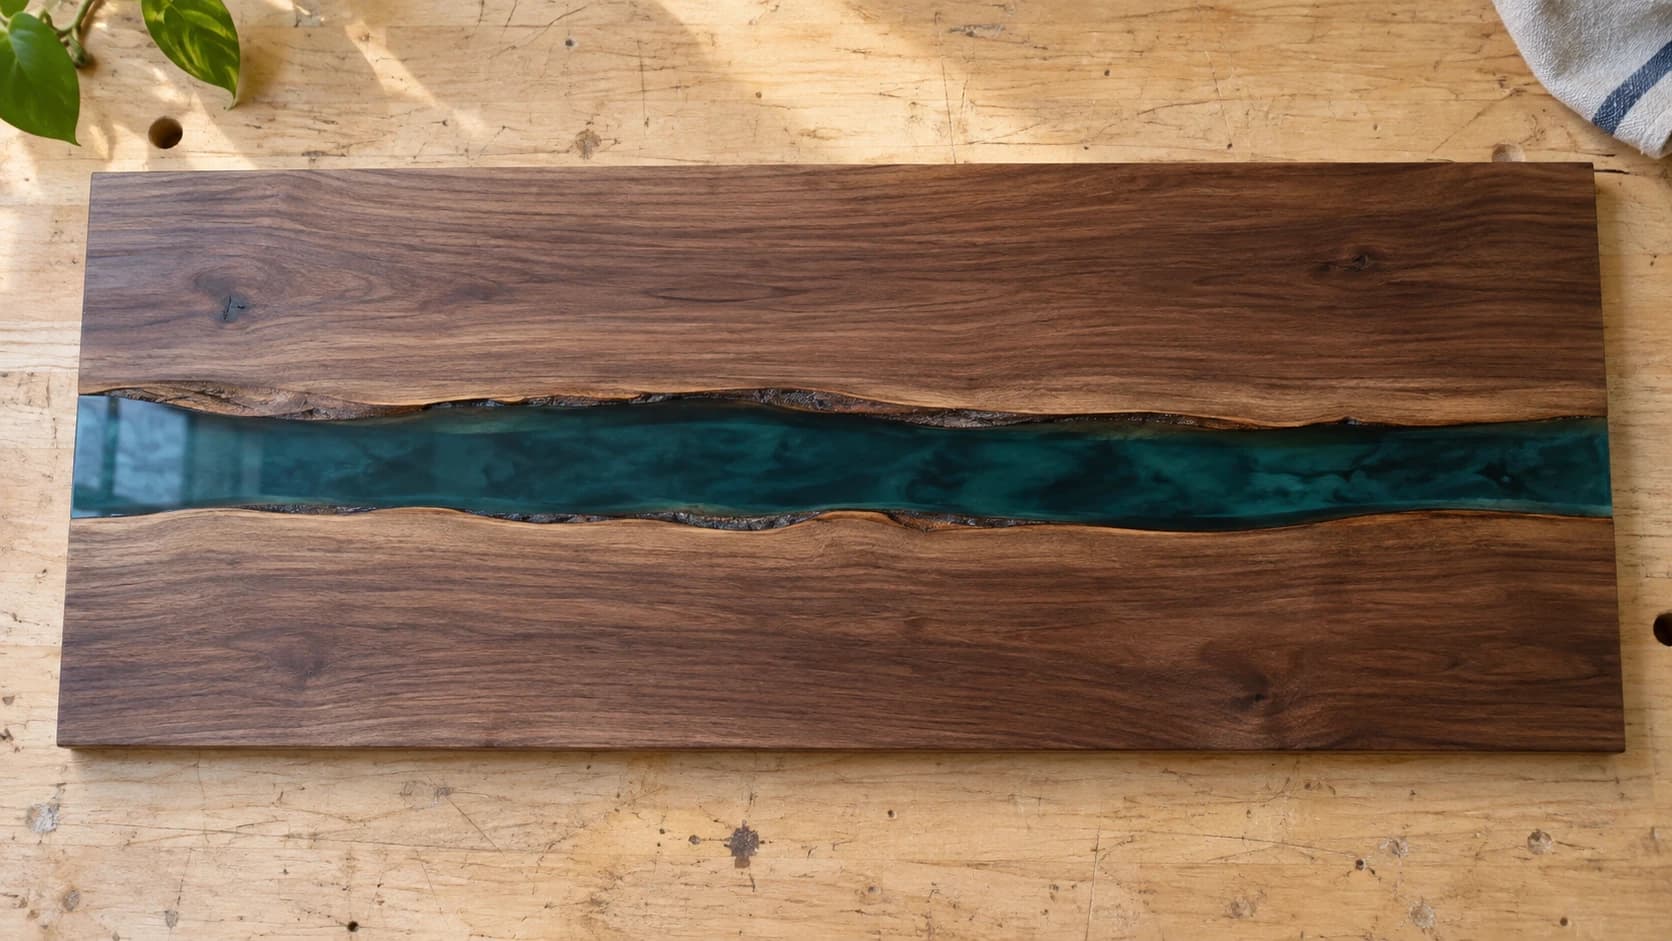
Somewhere in your scrap pile is a beautiful board with a problem. A knot that fell out, a crack running off one end, a void where a branch used to be. For years the answer was "cut around it." Resin flipped that: now the defect is the feature, and the boards sawmills used to burn sell for more than the clear stuff.
But resin and wood is one of those combinations where the first attempt tends to go wrong in the exact same handful of ways for everyone. Bubbles streaming up out of the wood for hours. Resin leaking out of the mold overnight. A river pour that got hot, yellowed, and cracked. All of it is preventable, and almost all of it is prevented before you ever mix the two parts.
Tip
Short answer: Seal the wood with a thin coat of resin first, use dry wood, use a deep-pour formula for anything thick, and never exceed the maximum pour depth printed on your resin's label. Those four habits prevent most resin-and-wood failures.
The Three Ways Resin Meets Wood
Every resin-and-wood project is one of three moves, and they stack. The skills from the first carry straight into the second and third.
| Project type | What it is | Difficulty | Resin needed |
|---|---|---|---|
| Filling voids and knots | Resin fills a defect the wood already has | Easiest | Small amounts, regular or deep-pour depending on depth |
| River boards and trays | Resin becomes a structural part of the design | Moderate | Deep-pour formula, real volume |
| Routed inlays | You cut a channel on purpose and fill it | Moderate, needs a router or CNC | Small amounts, tinted |
Start with fills. A filled knot uses only a small amount of resin, forgives mistakes, and teaches you sealing, tinting, and flattening on a board you were not emotionally attached to. A river board uses the same skills with more resin and higher stakes. An inlay adds toolpaths on top.
If you have never mixed resin at all, our beginner resin projects post covers the basics of measuring, mixing, and safety before you bring wood into it.
PRINT. CUT. CARVE.



- Multiple formats (SVG, DXF, PNG)
- Machine-tested designs
- Commercial licenses
Sponsored by PrintCutCarve.com
Before Any Pour: Dry Wood, Sealed Wood
These two steps are boring, which is why people skip them, which is why so many first boards fail.
Moisture content, honestly
Resin bonds to wood, not to the water inside it. Pour over wet wood and you get poor adhesion now and movement problems later, because the wood keeps shrinking after the resin has locked its shape in place. That is how rivers separate from their banks months after the pour looked perfect.
Supplier lumber is usually kiln-dried, which is a good start, but it still deserves a measurement against your resin's limit, since wood picks moisture back up in storage. The gorgeous live-edge slab from a guy on a local marketplace is the bigger gamble. Either way, a cheap moisture meter pays for itself on the first project. Your resin manufacturer publishes a maximum moisture content for substrates; check it and believe it. "It feels dry" is not a measurement.
Seal coat: the fix for bubble streams
Wood is full of air. Pour resin over raw wood and that air has nowhere to go but up, through your pour, for hours, long after you put the torch away. A knot or a punky void is worse: it can vent bubbles for the entire working time of the resin, and end-grain is basically a bundle of straws.
The fix is a seal coat. Brush a thin layer of resin over every surface the pour will touch, including inside the knots and down in the cracks, and let it cure per the manufacturer's schedule before the main pour. The seal coat takes the bubble hit on a layer thin enough that bubbles pop at the surface or stay invisible. Your main pour then goes over sealed, stable wood and stays clear.
Warning
Seal the inside of every void, not just the top face. An unsealed crack under your river is a hidden bubble factory, and the bubbles it releases surface in the middle of your finished pour.
Project One: Filling Knots, Cracks, and Voids
The gateway project. Take a board with character defects, fill them with tinted resin, flatten, done.
- Stabilize the defect. Dig out loose bark and crumbly material with a pick or chisel. Resin bonds to solid wood, not to debris.
- Tape the back. Cracks and knots usually go all the way through. Cover the underside with a tape that releases cleanly from cured resin, pressed down hard. Sheathing tape (the shiny housewrap tape) is the community favorite because resin does not stick to it. Ordinary paper masking tape can leak and may bond to cured resin, so keep it away from the pour.
- Seal, then fill. Thin seal coat in the void first, cure, then fill. For shallow defects a regular epoxy works; for a deep void, either use a deep-pour formula or fill in multiple layers per the label. Overfill very slightly, because you will sand it flush later.
- Tint deliberately. Black and deep translucent colors read as intentional. A drop of pigment goes a long way; mix it fully before pouring.
- Pop the surface bubbles. A quick pass with a torch or heat gun right after pouring, then again a few minutes later. Light passes, keep it moving, you are popping bubbles rather than cooking resin.
A board full of black-filled knots is a legitimately sellable product on its own, and you have now practiced every skill the river needs.
Project Two: River Boards and Trays
Same physics, bigger volume, one new problem: the resin is no longer contained by the wood. You have to build the container.
Dams and molds
A river pour needs walls that resin cannot escape or bond to. The options, in rough order of effort:
- Tape and scrap. Melamine or plywood scraps clamped around the blank, every seam sealed with sheathing tape, inside faces covered in the same tape. Cheap and works, but one lazy seam drains your pour onto the bench overnight.
- Silicone caulk on the seams. Belt and suspenders on top of the tape method. Run a bead along every inside corner and let it set before pouring.
- Reusable molds. HDPE sheet or silicone molds sized for boards, the two common mold materials because epoxy releases from them far more easily than from bare wood. Whether you still need a release agent depends on the resin and the mold, so follow both manufacturers' instructions rather than assuming. Worth it by your third board.
- Mold release. If any surface of your form is a material resin does bond to, coat it with a release agent made for epoxy. Do not improvise with random household stuff; a contaminated release can ruin the resin surface it touches.
Whatever you build, put it on a dead-level surface and check with a level in both directions. Resin finds level even when your bench is not, and a tilted pour gives you a river that is deep at one bank and starved at the other. Put a sacrificial sheet under everything anyway.
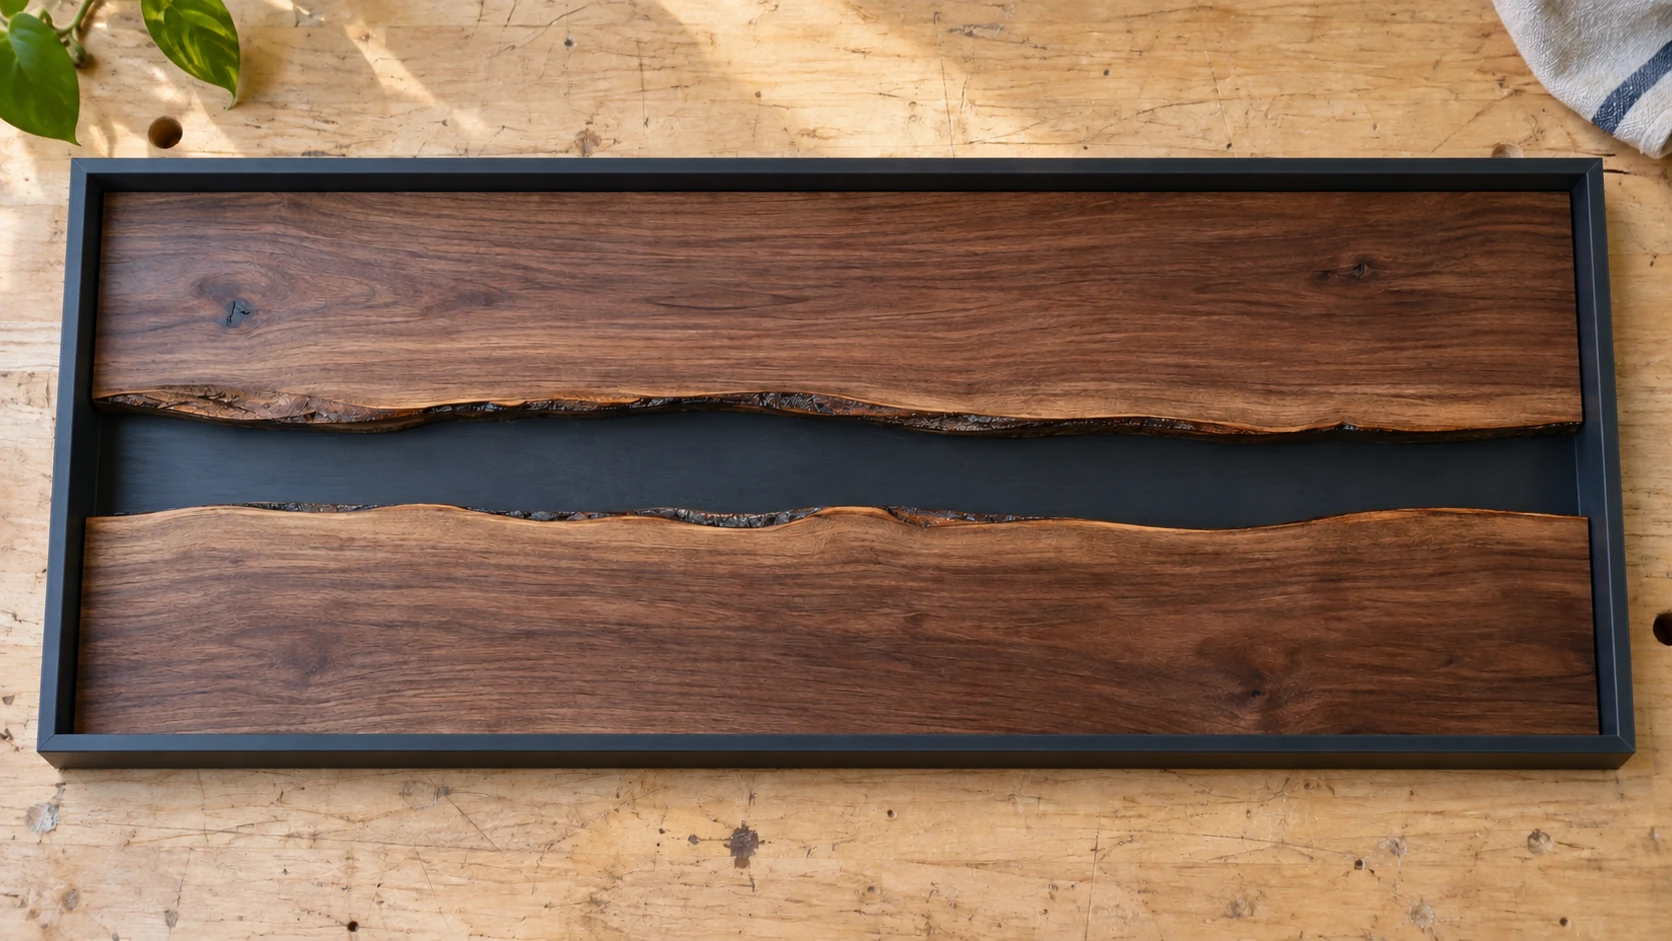
Dry-fit the wood before mixing resin. This layout shows the river channel clearly; sealing, release treatment and hold-downs still need to be prepared for the pour.
Deep-pour vs regular resin
This is the spec that ruins the most first rivers. Resin cures by an exothermic reaction: it makes heat, and heat makes it cure faster, which makes more heat. In a thin layer that heat escapes. In a thick mass it cannot, and the pour runs away: it yellows, cracks, and can shrink or distort in the mold.
| Regular (tabletop) resin | Deep-pour resin | |
|---|---|---|
| Max depth per pour | Shallow, per label | Much deeper single pours, per label |
| Viscosity | Thicker | Thinner, releases bubbles more easily |
| Cure speed | Faster | Slow, often days |
| Right job | Seal coats, shallow fills, flood coats | Rivers, deep voids, castings |
The numbers themselves live on your specific product's label and nowhere else. Formulas differ, and ambient temperature changes the math, since a warm shop pushes a big pour toward overheating. The rule that transfers between brands: never exceed the maximum pour depth on the label, and when in doubt, pour in multiple layers following the manufacturer's timing for layer-to-layer bonding.
Deep-pour resins trade speed for that depth. They cure slowly on purpose, which also gives bubbles time to rise out on their own. Plan for the mold to be occupied for days, not hours, and keep it dust-covered and level the entire time.
Info
Estimate your resin volume before mix day: length times average width times depth of the river cavity, then add a margin for soak-in and spillage. Coming up short mid-pour means a visible layer line at best. Stuck on the math or on which formula fits your pour depth? Ask Craft Chat, free with a signed-in account, and it will walk through your specific numbers.
Pour day
- Dry-fit everything and check level one last time.
- Mix per the label: exact ratio, full scrape-down of the container walls, and respect the minimum and maximum batch size.
- Tint, then pour slowly into the cavity, low to the surface.
- Torch the surface lightly for bubbles, then again on the schedule your working time allows.
- Cover against dust and walk away. Poking at a curing river is how fingerprints become permanent.
Project Three: Routed Inlay Channels
Fills use defects the wood gives you. Inlays cut the design on purpose: a routed channel in the shape of artwork, text, or a logo, filled with tinted resin and sanded flush. This is where a CNC router earns its keep, though a handheld router with a template does the same job.
The workflow:
- Get the artwork into vector form. Your router or CNC wants clean vector paths, not a JPEG. MonoTrace converts a sketch, logo, or any black-and-white artwork into a clean SVG for free, and that SVG becomes your routing template or CNC toolpath source. Bold, chunky shapes inlay far better than fine hairlines, so simplify the art before you trace it.
- Route the channel. Shallow works: you need enough depth for the resin to hold and read as solid color, not a canyon. Crisp channel walls give crisp inlay edges.
- Seal the channel. Same rule as everywhere else. Raw routed wood, especially freshly cut end grain inside the channel, will stream bubbles into a tiny pour where every bubble shows. Thin seal coat, cure, then fill.
- Overfill slightly and flatten. The meniscus at the channel edges can leave the cured fill sitting slightly low, and some formulations also shrink a little as they cure (your resin's data sheet will say). Fill just proud of the surface, then sand the whole face flush after full cure.
One extra trick: if your channel design has fine details, warm the resin bottles slightly per the manufacturer's guidance before mixing. Lower viscosity flows into detail better and releases bubbles faster.
Flattening and Finishing After Cure
Cured resin sitting proud of the wood has to come flush, and this stage decides whether the piece looks professional or like a craft fair accident.
- Rough flattening. A CNC or router flattening bit, a hand plane with a sharp blade, or coarse sandpaper on a rigid block. Resin machines fine but hates heat, so sharp tools, light passes.
- Sand through the grits in order. Skipping grits leaves scratches you will only see after the finish goes on, and they show worse in resin than in wood. Work up progressively and do not jump.
- The cloudy stage is normal. Sanded resin turns uniformly frosty. It comes back to clear with fine grits followed by polish, or under a film finish.
- Pick one finish for both materials. A film finish like a wipe-on varnish builds an even sheen across wood and resin together. Pure oil finishes feed the wood beautifully but do nothing for resin, so oiled boards usually get their resin polished separately first.
The grit discipline and sheen-matching here are the same craft as finishing any machined project. Our finishing guide for laser and CNC projects goes deeper on sanding schedules and finish choices, and nearly all of it applies to a river board.
Warning
If the board will touch food, use a finish explicitly rated food safe by its manufacturer, and follow your resin manufacturer's own statements about food contact for the cured resin itself. Claims vary between products; the label outranks the forum post.
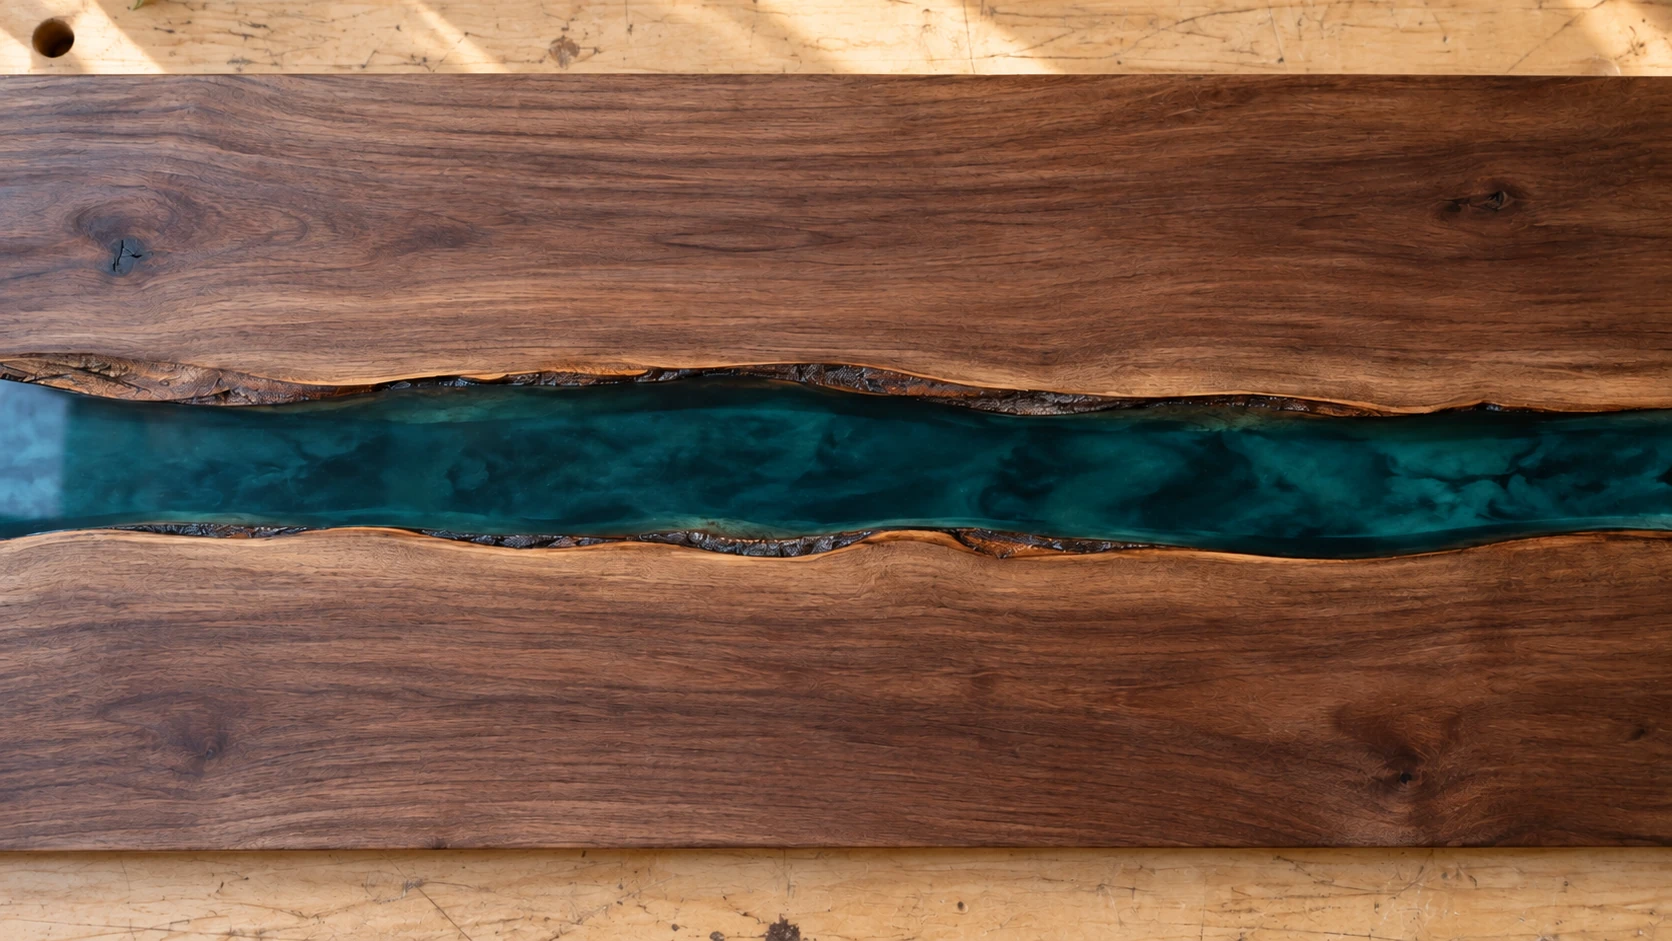
Follow the same grain and live-edge outlines from the dry fit to the finished piece. The close view makes the wood-to-resin boundaries easier to inspect.
What Beginners Get Wrong
The classics, from most common to most expensive:
- Skipping the seal coat. The single biggest source of ruined pours. Bubbles from the wood, forever.
- Pouring regular resin deep. Overheated, yellowed, cracked. Deep-pour formulas exist for a reason, and the label's max depth is a hard limit, not a suggestion.
- Wet or unstable wood. The pour looks perfect for a month, then the wood moves and the river lets go of the bank.
- Leaky dams. Discovered at 6 a.m. as a resin puddle with a bench glued to it. Tape every seam, then seal the seams again.
- Eyeballing the mix ratio. The resin stays soft and sticky and never fully cures. Measure exactly as the label says, by volume or weight as specified, and mix longer than feels necessary with a full scrape of the sides.
- Rushing the flattening. Sanding before full cure clogs paper and smears resin. Full cure per the label, then flatten.
Most of these are covered in gory detail in our common resin mistakes post, which is worth reading before your first big pour rather than after it.
Frequently Asked Questions
Can I use regular tabletop epoxy for a river board?
Only if you pour it in many thin layers, each within the label's max depth, with the manufacturer's specified timing between layers. It works, but it is slow, layer lines can show, and a deep-pour formula is the better tool for the job.
Why is my pour full of tiny bubbles hours after torching?
Often it is unsealed wood venting air into the resin, usually from a knot, a crack, or exposed end grain, and torching only fixes bubbles at the surface. The cure for that is a seal coat on every wood surface before the main pour. Vigorous mixing, a cold shop, or pouring too thick and too fast can also trap persistent bubbles, so rule those out too.
Do I have to use a CNC for resin inlays?
No. A handheld router with a template cut from your vector artwork does the same job, and even a chisel works for simple shapes. The CNC buys you precision and repeatability, not possibility.
Start With the Ugly Board
Pull the worst board out of your pile, the one with the knot you have been cutting around, and make it your first fill. Cheap lesson, real result, and every skill in it scales straight up to the river.
When you get to the inlay stage, run your artwork through MonoTrace to get a clean, router-ready SVG for free. And when a pour does something weird at 9 p.m. and the forums disagree with each other, Craft Chat is there to talk you through it with your actual materials and numbers in front of you.
Related Tools
Ready to try these tools?
Sign up free, no credit card required. Free tools available immediately.
Start Free