

Common Resin Mistakes and How to Fix Them
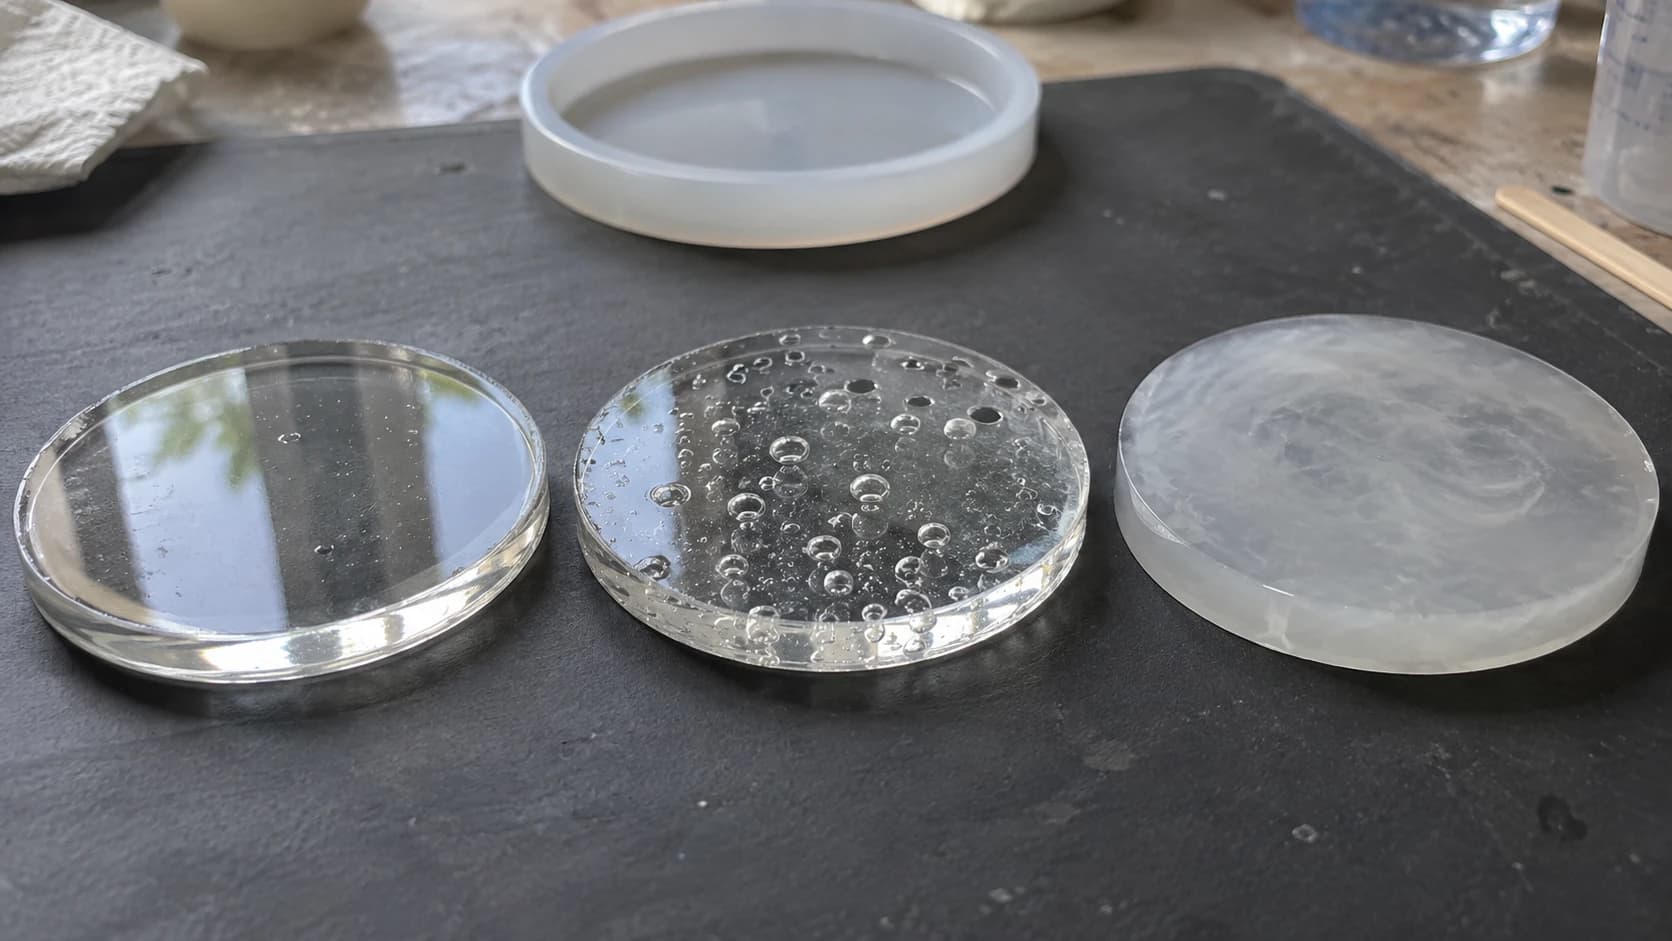
Resin is the only craft where you can do everything right and still not know if it worked for another 48 hours. You mix, you pour, you walk away, and then you come back to find a beautiful glassy coaster or a tacky puddle of regret.
The frustrating part is that resin failures all look dramatic but almost all come from a short list of causes. Ratio, temperature, moisture, air, and patience. That's basically the whole list. Once you can look at a bad pour and name which of those five went wrong, the fixes get boring in the best possible way.
Here's how to read your failures.
Start Here: Match the Symptom
Find what your piece is doing, then jump to that section. Resin lies to you constantly, so the symptom matters more than what you think you did wrong.
| What you're looking at | Usual culprit |
|---|---|
| Whole piece is soft, tacky, or dents with a fingernail | Off ratio, or not fully cured yet |
| Sticky patches with clear areas between them | Under-mixed, most often from the cup walls |
| Slick waxy film that wipes to a smear | Amine blush from a humid or cool cure |
| Bubbles everywhere, especially around inclusions | Cold resin, fast stirring, or porous items outgassing |
| Cloudy, milky, or foggy | Moisture, in the mold, in the mix, or in the air |
| Cracked, warped, or the mold got hot | Poured deeper than the product allows |
| Yellowed after a few weeks or months | UV exposure, heat during cure, or a resin without UV inhibitors |
| Dimples, dust specks, fingerprints | Contamination and demolding too early |
One rule before any of it: resin cures on its own schedule, not yours. Touch-dry is not cured. Most epoxies reach full hardness days after they stop feeling wet, and a piece that seems slightly soft on day one is often perfectly fine on day three. Check your product's stated cure time before you declare anything a failure.
PRINT. CUT. CARVE.



- Multiple formats (SVG, DXF, PNG)
- Machine-tested designs
- Commercial licenses
Sponsored by PrintCutCarve.com
The Whole Piece Is Soft, Bendy, or Tacky
This is the big one, and it is almost always the ratio.
Two-part resin isn't a paint that dries. It's a chemical reaction between resin and hardener, and both halves have to show up in the right amount. Get it wrong and there are leftover molecules with nothing to bond to. Those molecules stay soft forever. No amount of waiting, sunlight, or hoping will fix a genuinely off-ratio pour.
The trap is that ratios are not standardized. Some products mix 1:1, some 2:1, some 3:1. Some are measured by volume and some by weight, and the two numbers are completely different for the same product because resin and hardener have different densities. A 1:1 by volume resin measured 1:1 on a scale is off ratio.
How to fix it going forward:
- Read your specific product's instructions every time you open a new brand. Not a video, not a forum post. The bottle or its technical data sheet.
- If it says by weight, use a digital scale with a tare function. If it says by volume, use graduated mixing cups and read them at eye level on a flat surface.
- Mix at least the minimum batch size the manufacturer lists. Tiny batches are the easiest to get wrong, and some resins cure poorly below a certain volume.
- Don't "eyeball a splash more hardener." Extra hardener does not mean a harder cure. It means a softer one.
Can you rescue the piece? If it's a thin coating on a solid object, you can often scrape and peel the soft layer off, clean the surface thoroughly, let it dry completely, and recoat with a correctly measured batch. If it's a cast piece that's soft all the way through, it isn't recoverable. Start over and dispose of the failed piece the way your resin's instructions and your local waste rules require. Pouring fresh resin over a soft layer just traps the problem under a nice shiny lid.
The other cause worth ruling out is cold. Resin cures slowly and sometimes incompletely when the room is below the manufacturer's recommended range, and a cold garage in winter has ended a lot of otherwise perfect pours. If your workspace runs cool, warm the space itself for several hours before and after the pour rather than just warming the bottles.
Sticky Patches, or a Weird Waxy Film
Two different problems that get confused constantly.
Sticky patches with cured resin in between means the mix wasn't homogeneous. Almost always this is the cup. You stir the middle beautifully and leave a ring of unmixed resin clinging to the wall and the bottom corner, then you scrape that ring into your mold at the end of the pour.
The fix is the double cup method. Mix thoroughly in your first container, scraping the sides and bottom with a flat stir stick, then pour the whole thing into a second clean container and mix again. Whatever was hiding on cup one's walls gets fully mixed in cup two. It costs you one extra cup and eliminates most sticky-spot failures.
While you're at it, stir slowly and deliberately. Whipping it does not mix it faster. It just adds air.
Tip
Use a flat stir stick with a square edge, not a round one. A flat edge actually scrapes the cup wall. A craft stick or a silicone spatula works. Wire whisks and drill mixers are for large volumes and belong nowhere near a small art pour.
A slick, waxy, sometimes greasy film across an otherwise hard surface is different. That's likely amine blush, a byproduct that can form on curing epoxy in cool or humid conditions. It isn't uncured resin, and sanding it just smears it around and clogs your paper.
Wash it off first. Warm water and a little dish soap on a clean cloth, then rinse well and dry completely. Then sand or recoat. If you skip the wash, your next coat will have adhesion problems and you get to do the whole thing twice.
Bubbles
Some bubbles are cosmetic. Some are structural. The difference is where they came from.
Air you introduced. Fast stirring, scraping the mix in aggressively, and pouring from too high all whip air into the resin. Stir slowly, pour in a thin steady stream close to the surface, and let the mixed batch sit for a few minutes before pouring so the big bubbles can rise.
Cold resin. Cold resin is thick, and thick resin will not let bubbles climb out. Warming the sealed bottles in a bath of warm water thins the resin and helps enormously. Keep water out of the resin itself, dry the bottles completely before opening, and let warmed resin settle before pouring.
Outgassing from your inclusions. This is the one that makes people crazy. You pop every bubble, walk away, come back an hour later and the piece is full of them again. Wood, dried flowers, paper, glitter with rough edges, seashells, and anything porous holds air in tiny voids and slowly burps it into your resin as it cures.
The fix is to seal porous items before you cast them. A thin brush-on coat of the same resin, cured before the main pour, works well. So does a light spray sealer, applied thinly and allowed to dry fully. Either way, the sealed item goes in dry.
Popping the bubbles you do get: quick passes with a heat gun on a low setting or a small torch, held moving, several inches back. Heat lowers the surface tension for a moment and the bubbles break. Never park the heat in one spot, never let a flame touch the resin, and stop once the surface goes clear. A hair dryer is a poor substitute because it blows dust and pushes the resin around more than it heats it.
Warning
Torch work happens near flammable materials, plastic molds, and freshly poured resin. Keep the flame moving, keep it away from the mold edges, and never use an open flame in a small unventilated room where resin vapor is present. If you are unsure, use a heat gun instead.
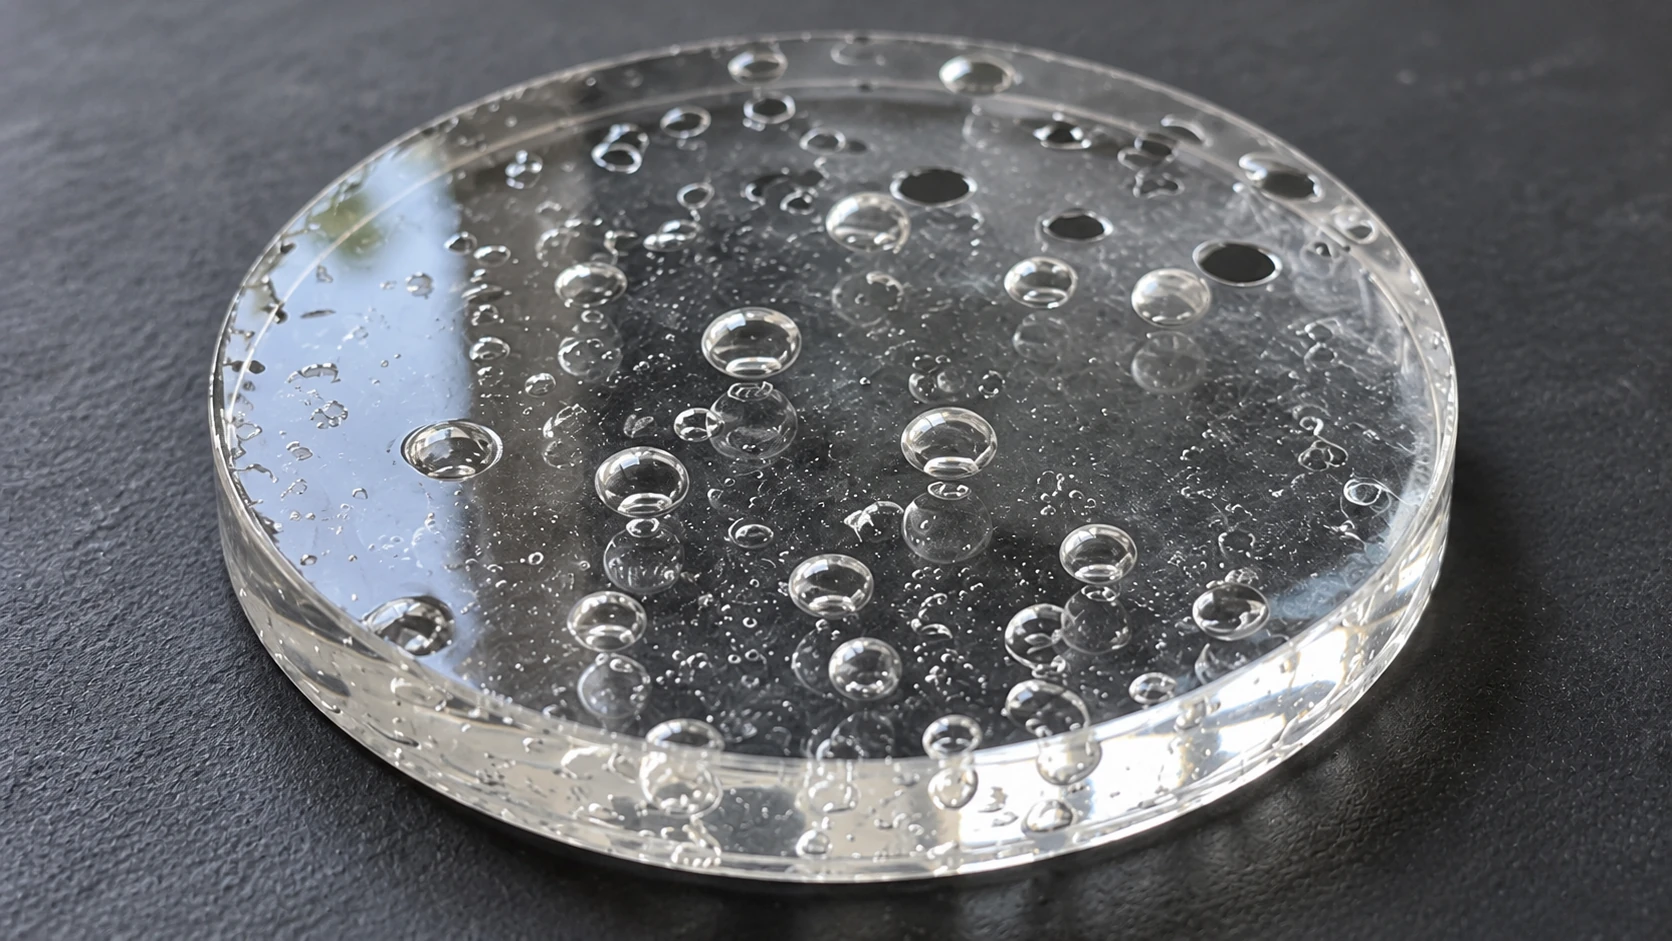
Round bubbles inside a casting and open surface pits can look similar at a glance. Inspect the surface as well as the depth before deciding what to try on the next pour.
Cloudy or Milky Resin
Cloudiness is almost always water. Resin and moisture do not get along.
Common sources, roughly in order of how often they catch people:
- Damp mold. A silicone mold washed and not fully dried inside its detail.
- Humid air. Pouring on a muggy day, or in a basement, or with a humidifier running.
- Condensation from warming bottles in water and opening them while still cool and wet.
- Wet or unseasoned inclusions. Fresh flowers, damp wood, anything not properly dried.
- Contaminated stir sticks, cups, or a workspace where someone just wiped a surface with a wet cloth.
Dry everything. Molds get a full dry, ideally overnight. Bottles get wiped and brought to room temperature before opening. Flowers get properly dried and pressed, not just left on a windowsill for two days. If your space is genuinely humid, run a dehumidifier for a few hours before and during the pour.
There's a second kind of cloudiness that isn't moisture: too much pigment. Mica powder, alcohol ink, and pigment paste all have a maximum load, and past it the resin turns chalky and can cure soft because the additive is diluting the chemistry. If you want opaque color, use a resin-compatible colorant at the manufacturer's recommended percentage rather than just adding more.
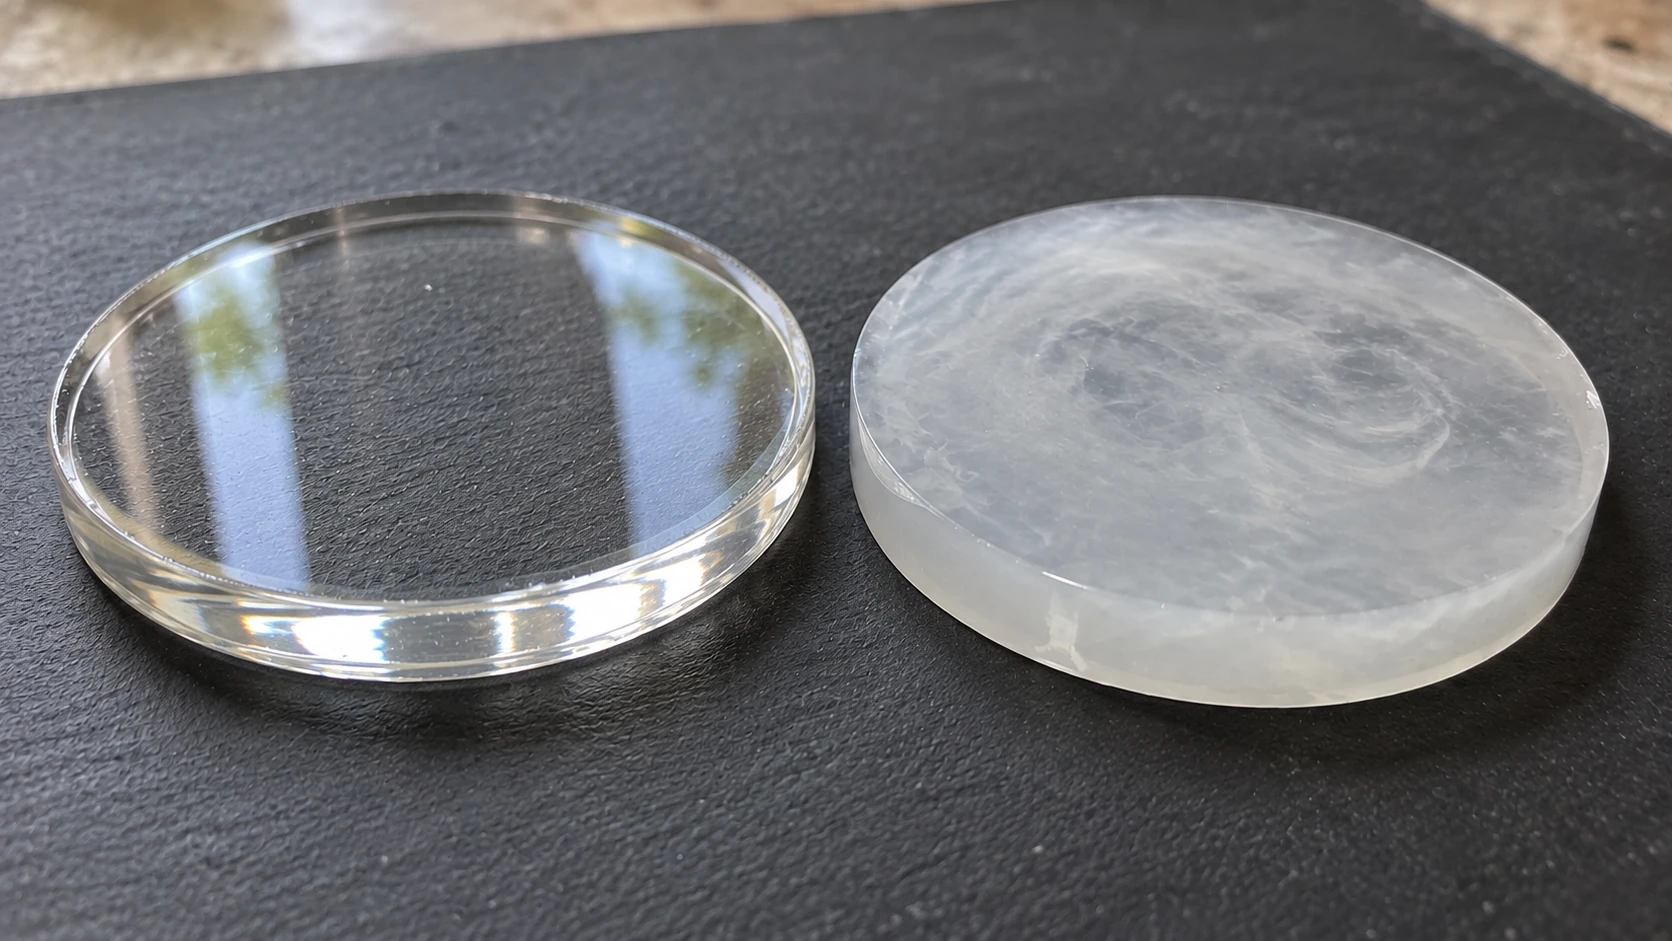
Compare how clearly the work mat shows through each disc. Cloudiness is a visible symptom; a photograph alone cannot tell you which mixing, moisture or curing issue caused it.
It Cracked, Warped, or the Mold Got Hot
Curing epoxy is exothermic, meaning it generates its own heat. In a thin coat that heat dissipates harmlessly. In a deep mass it compounds, because heat speeds the reaction, which makes more heat, which speeds the reaction further.
Runaway exotherm is the source of cracked castings, yellowed centers, warped molds, and in serious cases smoking resin and a container hot enough to burn you. This is not a cosmetic problem. It's the most acute heat-related hazard in a beginner resin project, and it deserves the same respect as the skin and vapor precautions below.
The cause is nearly always using the wrong product for the depth.
| Type | What it's for | Where people go wrong |
|---|---|---|
| Coating / tabletop resin | Thin surface coats, artwork, sealing | Poured deep into a mold, where it overheats |
| Deep pour / casting resin | Thicker molds and castings | Used as a thin topcoat, where it may stay soft or cure slowly |
| UV resin | Tiny pieces, quick jewelry, small fills | Poured too thick for the light to reach the bottom |
Every casting resin lists a maximum pour depth and a maximum batch volume. Those are limits, not suggestions. If you need more depth, pour in layers, waiting for each layer to reach the manufacturer's recommended stage before adding the next.
Two more habits that help: don't leave mixed resin sitting in the cup, since a deep column of resin in a narrow cup heats up far faster than the same amount spread in a mold. And don't pour a big batch in a hot room, which stacks ambient heat on top of the reaction heat.
Warning
If a cup or mold gets noticeably hot, starts steaming, or gives off a sharp smell, do not pick it up with bare hands and do not put it in the trash. Move it outdoors or onto a non-flammable surface away from anything that can burn, ventilate the space, and let it finish reacting on its own.
It Turned Yellow
Some yellowing is unavoidable over long enough time. Most of what people see in a few weeks is not.
UV exposure is the main driver. A piece sitting in a sunny window will yellow faster than the same piece in a drawer. Resins sold with UV inhibitors slow this down but do not stop it, and no epoxy is truly permanently clear in direct sun.
Heat during cure is the second driver. That over-deep pour that got hot in the middle will often come out with a yellow core even though the edges are clear.
What helps: buy a resin that lists UV stabilizers if clarity matters to your project, keep pours within the depth limits so they cure cool, store your bottles closed and out of light, and use up old hardener rather than keeping a half bottle for two years. Hardener that has yellowed in the bottle will not produce a water-clear casting.
If a finished piece will live outdoors or in a window, plan for it. A tinted or opaque design ages far more gracefully than a crystal-clear one.
Dust, Dimples, and Fingerprints
The unglamorous failures. Your chemistry was perfect and the surface still looks bad.
Dust settles on wet resin for hours. Cover the piece as soon as the surface stops needing attention. A cardboard box over the top, propped so it doesn't touch, is all it takes. Also stop sweeping, sanding, or brushing anything in the same room while resin is curing.
Dimples and craters usually mean contamination on the surface below: silicone spray, mold release, hand lotion, or the oils from bare fingers on a substrate you're coating. Clean and degrease the surface before you pour, and handle it with gloves from that point on.
Fingerprints and warping come from demolding too early. Firm is not cured. If you can dent it, flex it, or leave a print in it, it needs more time in the mold. Pulling a piece early also stretches the shape slightly, which is why some castings never quite sit flat afterward.
Sanding scratches that won't polish out usually mean you skipped grits. Work up through the grits in order without jumping, and wet sand where your product allows it. Wet sanding cuts cleaner and keeps the dust down, which matters for the next section.
The Safety Mistakes Nobody Notices Until It's Too Late
This is the part of resin that gets glossed over because it isn't fun, and it's the part most worth getting right. None of it is difficult. All of it is habit.
Gloves, every time. Nitrile is the usual recommendation and latex is not a substitute, but glove material should match the product, so check your resin's safety data sheet. Change them the moment they get resin on them rather than working on with sticky fingers, and peel them off without touching the outside. Repeated skin contact with uncured epoxy can cause allergic sensitization, and sensitization is not something you recover from. People genuinely lose the hobby this way. Uncured resin on skin comes off with soap and water, not with solvents, because solvents can carry the resin through your skin rather than removing it.
Ventilation, every time. "Low odor" describes the smell, not the chemistry. Work with real airflow: a cross breeze, an open window with a fan pulling air out, or a garage with the door up. If your workspace is small or enclosed, or if you're pouring frequently, add a respirator, and choose the cartridge based on your resin's safety data sheet rather than assuming one type covers everything. It also has to actually fit and seal to do anything.
Eye protection. Splashes happen when you're scraping cups and demolding stiff silicone. Uncured resin in an eye is an urgent problem, not an inconvenient one.
Sanding dust needs its own precautions. Only sand fully cured resin, wet sand when the product allows, and wear appropriate respiratory protection when you dry sand. Cured resin dust is a fine particulate you do not want in your lungs.
Skin, food, and kids. Keep uncured resin off skin, keep the entire process away from food prep surfaces, keep tools and molds dedicated to resin only, and keep the workspace closed to children and pets while anything is curing.
Disposal. Never pour uncured resin down a drain or into the ground. Mix leftover A and B together in small amounts only, since a thick mass in a cup can overheat badly, then let the waste cure fully and dispose of the hardened block according to your product's instructions and local rules. Wipe tools before the resin sets so they can be reused.
If you are setting up a dedicated space for this, our maker workshop setup guide covers ventilation and workspace layout in more detail. Resin is one of the crafts that most rewards a proper bench and airflow.
When You Genuinely Can't Tell What Went Wrong
Sometimes the symptom is ambiguous. A tacky surface could be amine blush, an under-mixed batch, or a resin that just needs another day. The rescue is different for each, and choosing wrong wastes the piece.
That's a good moment for Craft Chat, the AI assistant built into Craftgineer. You can upload a photo of the failed pour and describe the specifics: the resin type, the ratio you measured and how you measured it, the depth, the room temperature, the humidity, what you cast, and how long ago you poured. It will work through the likely causes with you and tell you whether the piece is salvageable or scrap.
The same detail rules apply as with any troubleshooting. "My resin is sticky" gets you a list of everything on this page. "I mixed 100g resin to 50g hardener on a scale for a product that specifies 2:1 by weight, poured 15mm deep in a silicone mold, room was cool and damp, it's been 36 hours and the whole thing dents under a fingernail" gets you an actual answer. Our guide on using AI chat to learn maker skills has more on asking questions that get useful replies, and the AI troubleshooting walkthrough covers the photo upload workflow.
Craft Chat is free to use with a signed-in account and runs on monthly chatbot messages rather than credits, so it costs nothing to describe a failed pour and find out whether to sand it or bin it.
The Pre-Pour Checklist
Tape this above your resin bench:
- Room is within the product's temperature range, and has been for a few hours
- Humidity is reasonable, mold is bone dry, inclusions are dry and sealed
- Correct resin type for the pour depth, and the depth is within the stated limit
- Ratio confirmed from the actual bottle, by weight or by volume as specified
- Batch is at or above the minimum volume, and at or below the maximum
- Gloves on, ventilation running, eye protection within reach
- Two mixing cups ready, flat stir stick, slow mixing, scrape the walls
- Surface degreased, work area clean, dust cover ready to go over the piece
- Leftovers get mixed and cured out, not poured down a drain
- Nobody touches it until the manufacturer's cure time has passed
Frequently Asked Questions
Can sticky resin ever be saved?
Depends where the stickiness is. A tacky surface film often cleans up: wash off any blush, scuff the surface, and apply a correctly measured coat over it. A piece that is soft all the way through is off ratio and will never harden. Recast it.
How long until I can demold?
Follow the demold time on your product, not a number from the internet. Different products vary a lot. The practical test is that it should be rigid and leave no mark when you press a gloved fingertip on a hidden edge. If in doubt, wait another day. Nothing bad happens from leaving it in the mold longer.
Why do bubbles keep coming back after I pop them?
Because they aren't the same bubbles. Something porous in the casting is still releasing air. Seal wood, flowers, paper, and shells with a thin cured coat before the main pour, and let that seal coat fully harden first.
Can I use a hair dryer instead of a torch?
It's the weakest option. A hair dryer moves a lot of air, which brings dust to your wet surface and can ripple the resin, while delivering relatively little of the heat that actually pops bubbles. A heat gun on low, kept moving, is the better swap if you'd rather not use a flame.
Is any resin actually food safe?
Treat that claim carefully. A product is only suitable for food contact if the manufacturer specifically states it, for the specific use, and only when cured exactly to their instructions with no added colorants or glitters that break those conditions. Marketing language on a listing is not a certification. When in doubt, keep resin off surfaces that touch food.
Do I really need a respirator, or is a window enough?
Ventilation is the baseline requirement in every case. A respirator is the sensible addition when your space is small or enclosed, when you pour often, or when you're working with larger volumes, with the cartridge chosen to match what your product's safety data sheet lists. For sanding cured resin, respiratory protection against dust is separate and also worth having.
Go Pour Something That Works
The good news about resin is that the failure list is short and every item on it is preventable. Measure correctly, control the temperature and moisture, respect the depth limit, mix slowly in two cups, and give it the full cure time. That alone eliminates the vast majority of ruined pours.
Better still, every failure teaches you something specific. That cloudy coaster tells you your molds aren't drying properly. That bendy casting tells you to check whether your resin measures by weight or volume. Keep the duds on a shelf for a while and label what went wrong. It's a surprisingly effective reference library.
And when a pour goes wrong in a way you can't name, take a photo, open Craft Chat, and describe exactly what you did. Diagnosing it correctly the first time is what turns a ruined afternoon into a one-line fix.
Ready to try these tools?
Sign up free, no credit card required. Free tools available immediately.
Start Free