

How to Make a Wooden Advent Calendar on a Laser or CNC
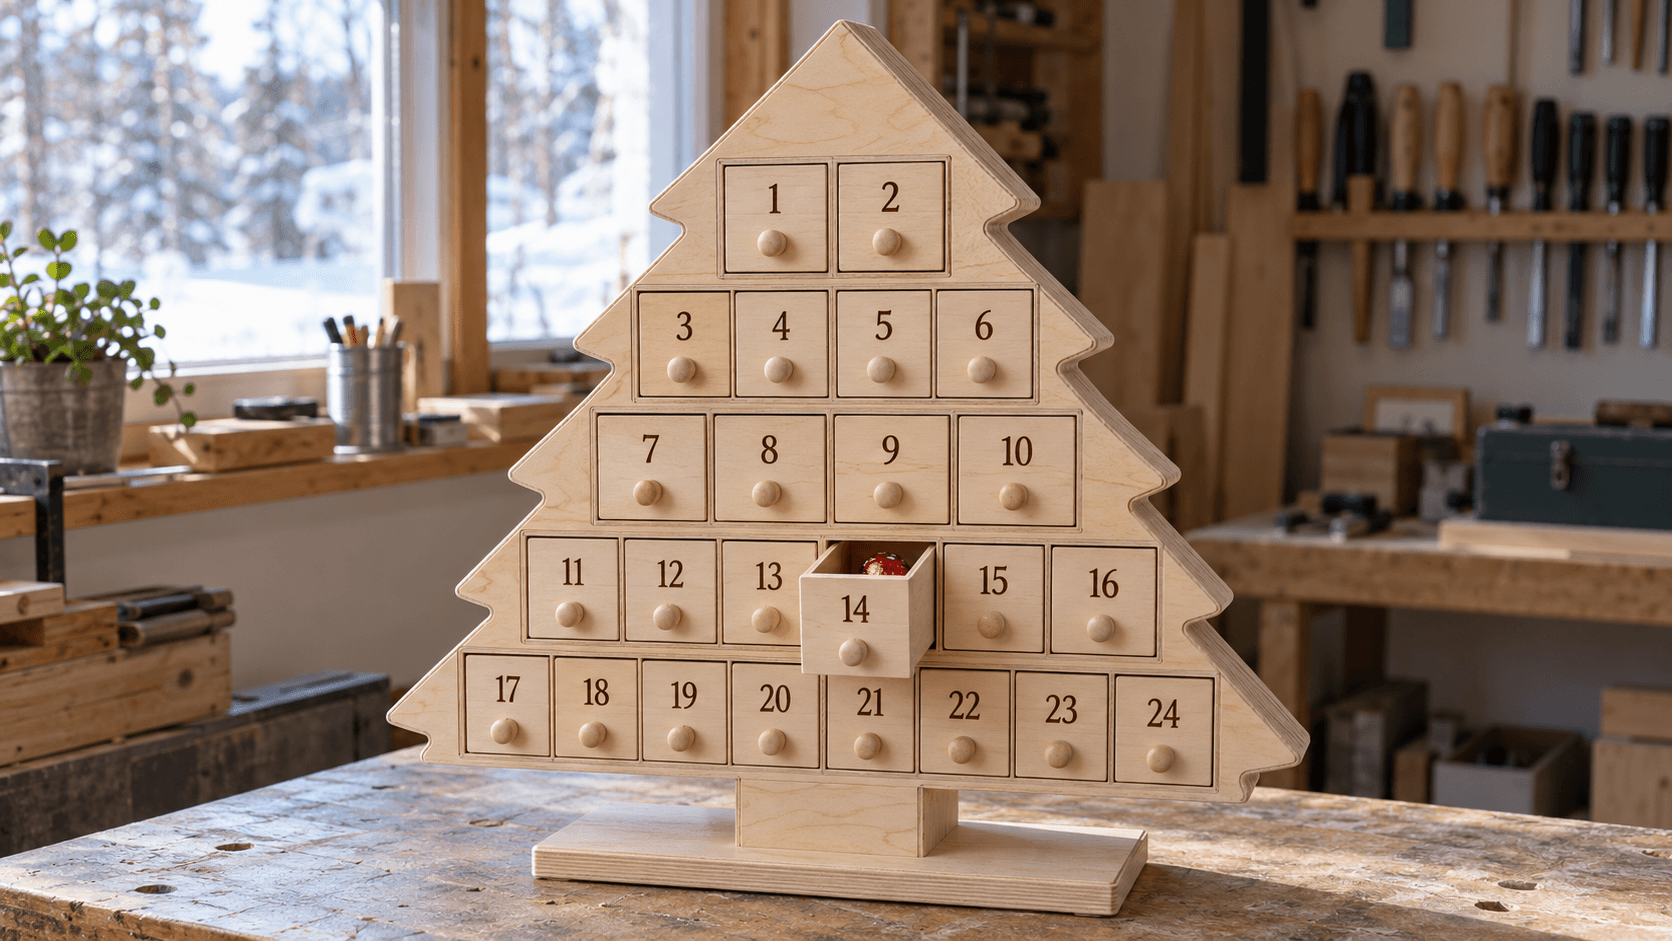
Store-bought advent calendars have a short life. The cardboard doors tear on day three, the chocolate tastes like the cardboard, and on December 26 the whole thing goes in the recycling.
A wooden one is the opposite. It comes back out every year, it gets refilled with whatever the family actually likes, and it quietly becomes part of the holiday. That's also why they sell. People will pay for something they get to keep using.
The catch is timing. An advent calendar is useless on December 2, so this is a project you start in early November, not the week before.
Pick a Design You Can Actually Finish
There are three common shapes, and they differ mostly in how many pieces you have to cut and glue.
| Design | Pieces to cut | Glue-up time | Good for |
|---|---|---|---|
| Peg board with hanging tags | About 26 | An evening | First attempt, small lasers |
| Doors on a flat panel | About 50 | A weekend | Wall-mounted, mostly 2D |
| Box frame with 24 drawers | 120 or more | Several evenings | Gifts, selling, showpieces |
The peg board is the honest beginner version. A backboard shaped like a tree, 24 small pegs or hooks, and 24 numbered tags that each hold a little bag or envelope. One sheet of plywood, almost no assembly.
Drawers are the version people photograph. Each drawer is a tiny box, so 24 drawers means roughly 120 small parts before you count the frame. Budget the time honestly, because sanding 120 parts is where the enthusiasm usually runs out.
Size the Openings Around the Treat
Decide what goes inside before you draw anything. A wrapped chocolate needs maybe 1.5 inches (38 mm) of drawer. A small toy, a rolled-up note, or a pair of earrings needs more.
A common mistake is designing a gorgeous frame and then discovering the treats don't fit. Buy a few of the fillings first and measure them.
Tip
Make one drawer before you cut all 24. Check the fit, the slide, and the knob hole. Fixing a drawing costs nothing. Fixing 24 cut drawers costs a sheet of plywood.
Laser vs CNC for This Project
Both work, and they suit different parts of the build.
A laser shines on the small stuff: thin drawer parts in 3 mm (1/8 in) plywood, finger-jointed corners, and engraved numbers. If you've never designed box joints, our guide to laser-cut finger joint boxes covers the kerf and fit details that matter here.
A CNC router is better for a thick, sturdy frame: 12 mm or 1/2 in stock, rounded edges, maybe a carved star on top. Drawer parts on a CNC are possible, but tiny pieces need tabs or good hold-down, and they take a long time to cut.
Plenty of makers split the work: CNC the frame, laser the drawers and numbers.
Plan the Sheet Before You Cut
A drawer calendar is mostly repeated rectangles, which makes it a perfect job for a cut list. Enter the parts once in CutPlan (24 drawer fronts, 48 sides, 24 backs, 24 bottoms, plus the frame), add the sheet sizes you own, and it lays them out with the kerf or bit diameter you set.
That matters more than it sounds. A calendar like this can eat most of a 2 by 4 foot sheet, and seeing the layout up front tells you whether you need a second sheet before you're halfway through cutting. Planning is free; downloading the layout files needs a paid plan.
If you're new to cut lists in general, how to make a cut list walks through the thinking.
Numbers and Decoration
The numbers are what make it an advent calendar, so give them some thought.
- Pick a readable font. Thin script looks lovely on screen and turns to mush at half an inch tall. Our fonts for laser and Cricut post has picks that hold up at small sizes.
- Engrave rather than cut. Engraved numbers on the drawer fronts are fast and never fall out.
- Keep the style consistent. Same font, same size, same position on every front.
For a topper or decorative panel, describe what you want in Vector Studio, for example "a simple five-pointed star with a scalloped border," and you get an SVG to engrave or cut. A family name or monogram on the top rail makes it a personal gift; the Monogram Generator handles that for free.
Assembly and Finish
Dry-fit everything before glue. Sand the drawer edges lightly so they slide, and keep finish off the sliding faces, since even a thin coat can make a snug drawer stick.
Finish it in a food-safe product if candy will sit loose in the drawers, or have people wrap the treats. Our finishing guide covers options for engraved plywood.
Warning
Solid-wood panels glued in tight can crack as the wood moves with the seasons. Plywood is far more stable, but leave a hair of clearance anyway so a drawer never binds.
If You Plan to Sell Them
Advent calendars have to arrive before December 1, so the selling window closes early. Work back from that date using your production time and shipping estimate, and you'll likely stop taking orders sometime in the last week of November. Make a couple ahead, photograph them early, and close custom orders by mid-November.
Personalization is where the margin is. A blank calendar competes with every store; one with the family name on the top rail doesn't. Our pricing custom orders guide helps you charge properly for that extra step.
Start with the cut list in CutPlan and you'll know exactly how much plywood to buy this weekend.
Keep reading

Related Tools
CutPlan
Plan cuts for sheet materials with parts, layouts, and cut sequences; export reports and sheet drawings.
Plan required for downloads
Vector Studio
Generate SVG artwork from a written prompt and selected style.
Monogram Generator
Create split or classic monograms with font and frame choices.
Ready to try these tools?
Sign up free, no credit card required. Free tools available immediately.
Start Free