

Impressive 3D Prints That Look Way Harder Than They Are
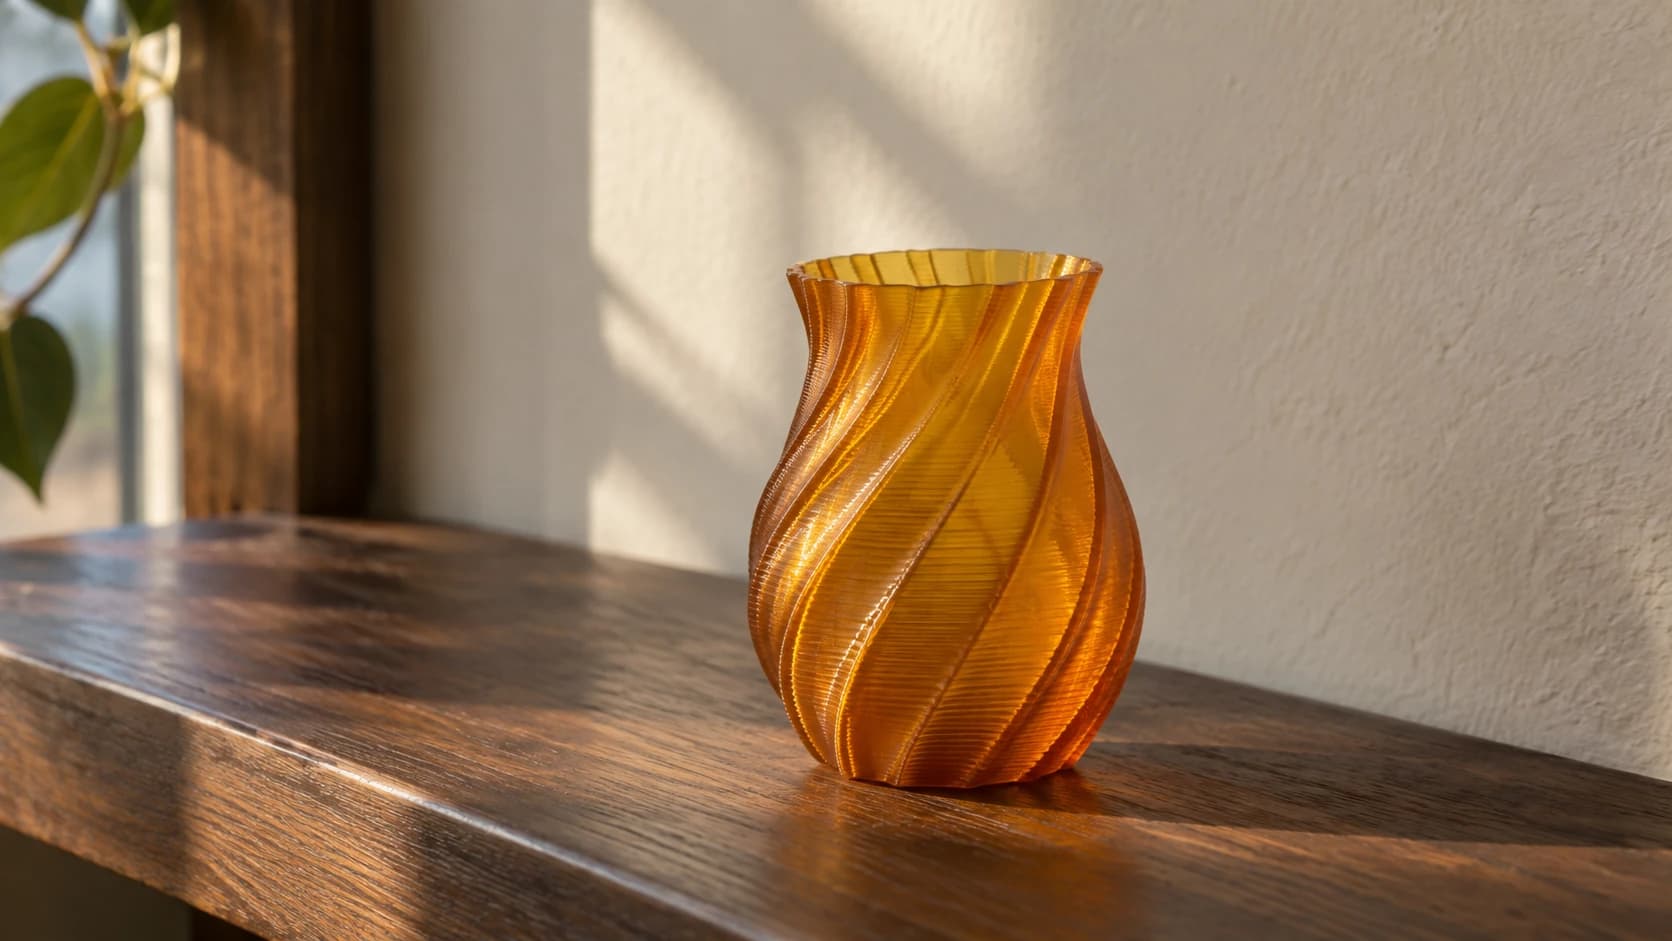
Somebody picks up a print off your bench, turns it over, and says "wait, you made this?" That moment is the entire reason a lot of us keep buying filament.
The frustrating part is that the prints which get that reaction never seem to be the ones you sweated over. The bracket you spent an evening modeling gets a polite nod. The thing you printed while making dinner, with default settings, gets passed around the room.
There is a pattern in which prints land. Almost none of them require advanced modeling, tuned profiles, or an expensive machine. They require knowing which trick is doing the work.
Impressive Is Usually a Trick
Every print that makes people go quiet is exploiting one of about five things:
- Geometry that looks impossible but prints in one piece with no supports
- Color placed where a printer normally cannot place it
- Light passing through plastic at a controlled thickness
- Depth and shadow from physical layers rather than a rendered image
- Surface texture that hides the fact it is plastic at all
None of that is skill in the sense of hours at a keyboard. It is picking a project whose difficulty lives in the design file, not in your hands. Your job is to load the right filament and not let the first layer fail.
PRINT. CUT. CARVE.



- Multiple formats (SVG, DXF, PNG)
- Machine-tested designs
- Commercial licenses
Sponsored by PrintCutCarve.com
The Single-Wall Spiral
Vase mode is the highest ratio of "looks expensive" to "took effort" in the entire hobby. Your slicer prints the object as one continuous spiraling wall with no infill, no seam, and no layer start marks.
Because there is no seam, the surface looks machined rather than printed. Because there is no infill or top surface, it prints fast and uses very little material. Because a single wall picks up light, twisted and faceted shapes catch highlights that flat-sided prints never do.
What to print in it: planters, lampshades, pen cups, twisted vessels, wavy bowls, textured candle holders. Anything that is essentially a closed shape rising off the plate.
Two things to know. Vase mode parts are single-wall thin, so they are decorative, not structural. And a default single-wall print is often not reliably watertight, so test one before trusting it or just drop a nursery pot or glass insert inside a planter.
Tip
Vase mode looks best in matte, silk, or dual-color filament, because the continuous wall shows off sheen and color shift with nothing breaking it up. A silk gold twisted vessel off an entry-level printer can easily read as ceramic or metal from across a room.
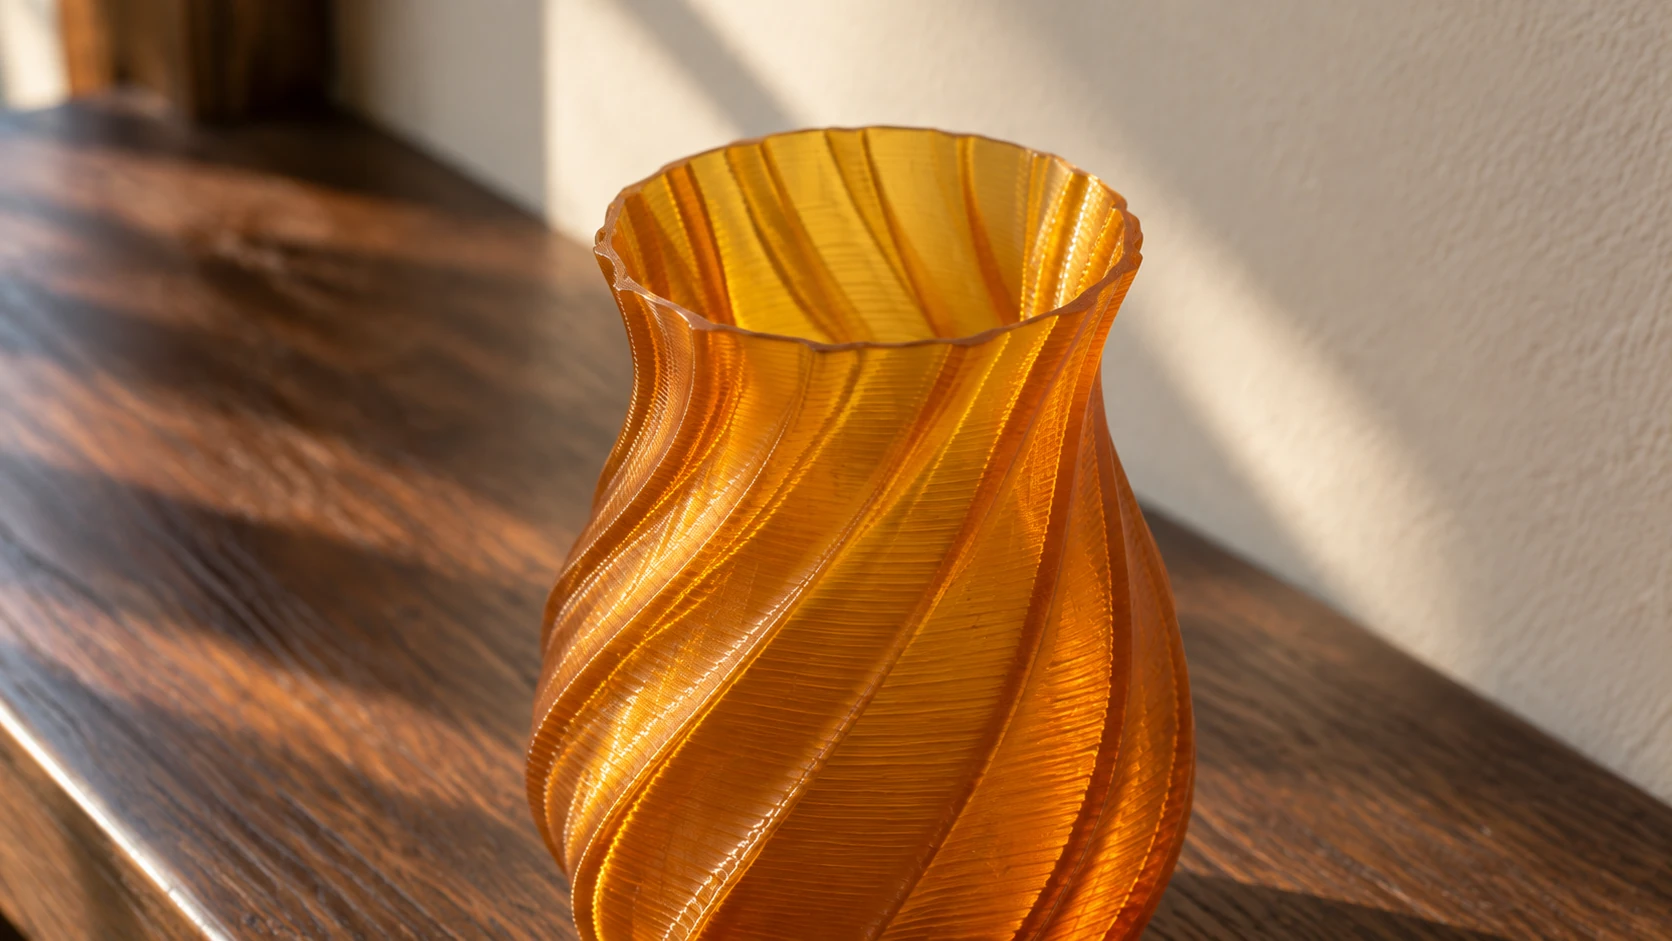
The open rim makes the construction visible: one thin wall surrounds a hollow interior. Raking light also reveals the fine print lines.
Print-in-Place: Assembly Required, Except It Isn't
An articulated fish that flexes along its whole body. A pair of pliers that opens. A box with a working hinge and latch. A chain that comes off the plate already linked.
These read as sorcery to anyone outside the hobby, and they are among the easiest prints you will ever run, because the designer already did all the hard thinking. The clearances between moving parts are baked into the model. You slice it, you print it, you flex it free.
The catch is that print-in-place is unforgiving about one thing: your printer's dimensional accuracy. If your parts come out slightly oversized, the joints fuse solid. If they come out undersized, the joints are floppy. That is a calibration issue, not a skill issue, and it is worth chasing down once because it improves everything else you print too. Our troubleshooting guide covers the usual suspects.
Start with a small articulated model before committing eight hours to a big one. If the joints free up with gentle flexing, your tolerances are good and you can scale up with confidence.
Color Tricks for One Nozzle
You do not need a filament changer to make a multicolor print. Two approaches do most of the work.
Height-based color swaps. Tell your slicer to pause at a specific layer, swap the spool, and resume. A sign with a base in black and lettering in gold, or a vase that transitions through three colors, needs nothing more than being present for two swaps. This works on most single-nozzle printers, as long as the firmware supports a pause or filament-change command.
Gradient and multi-color filament. A single spool that shifts color along its length does the work for you. On a tall vase-mode print the color changes as it climbs and the result looks like it took a machine you do not own. Zero effort, and it costs nothing beyond the spool.
Both of these are "free" in the sense that they cost you no new hardware. That is the point of this whole list.
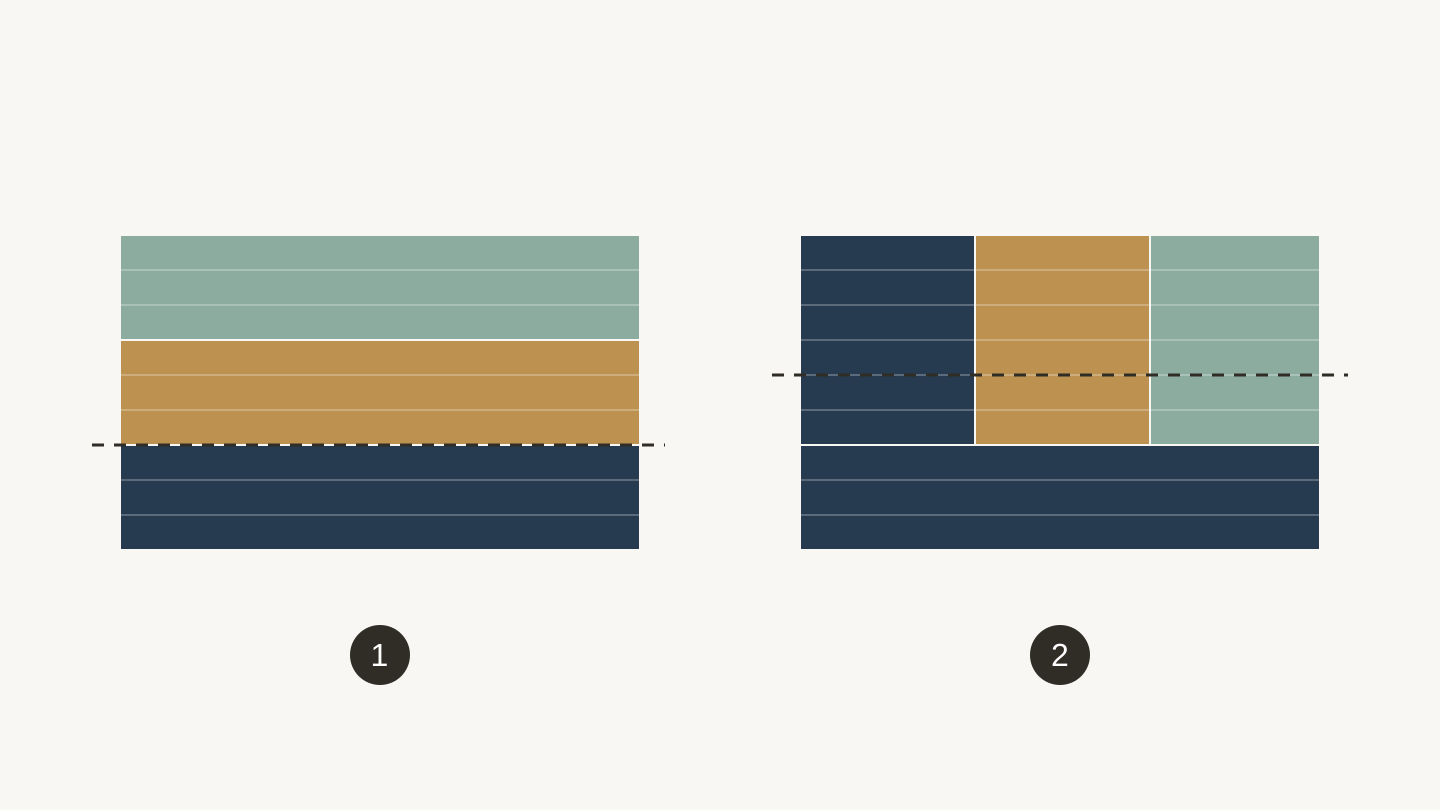
Left: a filament change at a chosen height colors the layers above it. Right: adjacent colors within one layer require a different workflow. A height change alone cannot make that pattern.
Flat Multicolor Art That Reads Across the Room
Now the good stuff. A flat multicolor piece is a design broken into color regions, with each color printed as its own independent piece of geometry sitting on a shared base. A crest, a map, a logo, a poster, a game character.
Done by hand, this is the tedious workflow that scares people off: trace each color region, export each one, convert each to a model, align them all on the plate, assign materials one at a time. For six colors, that is an evening.
MosaicFlow collapses it. Upload an image, the AI separates the color regions, you merge or exclude colors with a bubble palette until the count matches the filament slots you actually have, and you get a 3MF where every color region is already its own object with its own material assignment. Uploads and previews do not charge credits. AI generation uses credits. Downloads require an active paid subscription or a current unlock for that design.
The reason these land so well is that they read from across a room. Layer lines vanish at three feet. What people see is a clean, flat, saturated graphic in real plastic, which their brain files under "manufactured" rather than "printed."
Info
Your color count should match your available filament slots after merging and excluding. If you can only run four filaments, get the palette down to four before downloading. If you have a single nozzle, pause-and-swap will not help here, because the colors in a flat piece sit side by side in the same layers rather than stacking at different heights. Print each color as its own piece and fit them together instead.
Full walkthrough: how to create multicolor 3D prints from any image.
Depth You Can Cast a Shadow With
Stacked layer art is a different illusion, and in person it is the more dramatic one. Instead of colors sitting side by side on a flat plate, layers sit on top of each other, and each layer includes everything above it. Top layer is the smallest detail. Bottom layer is the full silhouette. Stack them and the gaps between layers throw real shadows.
That shadow is why a stacked piece looks carved rather than printed. Your eye reads actual physical depth, not a printed gradient pretending to be depth.
StackLab builds these cumulative layers from an image. Upload it, reorder the layers by dragging, merge similar colors, exclude the background, and preview the stack in 3D. Uploads and previews do not charge credits. AI generation uses credits. Downloads require an active paid subscription or a current unlock for that design.
The two tools are easy to mix up, so the short version:
| MosaicFlow | StackLab | |
|---|---|---|
| Layer logic | Each color is an independent piece | Each layer includes everything above it |
| Result | Flat multicolor graphic, pieces sit side by side | Stacked relief with visible physical depth |
| Best for | Logos, flags, characters, coasters, signs | Landscapes, portraits, silhouettes, wall art |
| Assembly | Prints as one multi-material job, or glue pieces flush | Print or cut each layer, stack and glue |
More on the technique in how to create stacked layer art from any image.
Light Through Plastic
A lithophane is a thin panel where the thickness varies with the brightness of a photo. Thick where the photo is dark, thin where it is bright. Sitting on the bench it looks like a mildly interesting grey rectangle. Hold it up to a light and a full photograph appears in it.
The reveal is the whole trick, and it never fails to get a reaction. It is also technically undemanding: printed flat against a curve or standing vertically, single color, no supports, no exotic settings. The design work is entirely in the depth conversion, which is the part you do not have to do by hand.
ReliefMaker handles that conversion. Feed it a photo and it works out a depth map, then turns that into a printable model with a lithophane mode built in. You get controls for height scale, base thickness, smoothing, and inverting the depth, plus a 3D preview you can spin before committing to a four-hour print. Export as STL or OBJ. The fast local engine is free, and the higher-quality mode costs 1 credit, so you can test a photo for nothing and only spend a credit on the one you actually want to print.
It is worth knowing that not every photo makes a good lithophane. Strong tonal contrast and a clear subject work. Busy backgrounds turn to mud, because subtle brightness differences become thickness differences too small to read as light. Preview first and you will save yourself the print.
Print them in plain white PLA and drop them into a backlit frame or a small night light. The lithophane guide covers the printing side, including the curved-panel trick that keeps the whole image evenly lit.
The same depth conversion gives you a second trick with no backlight at all. Push the relief deeper and print it opaque and you get a carved-looking panel, the sort of thing that reads as machined stone or wood. Our photo to 3D relief guide covers that side.
Surface Texture and the Twenty-Minute Finish
Two cheap moves that raise the perceived quality of anything you print.
Turn on a surface texture. Most slicers can apply a fuzzy or textured outer wall. It scatters light, hides layer lines, and gives the part a soft cast-stone feel. On decorative prints it is close to a free upgrade. On anything that needs to fit precisely, leave it off.
Spend twenty minutes finishing. Knock the elephant foot off the bottom edge, sand the two faces people will actually touch, hit it with filler primer, and spray a colored topcoat. Twenty minutes of that turns an obviously-printed object into something people cannot identify the manufacturing process for. It is the single highest-return habit in the hobby and almost nobody does it, which is exactly why it works.
Scale Is a Cheat Code
Two directions, both effective.
Go big. A print that fills the plate impresses people purely because of its size, even if the geometry is simple. A large single-color vase-mode piece is technically easier than a fiddly small part and gets ten times the reaction. The only cost is time and filament.
Go small and detailed. The opposite trick: a tiny part with fine features makes people lean in. Small prints are also fast, so you can iterate until it is right.
The unimpressive middle is the palm-sized generic knick-knack. It is neither imposing nor delicate, which is roughly why the drawer is full of them.
What Actually Is Hard
Being straight about this saves you a wasted weekend. These are the ones that genuinely take skill:
- Large overhang-heavy organic shapes without supports. Orientation and support tuning is a real craft.
- Tight-tolerance functional mechanisms. Anything that has to mate with metal hardware and hold a load.
- Transparent and optically clear parts. Getting real clarity out of an FDM printer is a long fight with extrusion width, temperature, and post-processing.
- Flexible multi-material combinations. Mixing TPU with rigid filament in a single job is fussy on almost every setup.
- Anything in a warp-prone material without an enclosure. No amount of clever design beats physics on a cold, drafty bench.
If you are newer to the machine, our beginner's guide covers the fundamentals that make everything above go smoothly.
Effort Versus Reaction
My honest read after watching which prints get picked up and which get walked past. This is opinion, not measurement:
| Project | Difficulty | Reaction |
|---|---|---|
| Vase-mode vessel in silk filament | Very low | High |
| Print-in-place articulated model | Low, once calibrated | Very high |
| Lithophane in a backlit frame | Low | Very high |
| Flat multicolor art | Low with the right file | High |
| Stacked layer relief | Medium, needs assembly | Very high |
| Sanded and painted display piece | Medium, mostly patience | Very high |
| Precision functional mechanism | High | Low, unless it fails |
The pattern is not subtle. The prints that get the biggest reaction are near the bottom of the difficulty column.
Pick One and Run It Tonight
Choose based on what is loaded right now. Silk or matte filament on the spool, print a vase-mode vessel. Plain white, run a photo through ReliefMaker and make a lithophane. A pile of colors and a spare evening, put an image through MosaicFlow for a flat multicolor piece or StackLab for a stacked relief with real shadow depth.
Uploads and previews do not charge credits. AI generation uses credits. Downloads require an active paid subscription or a current unlock for that design.
Then leave the finished thing somewhere people will pick it up. That is the actual point.
Happy making.
Related Tools
MosaicFlow
Turn uploaded or AI-generated artwork into separate color regions for inlays, with optional 3D exports.
Downloads require a plan or a design unlock
StackLab
Separate uploaded or AI-generated artwork into stacked layers, with adjustable layer order and optional 3D models.
Downloads require a plan or a design unlock
ReliefMaker
Create depth maps from images or AI generation and build relief meshes for carving or printing.
Downloads require a plan or a design unlock
Ready to try these tools?
Sign up free, no credit card required. Free tools available immediately.
Start Free